Things have tended to move faster once the frame was built. Of course, not nearly as fast as I’d like, but now that the house is weather proof and everything is contained indoors, there are fewer reasons to have idle time and we can keep moving.
At the end of my last post, we were getting ready to have the building inspection. We’ll pick up the story from there.
Stairs
Before we could have the building inspection, we needed to order, fabricate, and install the finished staircase from the first to second floor. There was a temporary staircase in place, but it would not have passed inspection as-is, the inspector would have wanted to see the final product.
When I was asked what kind of stairs I wanted, I poked around online and found a “waterfall” design that I thought looked cool and asked for that to be built. I thought it had a sleek, modern look to it, and I liked how the drywall met the treads and the risers when viewed from the side.

A sample of the “waterfall” stairs I found online and thought were cool. They were the inspiration for what I asked for from the staircase fabricator.
While the rough plumbing and electric work was being done, we ordered stairs from Alvaro Stairs in North Bergen. The stair fabricator noted that we didn’t have enough room to build the risers exactly as I wanted, and we needed to leave some extra space for nosing in order to meet code. So, I settled for treads that had a bit of a nose, and decorative wood on the sides that would replicate the waterfall look from the side.
Once the stairs were in, the contractor was able to build the frame to close off the staircase from the basement and frame the basement door.
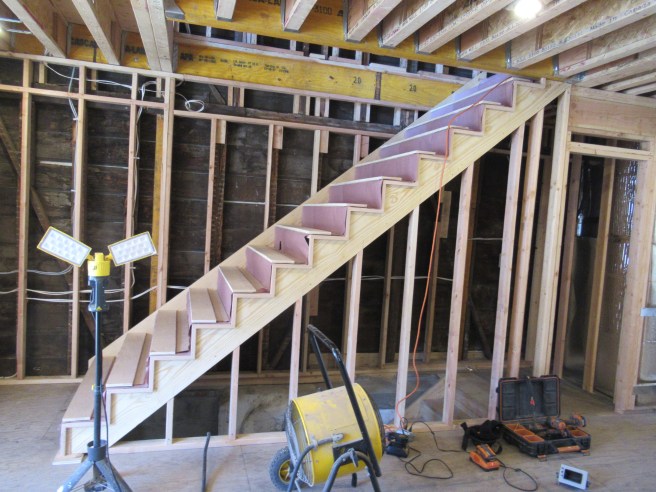
The stairs as installed. They will have a similar waterfall look on the side as the sample we were working with. The treads and risers are made from red oak, and the stringers are made from pine. The drywall will be installed right into the stringers and it will look similar to the sample picture when finished.
My Friend, The Building Inspector
This purpose of the building inspection was to take a look at the overall structure of the house and the materials that were use to build it. We would need to pass this inspection before we would be allowed to insulate the house and move on with the project.
My contractor was nervous about this one, having dealt with the Union City Building Department for the entirety of this project. He told me (and I was able to corroborate this story with a large number of other people) that Union City is not like other municipalities in North Jersey, in that they have a very stringent building code standard, and they pay attention to every detail. He asked me if I could have the architect on standby if needed.
I had a few vacation days I needed to kill so I happened to be off of work the day the building inspector came. There was a four-hour window for when the inspector was supposed to arrive so I asked my contractor to text me when he showed up. I got the text that he was there and I jumped in the car. While I was on my way up (and I drove safely and didn’t check my text messages until I parked, thank you very much) I got another text: “trouble brewing, get the architect here”. So, I called the architect and he said he was free and could be there in a matter of minutes.
I arrived at the house and the inspector was staring at the plans and my contractor was nervously pacing about. They started to rattle off terms that went over my head and were somewhat confusing. The architect walked in a few minutes later and was able to join in the discussion and help things along.
After a very detailed review of the plans, a long discussion, and a big walkthrough of the entire house from basement to roof, the inspector found a few things he wanted addressed. A few of the things he cited us for:
- The roof joists were missing something that was required to keep them from compressing.
- Some washers were missing in the basement on the masonry bolts.
- The windows on the 2nd floor were too low to the ground and needed to have limiters put on them to keep them from opening for more than 4 inches. This was likely my fault for switching the original design from casement windows to double-hung and not double-checking if they needed to be higher off the ground. Because, like, I don’t know building code.
- The tin knocker put screws in the dryer vent pipe. That is a no-no and we had to take it out and replace it with one that didn’t have screws in it, only tape.
- We had made a change to the original plans to put some of the HVAC equipment on the roof. Because of that, the inspector told us we need a railing. My architect disagrees, he believes this code doesn’t apply to a single-family house, but for now, it’s on the report as something that needs to be addressed. We might try to argue as I don’t feel like adding yet another $1,000 expense to the project that adds little value. Whenever the HVAC guy is on the roof to do maintenance, I’ll just say “bro, don’t fall off” and we should be good.
Throughout my observation of the conversation and the walkthrough, it appeared to me that my contractor was overly anxious about what was happening. In my opinion, the inspector was just doing his job. Getting annoyed at him if he found something wrong would be like getting annoyed at a cop for giving you a parking ticket an hour after the meter expired. He was being fair with us.
At the end of everything, he looked at us and said “I’m going to let you insulate. There’s nothing here to make me stop you”. So, we have to address the items on his report and prove that they were done (mostly by taking pictures and videos of completed work), but we got to move on.
Gas Pouch
PSE&G showed up and installed the regulator and meter for the new gas line in the pouch we built for it. This was to close out the work I had paid them to do in the very beginning.
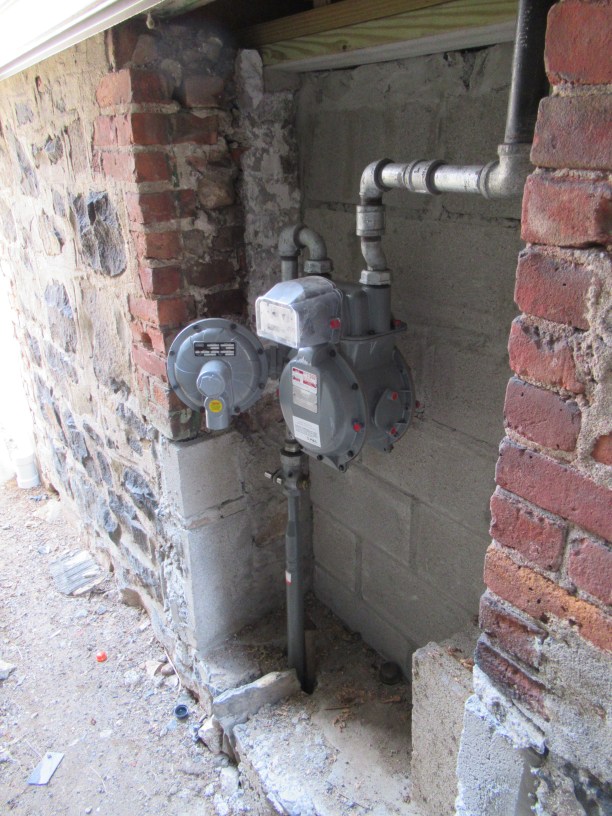
The new gas regulator and meter
Button Up the Electric
There were still a few things the electrician had to do. We did a walkthrough, and not everything was finished, and a few things had to change. There were a few outlets that weren’t placed properly, and a few switches and fixtures had to be added. This process dragged on a bit longer than I would have liked as it took several weeks to finish. But it had to be completed in order to do the AV and data rough wiring. We wouldn’t be able to work at the same time, we’d get in the electrician’s way.
One of the big milestones that place during this phase was to have PSE&G upgrade the service to 200 amps. The previous incoming connection of 100 amps would not have been nearly enough. We had to install a breaker in the driveway for the entire house. Due to some code regulation, it had to be there and couldn’t be inside the house. I’ll need to secure it or someone can just walk up and just shut the entire house electricity off.
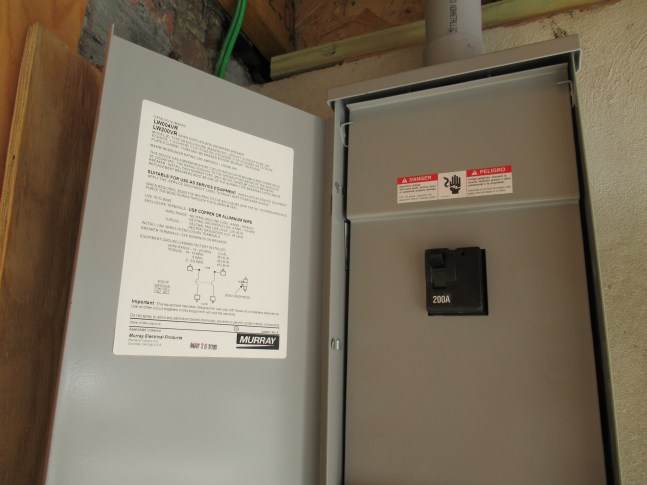
200 amp service. Cool!
AV and Data Rough Cabling
The reason a professional was not doing the audio-visual and data cabling was because I lucked out and happen to have a family connection to help. My brother happens to be a professional in the field and works for The Judge Group doing corporate AV installations. He was willing to work for food which was a huge help with the budget.
So, he donated about 10 hours of his time on nights and weekends and got to work cabling the house for television, data, and audio throughout. The first thing we had to do was get the holes drilled in the frame where we needed them, so we asked the electrician to help. His drill and set of tools were better suited for the task than anything we had.
Once the spray foam insulation would go in (more on that shortly), we’d be unable to pull any more cables in the future or fix any broken ones unless there was a conduit of some sort that wasn’t encased in spray foam. We went to a local hardware store and looked around for something that was shaped like a bendable tube. We settled on what looked like a long shop vacuum hose and brought that back to the house.
Basement
The majority of the AV and telecommunications equipment will be housed in a rack in the basement and controlled remotely from an iOS app. The DirecTV whole home DVR, the incoming Internet connection (I haven’t decided between FIOS or Optimum yet), the Denon home theater system, and the HDMI switcher will all be in the rack. So, all the HDMI and speaker cables will route into the designated corner. In some cases, we used HDMI, in others, we used Cat 6 depending on the required length.
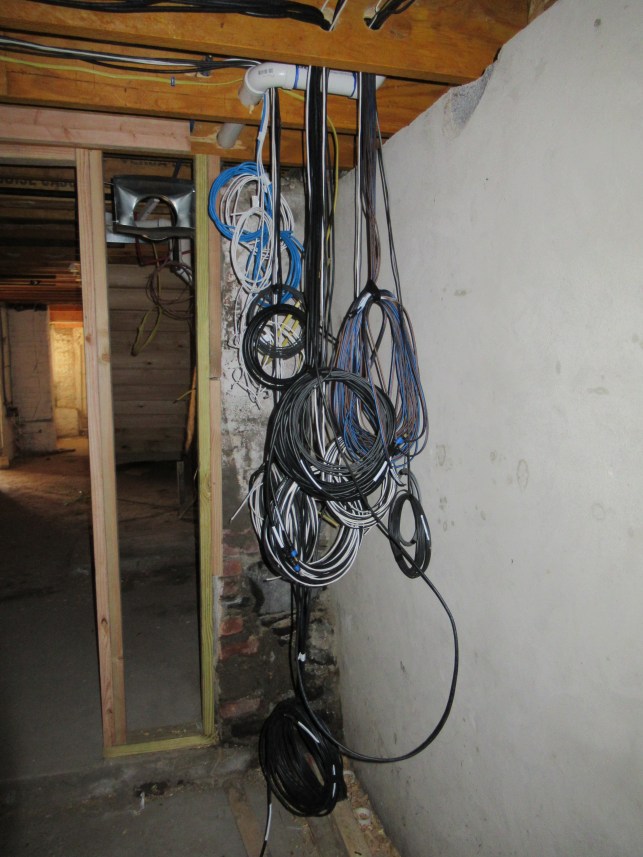
The corner of the basement where all the cables run to. Everything is carefully labeled. This is a combination of speaker cable and HDMI and Cat 6 cables.
Living Room
The living room required the most work out of all of the rooms. It is designed to be the main media center, computing center, and entertainment area for the inside of the house.
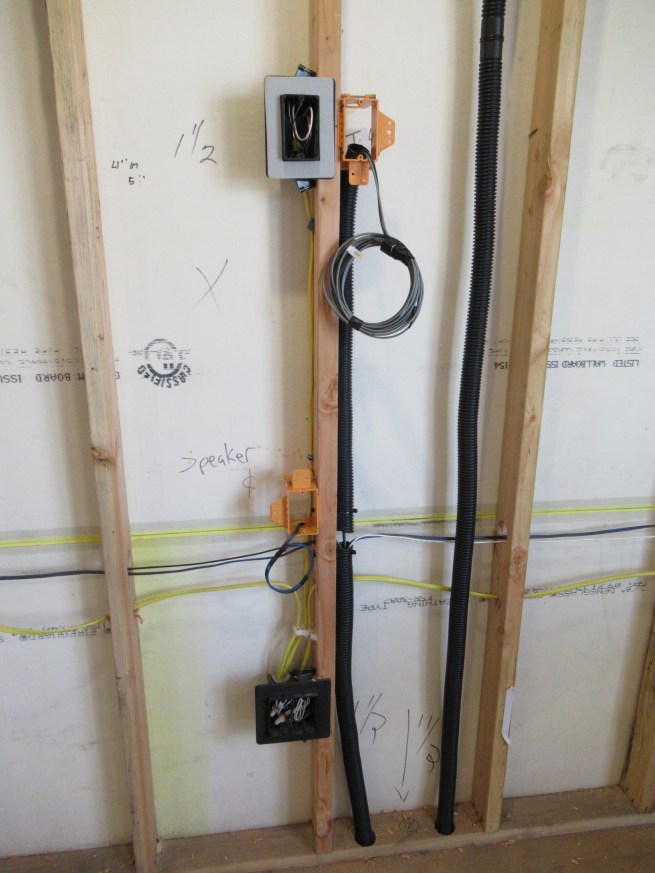
My desk will be along the east wall, so we wired for signals to be sent in both directions between the living room and the basement. The desk will house a TV, my computer, Xbox One, and Amazon Fire TV. The computer, Xbox, and Fire TV will send signals to the HDMI switcher in the basement, and the switcher will send a signal back up to the TV.

The desk wiring, using the improvised hose “conduit”.
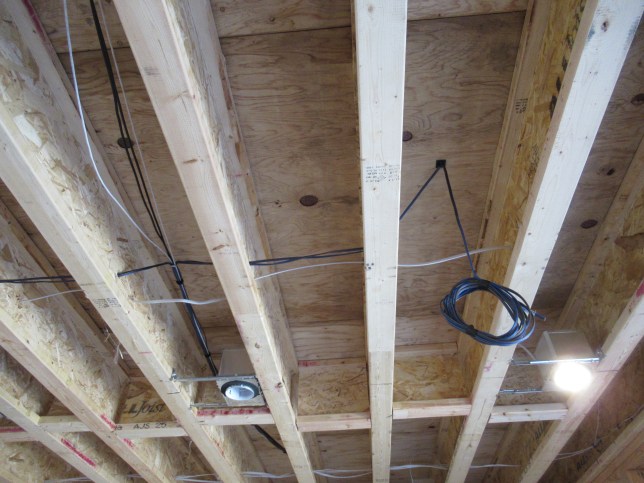
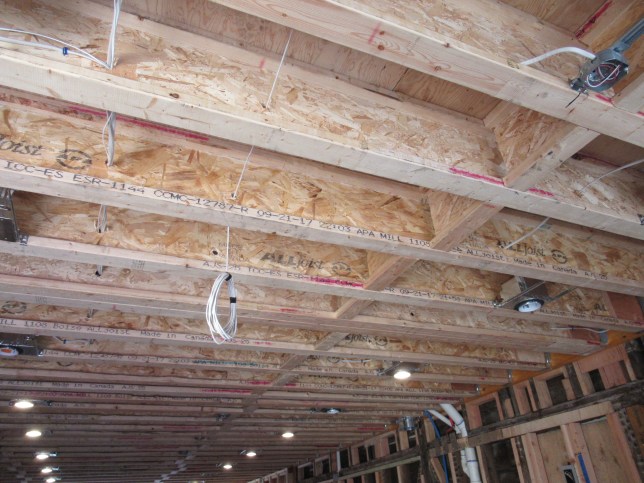
The ceiling will hold the four surround sound speakers required for 7.2 surround sound. I ordered one set of the speakers ahead of time so when the drywall is put in, they can use them as a template for the cutouts if they’d like. If not, we’ll cut the holes in later.

The four cables dangling from the ceiling are the cables for the ceiling speakers in the living room.
The west wall is where the TV and remaining speakers are going to go. I was going to get a 65” TV, but I found out that a friend who is also renovating his home got a 75” TV so now I’ll have to do the same. I haven’t ordered the TV yet, but we measured it out so the TV will be in the center of the wall from left to right, and we put an outlet and the HDMI output behind where it will be hung so they will be hidden.
The two front speakers and the single center speaker will be hung on the wall to the sides and below the television. The subwoofers will be on the floor on the north and south ends of the west wall, and we ran subwoofer speaker cable and outlets to each area.
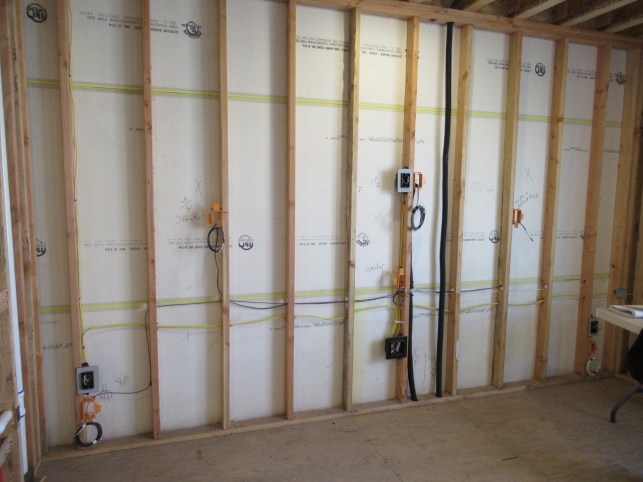
There’s a lot going on here. This will be the wall for the biggest TV in the house. It will have two suwoofers (on the bottom left and right), the right and left speakers, the center speaker below the TV, and the TV hung in the middle. It also has the conduit for the speakers and HDMI that run upstairs to the master bedroom.
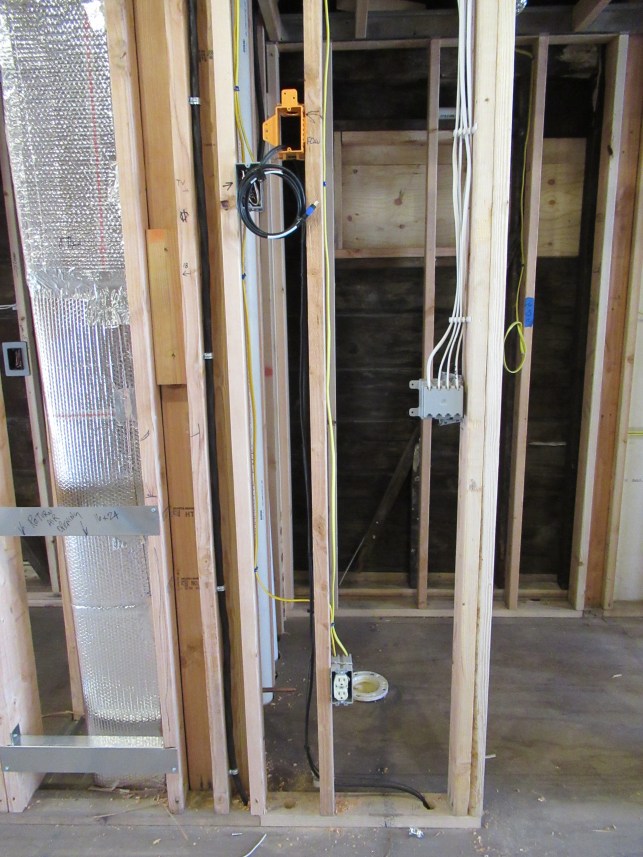
We also ran the wire for the upstairs bedroom television, and the bedroom and bathroom speakers through the same conduit in the living room. The wires traveled the floor joists and through a hole in the upstairs subfloor and into the bedroom.
The cable runs on the left go disappear through a hole in the ceiling and head up to the master room bedroom.
Kitchen
I want one smaller television (45” – 55”) in the kitchen across from the island so I can watch TV while I’m preparing food. I didn’t think I needed any speakers given the proximity to the audio on in the living room so this TV will likely always have the same signal as what’s on the living room TV. Again, we hid the outlet and the HDMI cable behind the television.
The HDMI and outlet for the kitchen television
Dining Room
I’m going to transfer my only TV in my Hoboken apartment to the dining room in the new house. It’s only 55” but I think the size will work well for this room. I may want to add cabinetry in the dining room at a later phase so I don’t want the TV to take up too much of the wall. The table is also going to be close to the TV so it will be good enough. The outlet and HDMI connector will be hidden behind the TV. In this case, we ran Cat 6 instead of HDMI due to the length of the cable run.
The dining room TV layout. The speaker cable for the ceiling is in the hose on the right.
This TV will be far enough away from the living room that it will need its own audio, so we ran speaker cable for two stereo speakers in the ceiling. Once again, we used our improvised conduit to guard against the spray foam insulation.
The cable for the left speaker in the dining room. It will be over the dining room table and in line with the chandelier.
Master Bedroom and Bathroom
The bedroom will be a bit of a simpler install. I don’t have a television in my bedroom in my apartment, but I figured that since I have two floors now, I might as well get one in the master bedroom. I also wanted to listen to music in the bedroom and master bathroom as I like to crank loud rock and roll in the morning while I shower and get gussied up for work.
As such, we put an outlet and an HDMI connector for the TV. I haven’t planned a size yet, it’ll probably be in the 55” to 65” range, nothing too crazy. We ran speaker cables for stereo speakers in the bedroom and on the opposite side of the wall in the bathroom. The speakers will be on the same left and right channels in each room, they won’t be able to play separate music, which would have been silly anyway.

The bedroom TV will be hung on the shared wall between the bedroom and bathroom. The speaker cables will run to both rooms so I can listen to Motörhead while I shower and get dressed in the morning.
Insulation
I learned a new term called “R-value” as it relates to insulation throughout the design and build process of the house. The R-value is a measure of a material’s resistance to conductive heat. Standard building codes tend to indicate the necessary R-value for external walls and roofs based on the climate in the region. You have to use materials (mainly insulation) that have an aggregate R-value to meet your R-value requirements.
In the beginning, we failed our initial drawing review because we the architect didn’t have the exactly correct R-value indicated in the plans as per Union City building code. Once we had that sorted out, the plans stated that we needed the following R-values:
- Basement ceiling: 30
- External walls: 21
- Roof: 49
There were three main ways we could reach the required R-value, by using fiberglass insulation, spray foam insulation (both open or closed cell), or insulated siding. Insulated siding wasn’t an option because we couldn’t insulate the Shou Sugi Ban boards, and the color of vinyl siding I chose didn’t come with an insulation option.
So, we were left with spray foam and fiberglass as options. Fiberglass is much cheaper than spray foam, but it takes a lot more space, the higher the R-value. Because we have a 2×4 frame on the external walls, we didn’t have much space to work with. This ended up becoming problematic from a design and budget perspective. We ended up having to go with the much more expensive option of spray foam on the external walls, and a hybrid spray-foam and fiberglass for the roof to meet the required R-values.

The fiberglass insulation in the basement gets us to an R-value of 30.

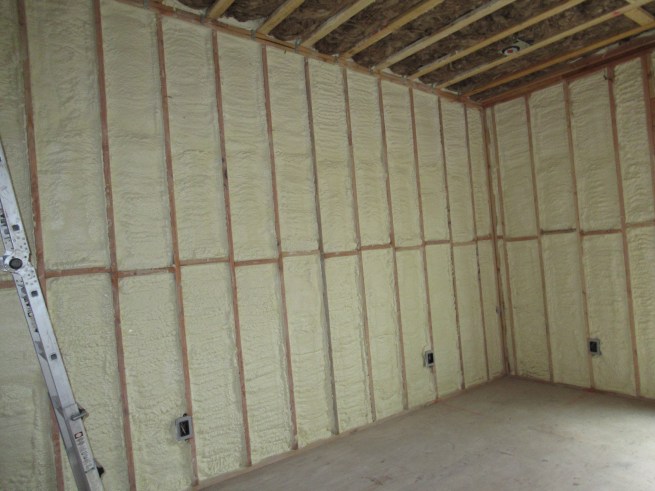
The east wall insulated with spray foam. Gets us to an R-value of 21.

The aforementioned living room west wall insulated with spray foam. It is now evident why we used that silly hose to make a conduit for the speaker and HDMI cables.
The master bedroom insulated with spray foam.
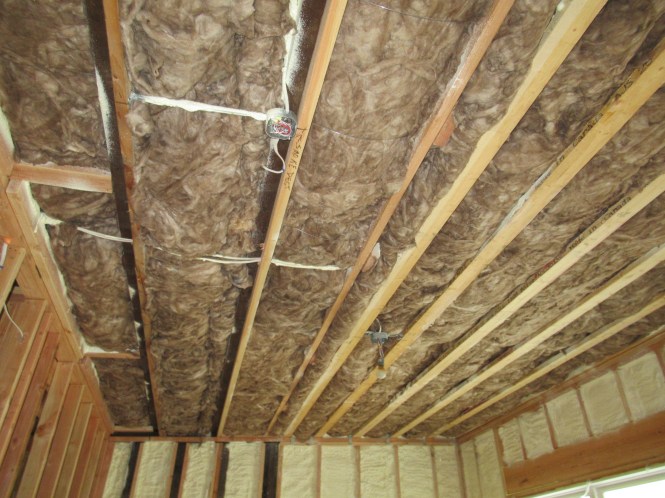
The roof insulated with spray foam and fiber glass. Gets us to an R-value of 49, baby! That’s some hefty insulation right there!
The insulation cost came out to roughly double what was budgeted for. This was my least favorite cost-overrun of the project, given that it’s not something that you can even see. The bright side is that this insulation should work very well to keep the sunlight from heating up the house. It will also help me save on heating and cooling costs as heat will not be able to enter or leave the house very easily.
Hardwood Floors
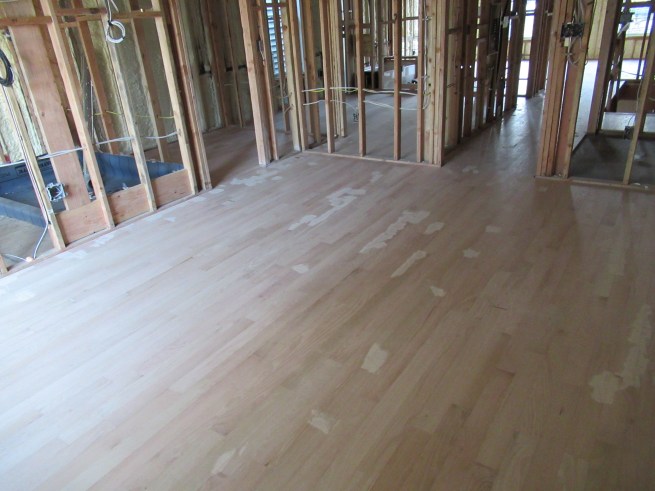
The flooring was pretty straight forward. The architect had rendered the house with a very light-colored wood flooring material. After some back and forth with samples, I decided on 3 ¼” red oak select floorboards.
While we were waiting for the insulation inspection, we had some time to install the floors. The flooring guy had the materials delivered and installed in a matter of two days. He added some filler where there were gaps in between boards. At a later time, we’ll have it sanded and covered in three coats of polyurethane. I’m not going to have it stained so it will retain it’s light coloring.

The hardwood flooring on the first floor.
The hardwood flooring on the 2nd floor.
The Insulation Inspection
The insulation inspection was very straight forward. The same building inspector came back and passed us for insulation. He still wanted a few things cleared up from the original inspection before he gave us our “sticker” to continue the project, but he gave verbal approval to move forward with drywall. This will be the last inspection until the very end. Major milestone passed!
What’s Next?
In the immediate future, we will begin installing the drywall in the ceilings and walls. This will be a relatively simple project. We have to plan for the fireproof ceilings and walls in the basement, and the moisture-proof walls in the bathrooms upstairs. Also, getting the drywall inside the house is apparently going to be a bit of a logistic challenge. From what I hear, it is going to require a big truck with boom lifts to get it through the windows.
Following that, we can work in parallel on the HVAC installation of the exposed duct work and the required machinery. We’ll finally begin what will be my favorite part of the project, building and installing the kitchen cabinetry and appliances!
Time Check
I get asked 100% of the time when the move in date is. I still have no idea. I bought the place in December 2015, and we’re still working on it in May 2018. You do the math…

[…] a quick video walk through of the house right before the walls were put up. It accompanies the last blog post and it details the insulation installation and the hardwood […]
LikeLike