The Backstory About the Backyard

Before I explain where I’m headed with the backyard project, I’ll tell the story of what I originally wanted, and how I got where I am today.

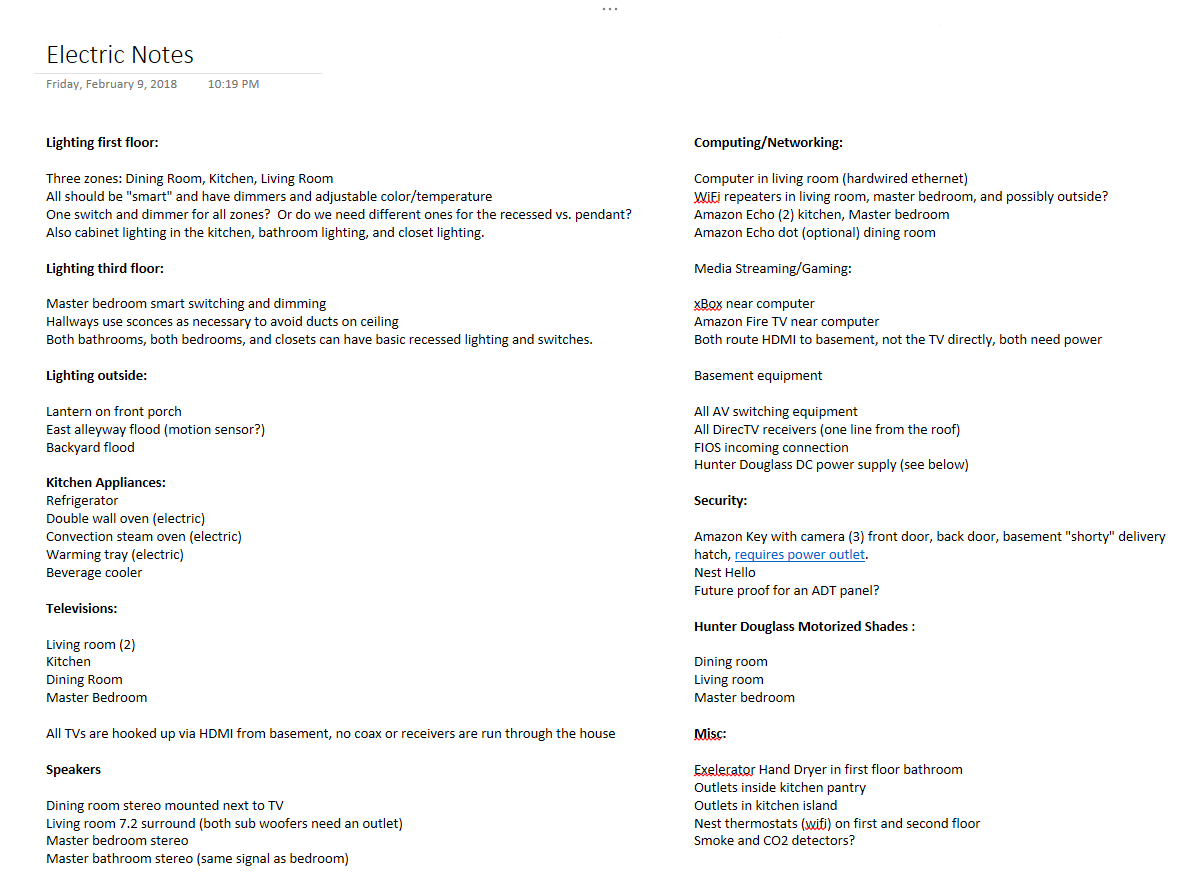
My concept for the house renovation was to develop a space that was able to host small gatherings and large-scale parties, both indoors and outdoors. I wanted an open floor plan for the first floor of the house with plenty of standing and seating room, built-in audio and visual equipment, and a highly functional kitchen.

I wanted essentially the same thing for the backyard. It needed to be spacious, have cooking facilities, plenty of room to recreate and entertain, and audio and visual capabilities. I also wanted a space for a vegetable and herb garden.

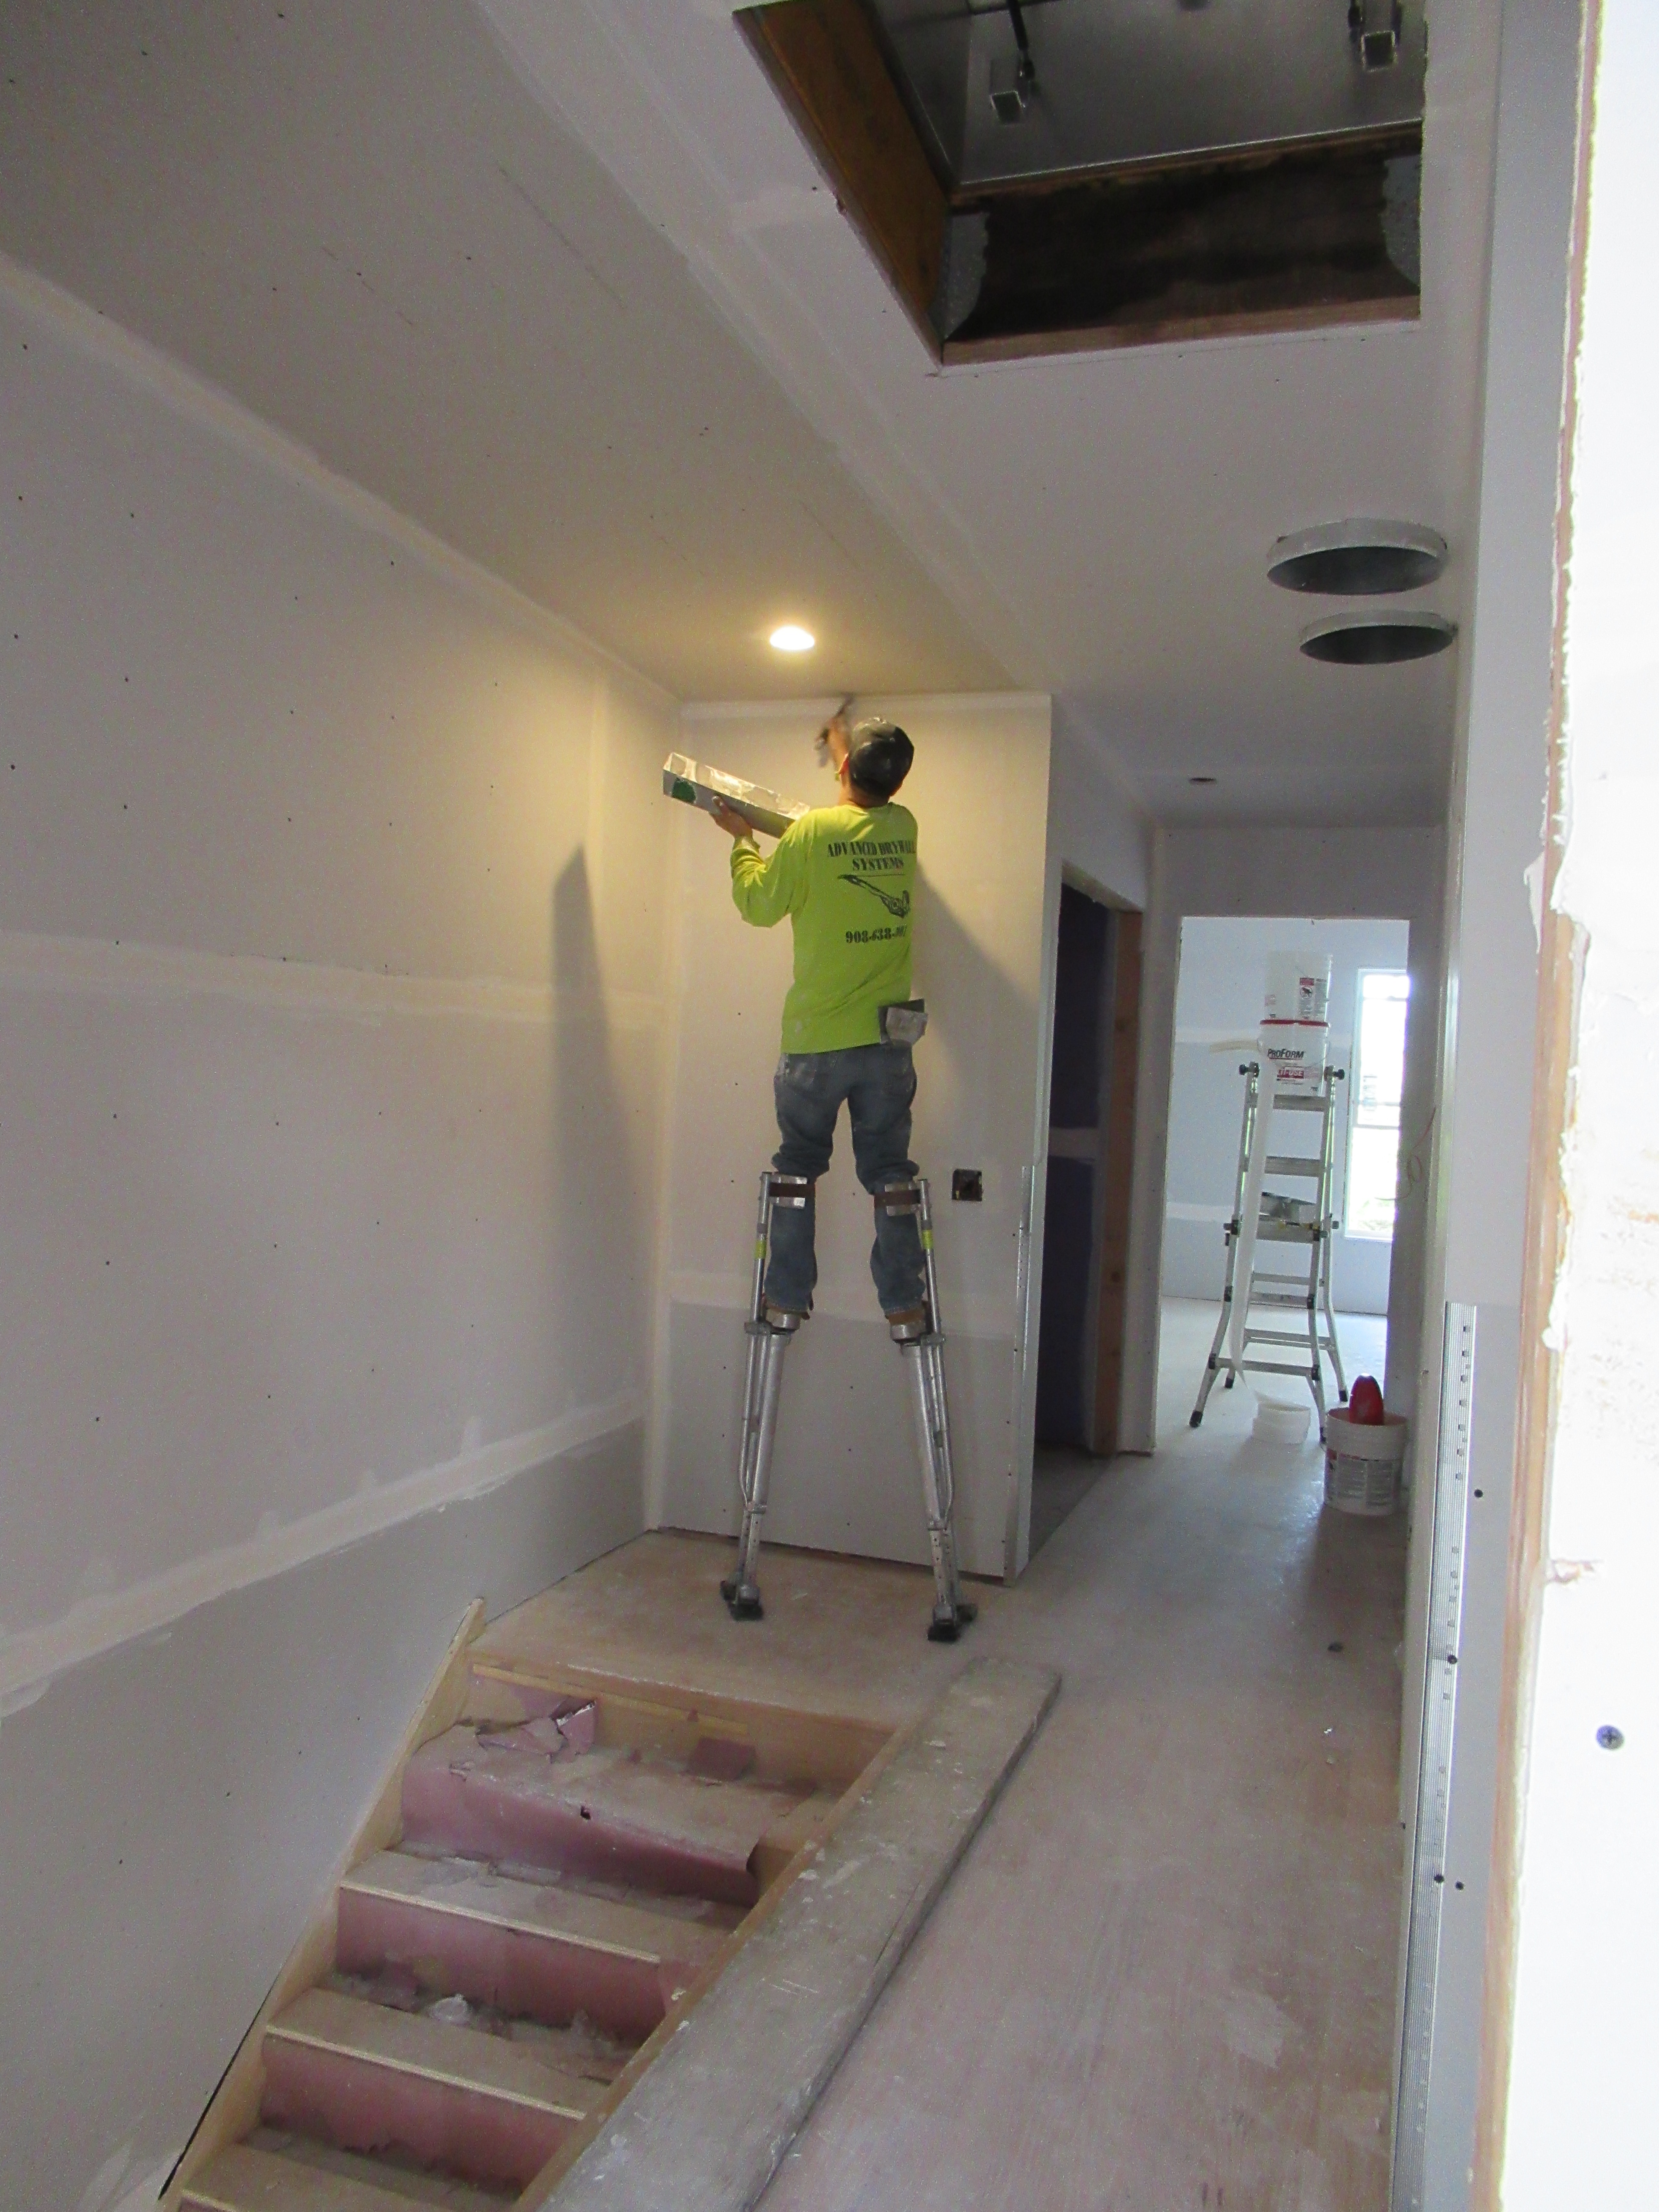
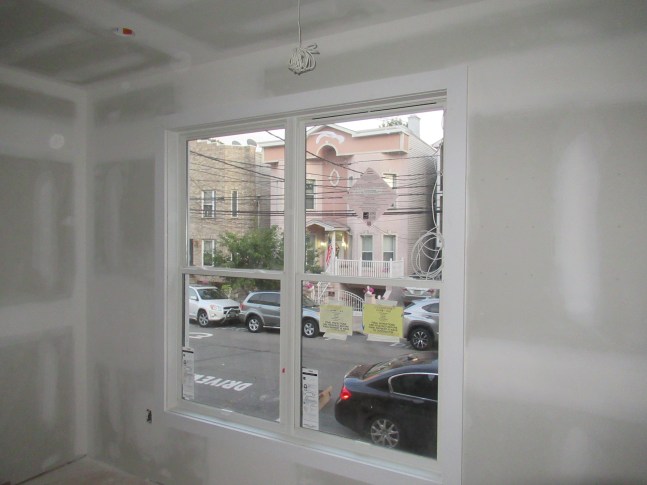
By the end of 2019, I accomplished the indoor goals despite Niki Sinclair’s incompetence. The kitchen she built looks like a drunken 7th grader tried to assemble IKEA furniture using a machete and a cigarette lighter without reading the instructions. But the appliances are all high-end and there is enough space to work with, so it functions well enough. Since I fired her and moved in, I’ve spent my time furnishing the space to make it more inviting to guests. I’ve been able to host plenty of gatherings.

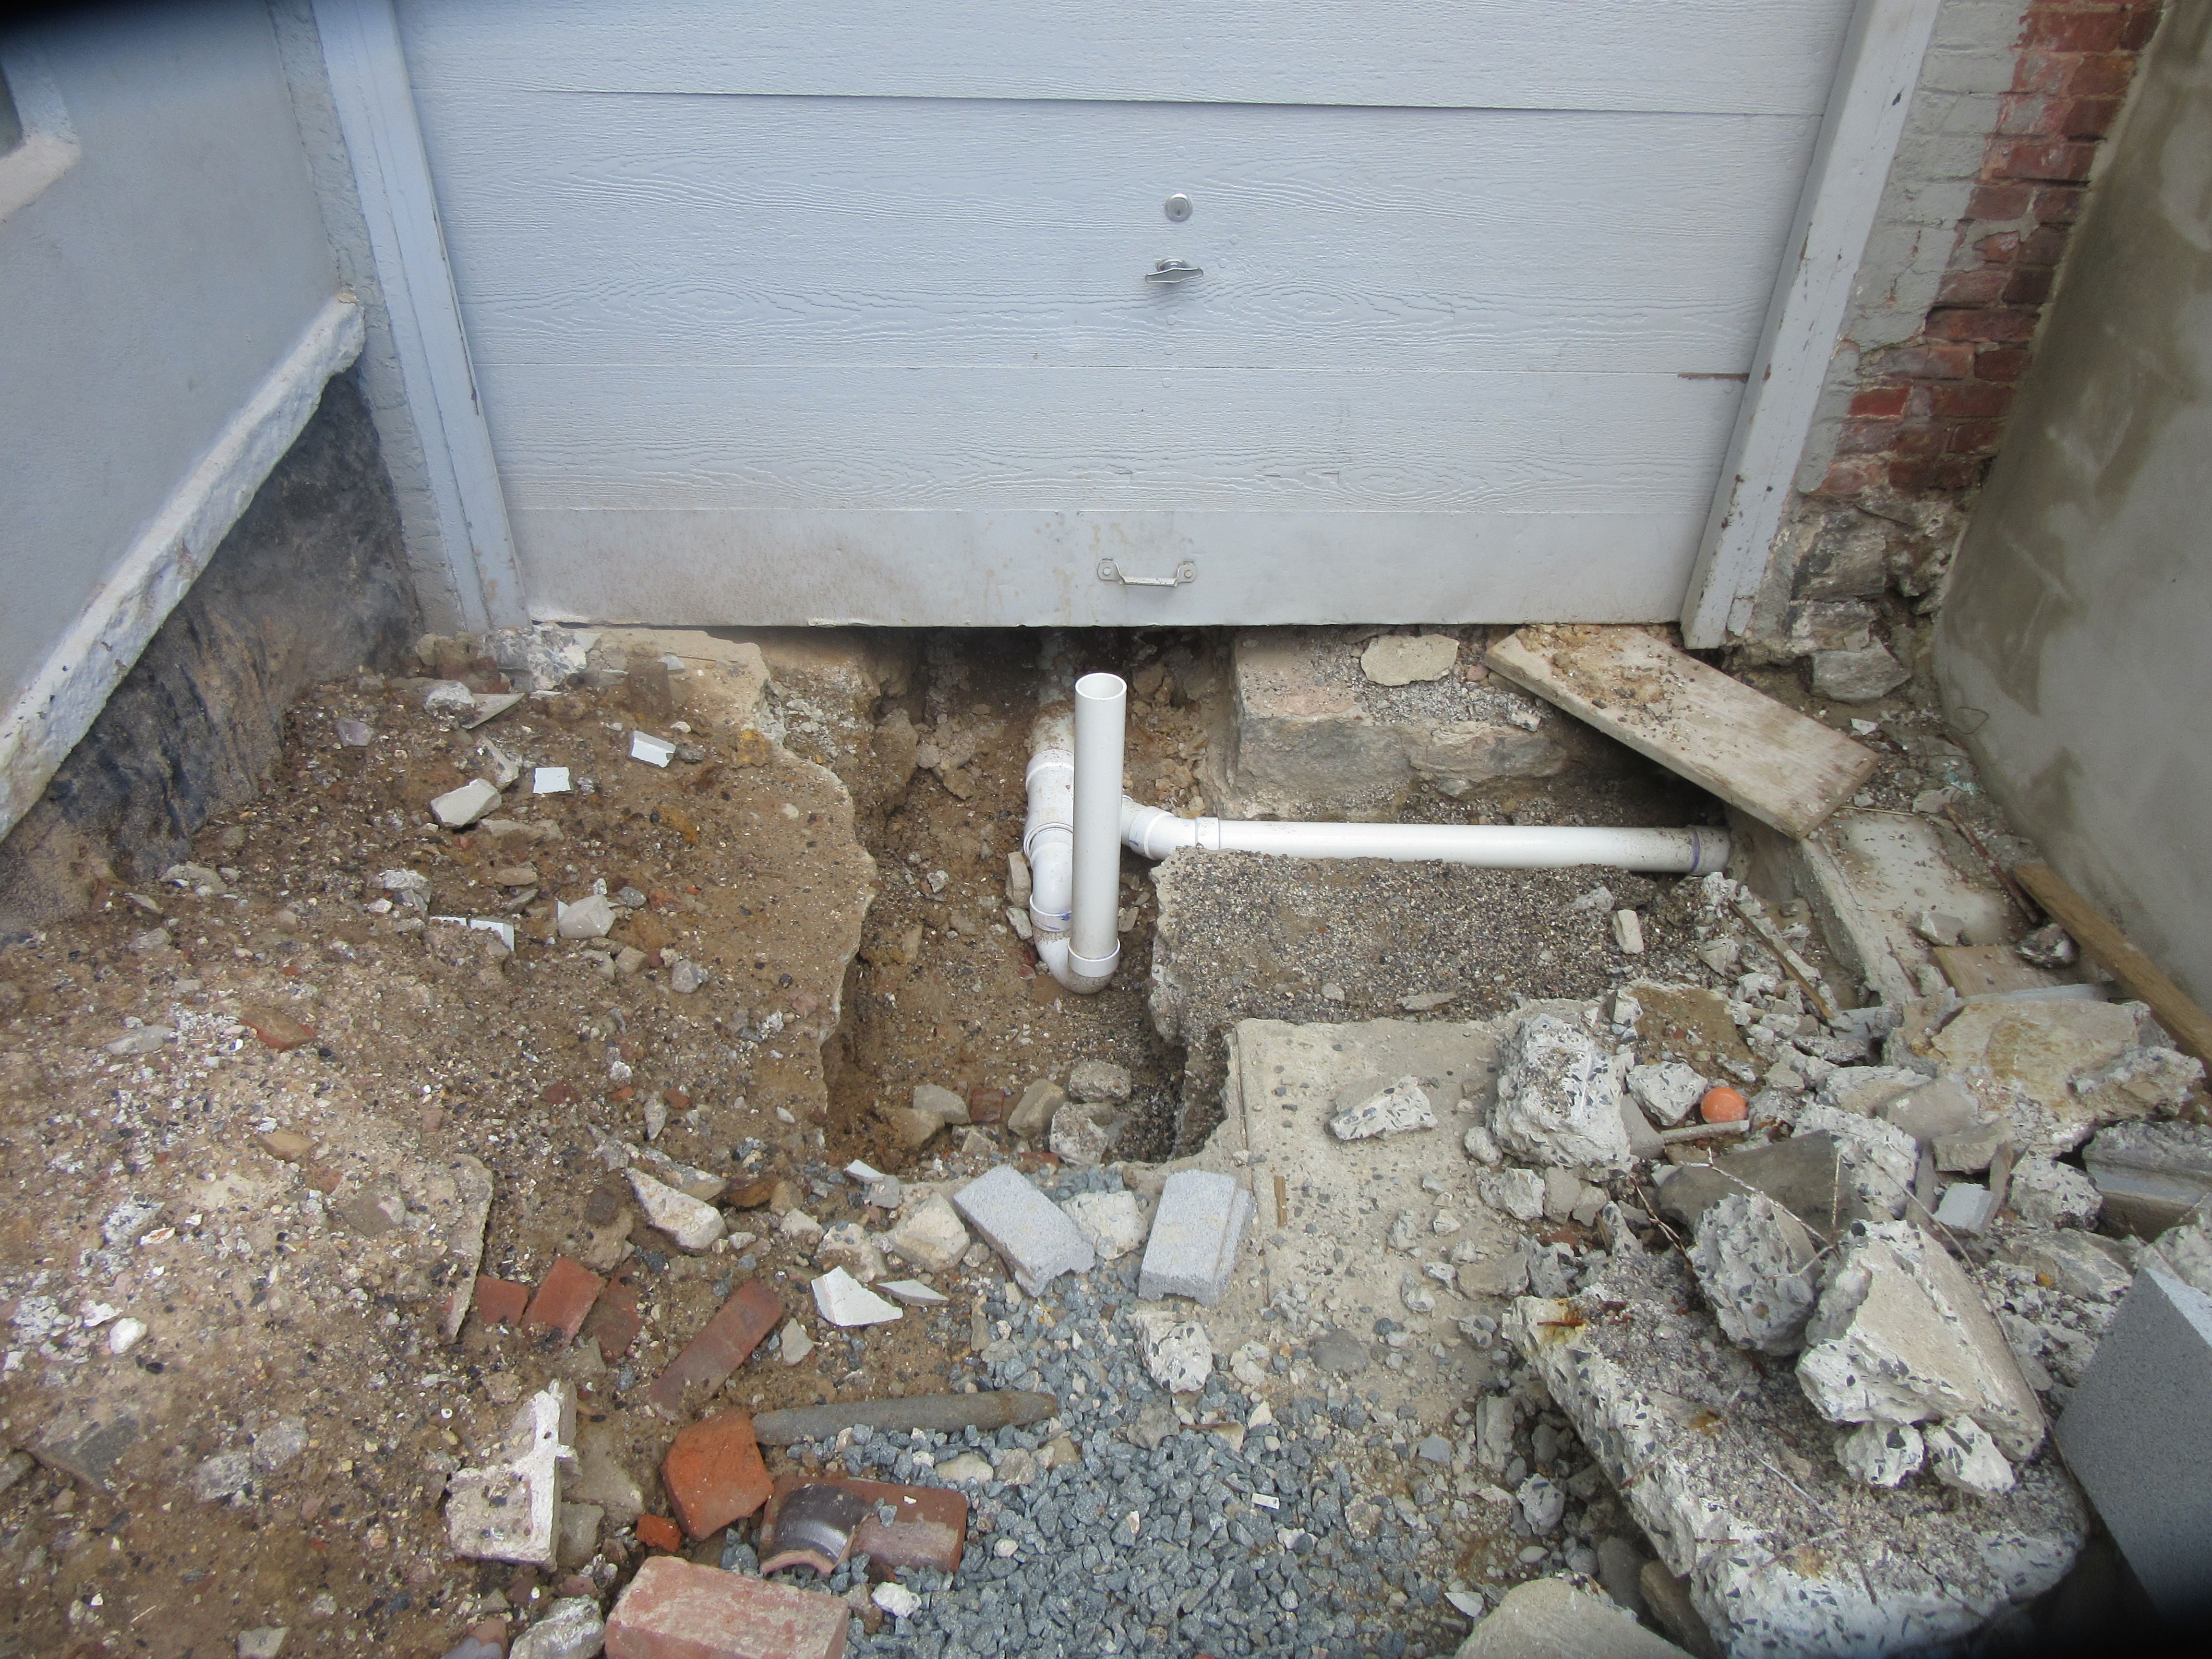
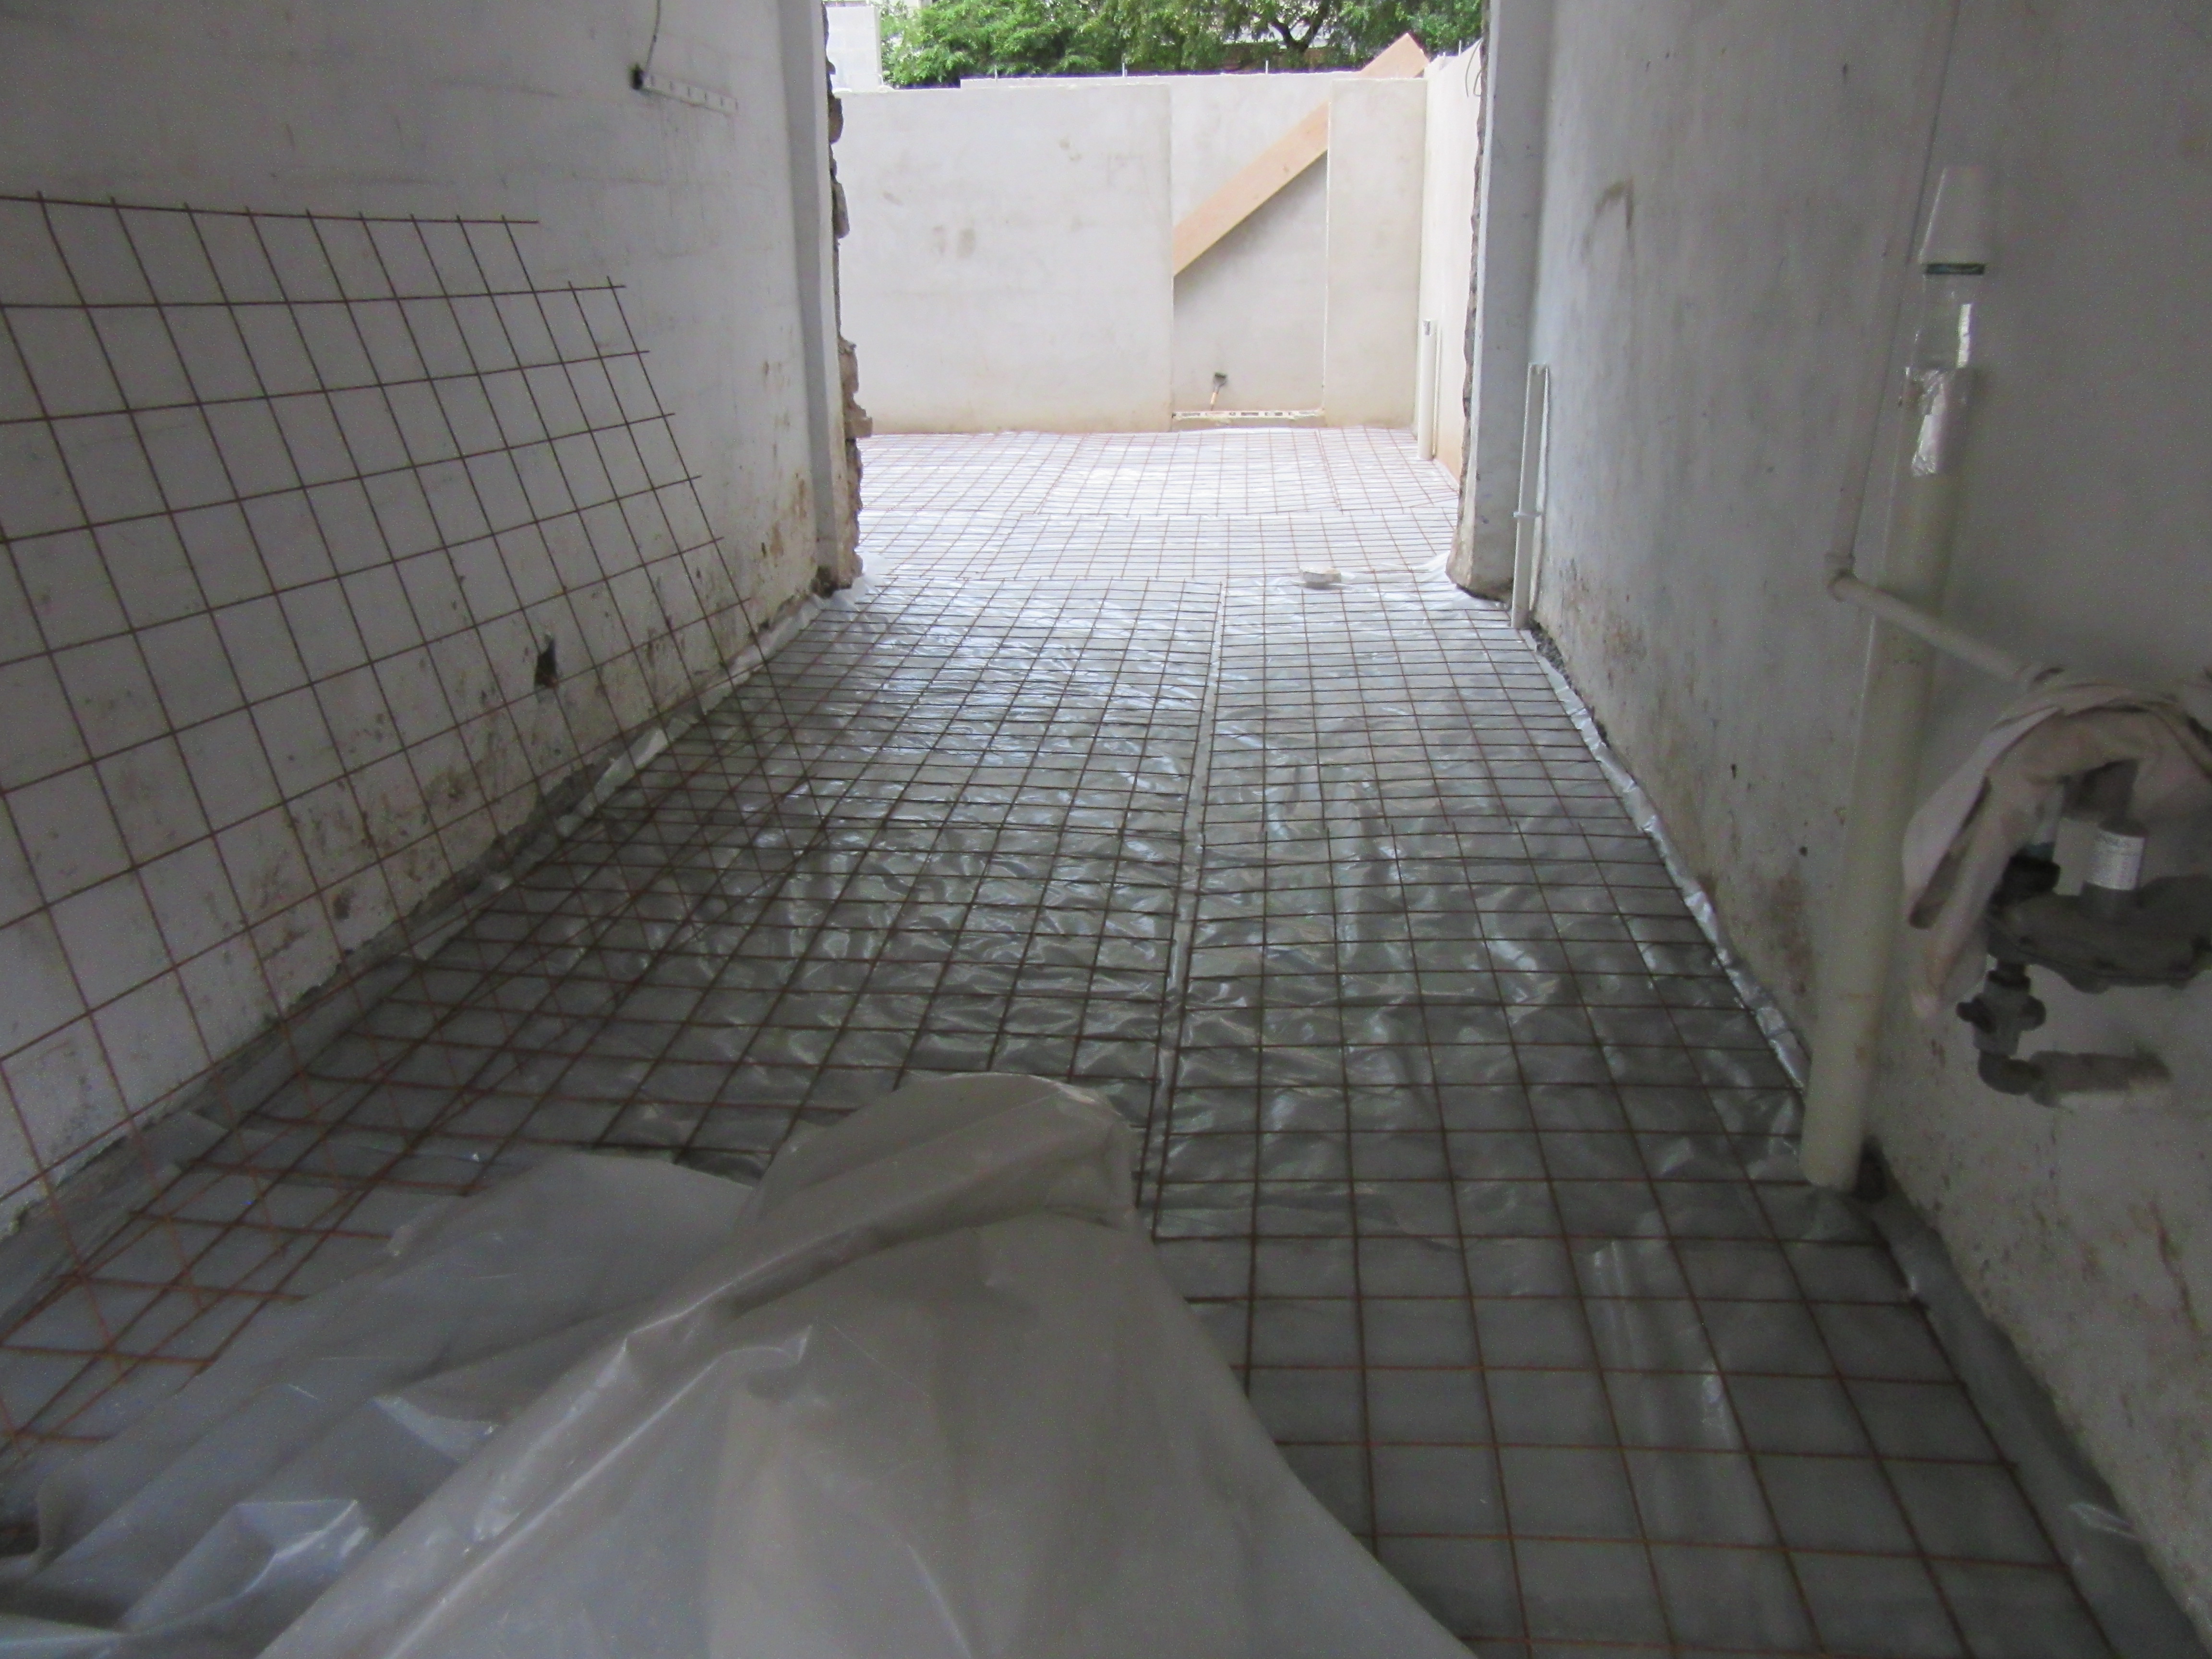
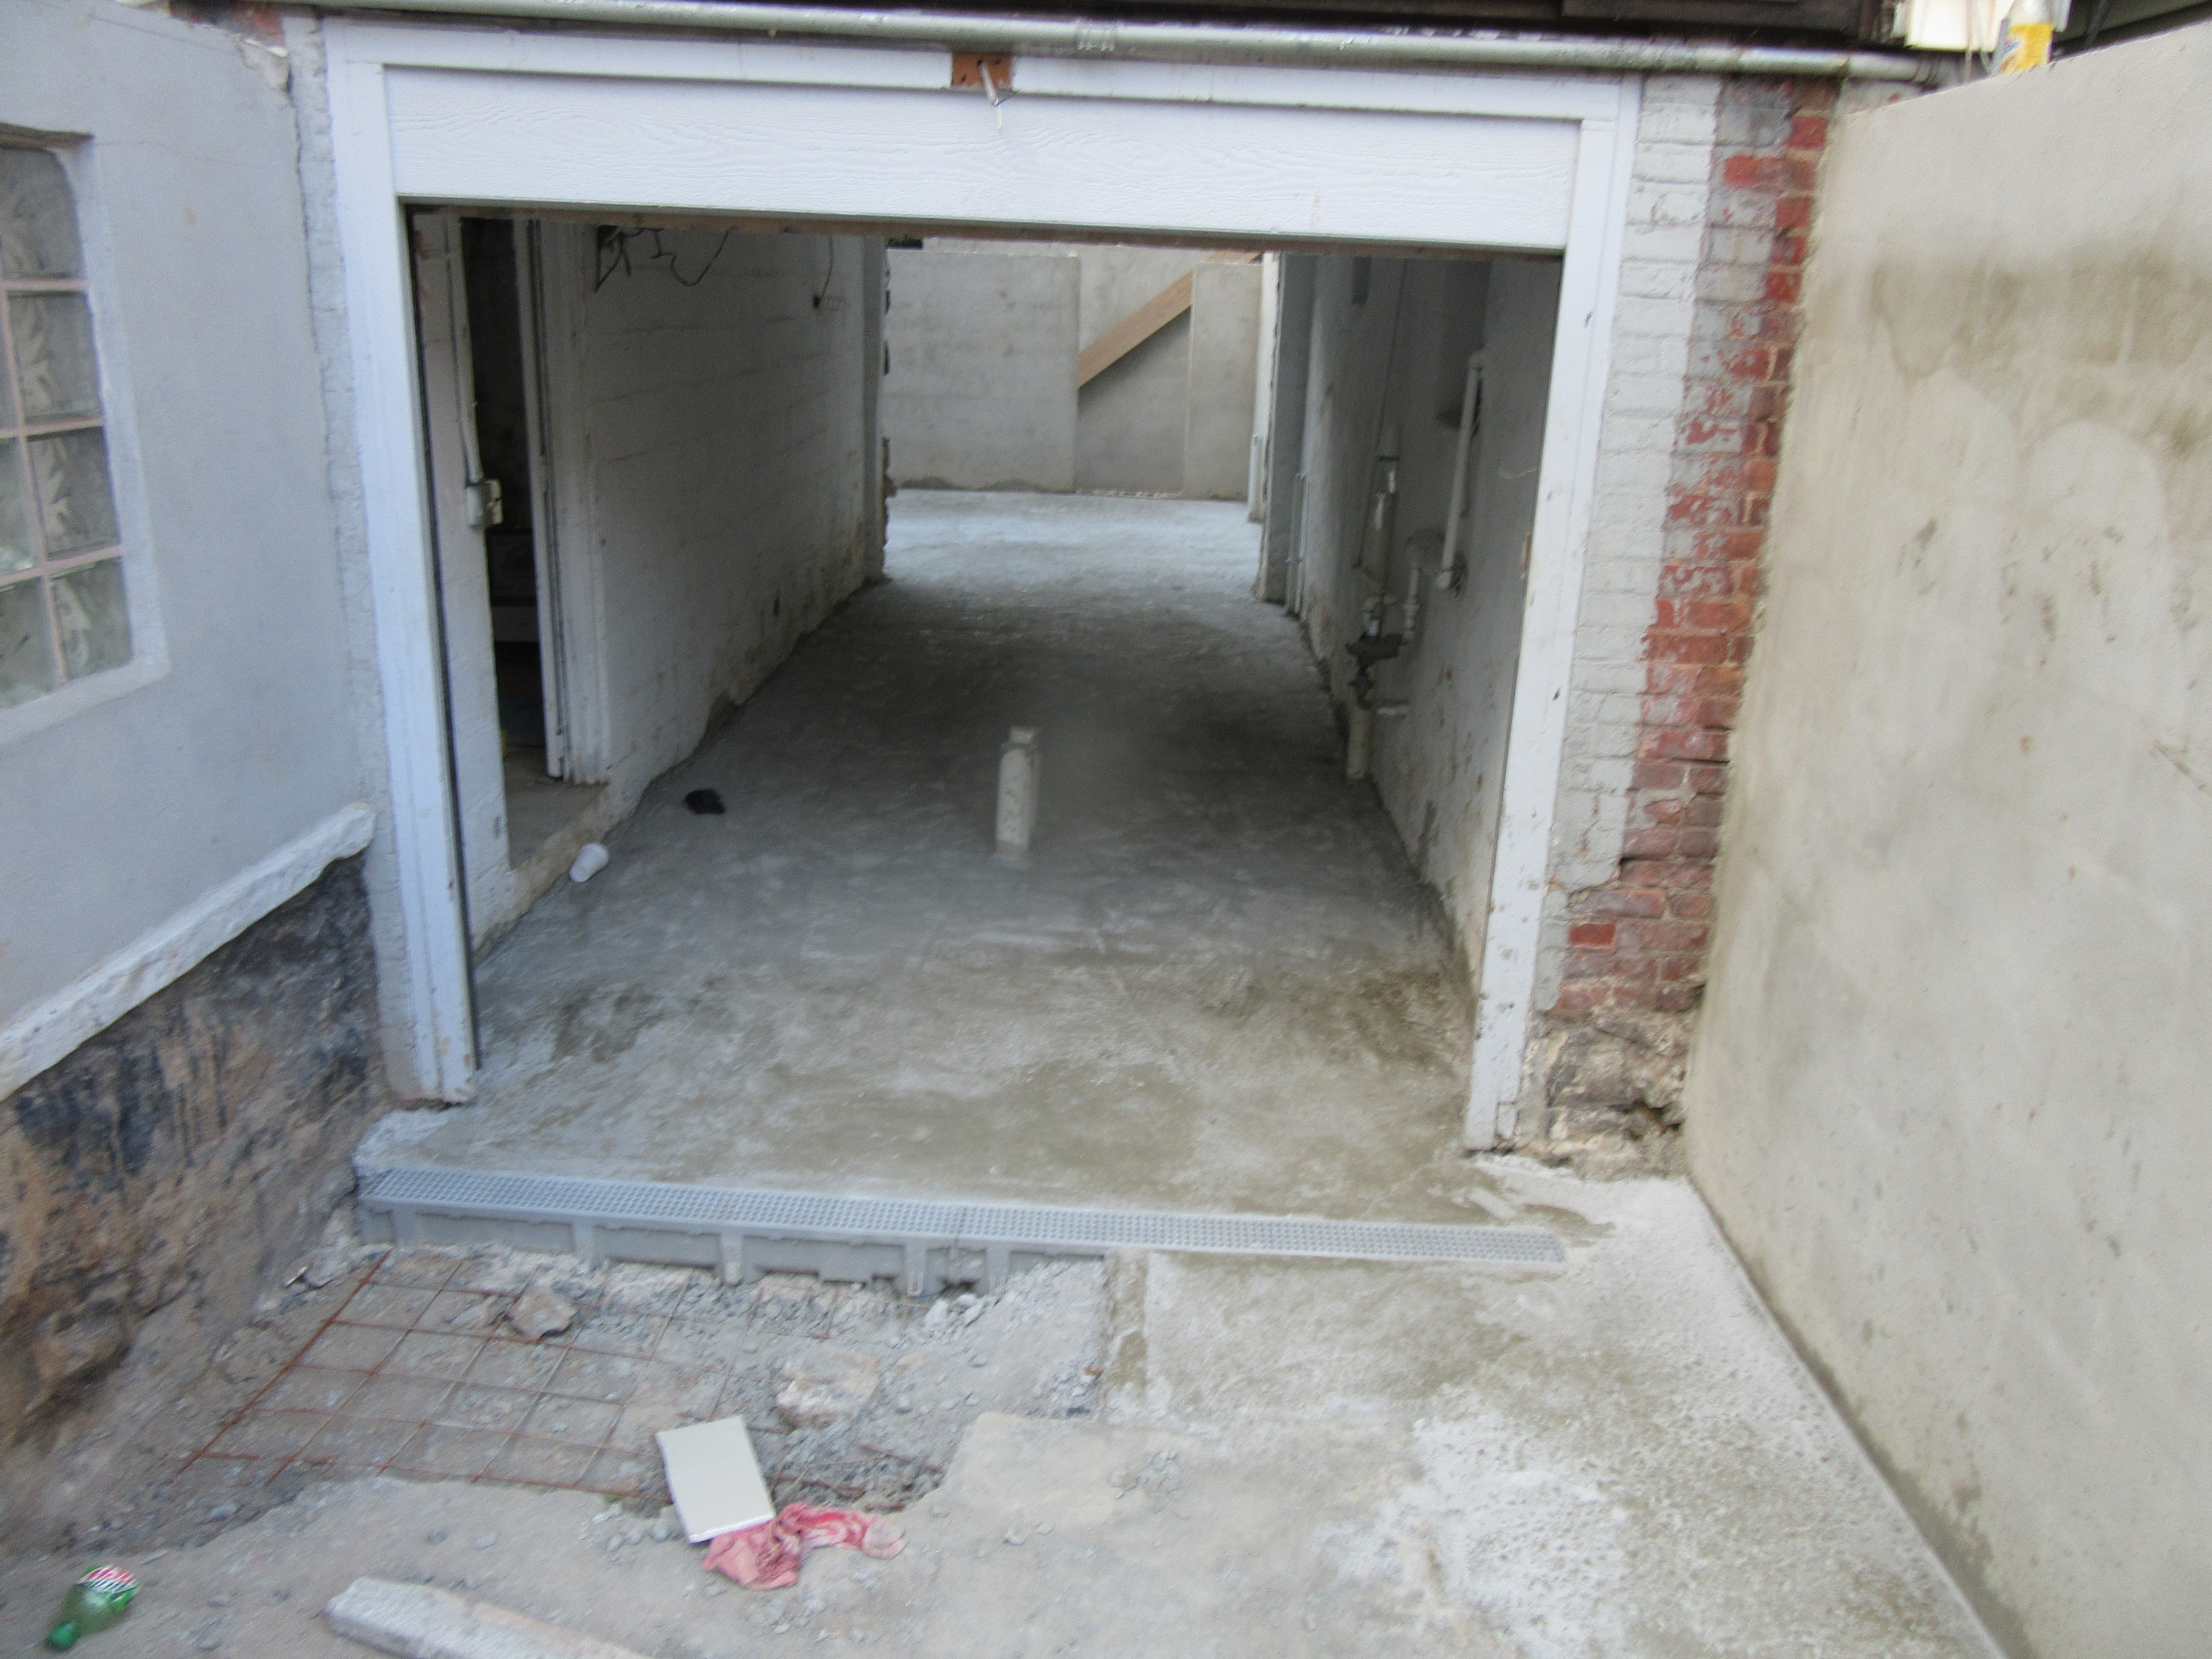
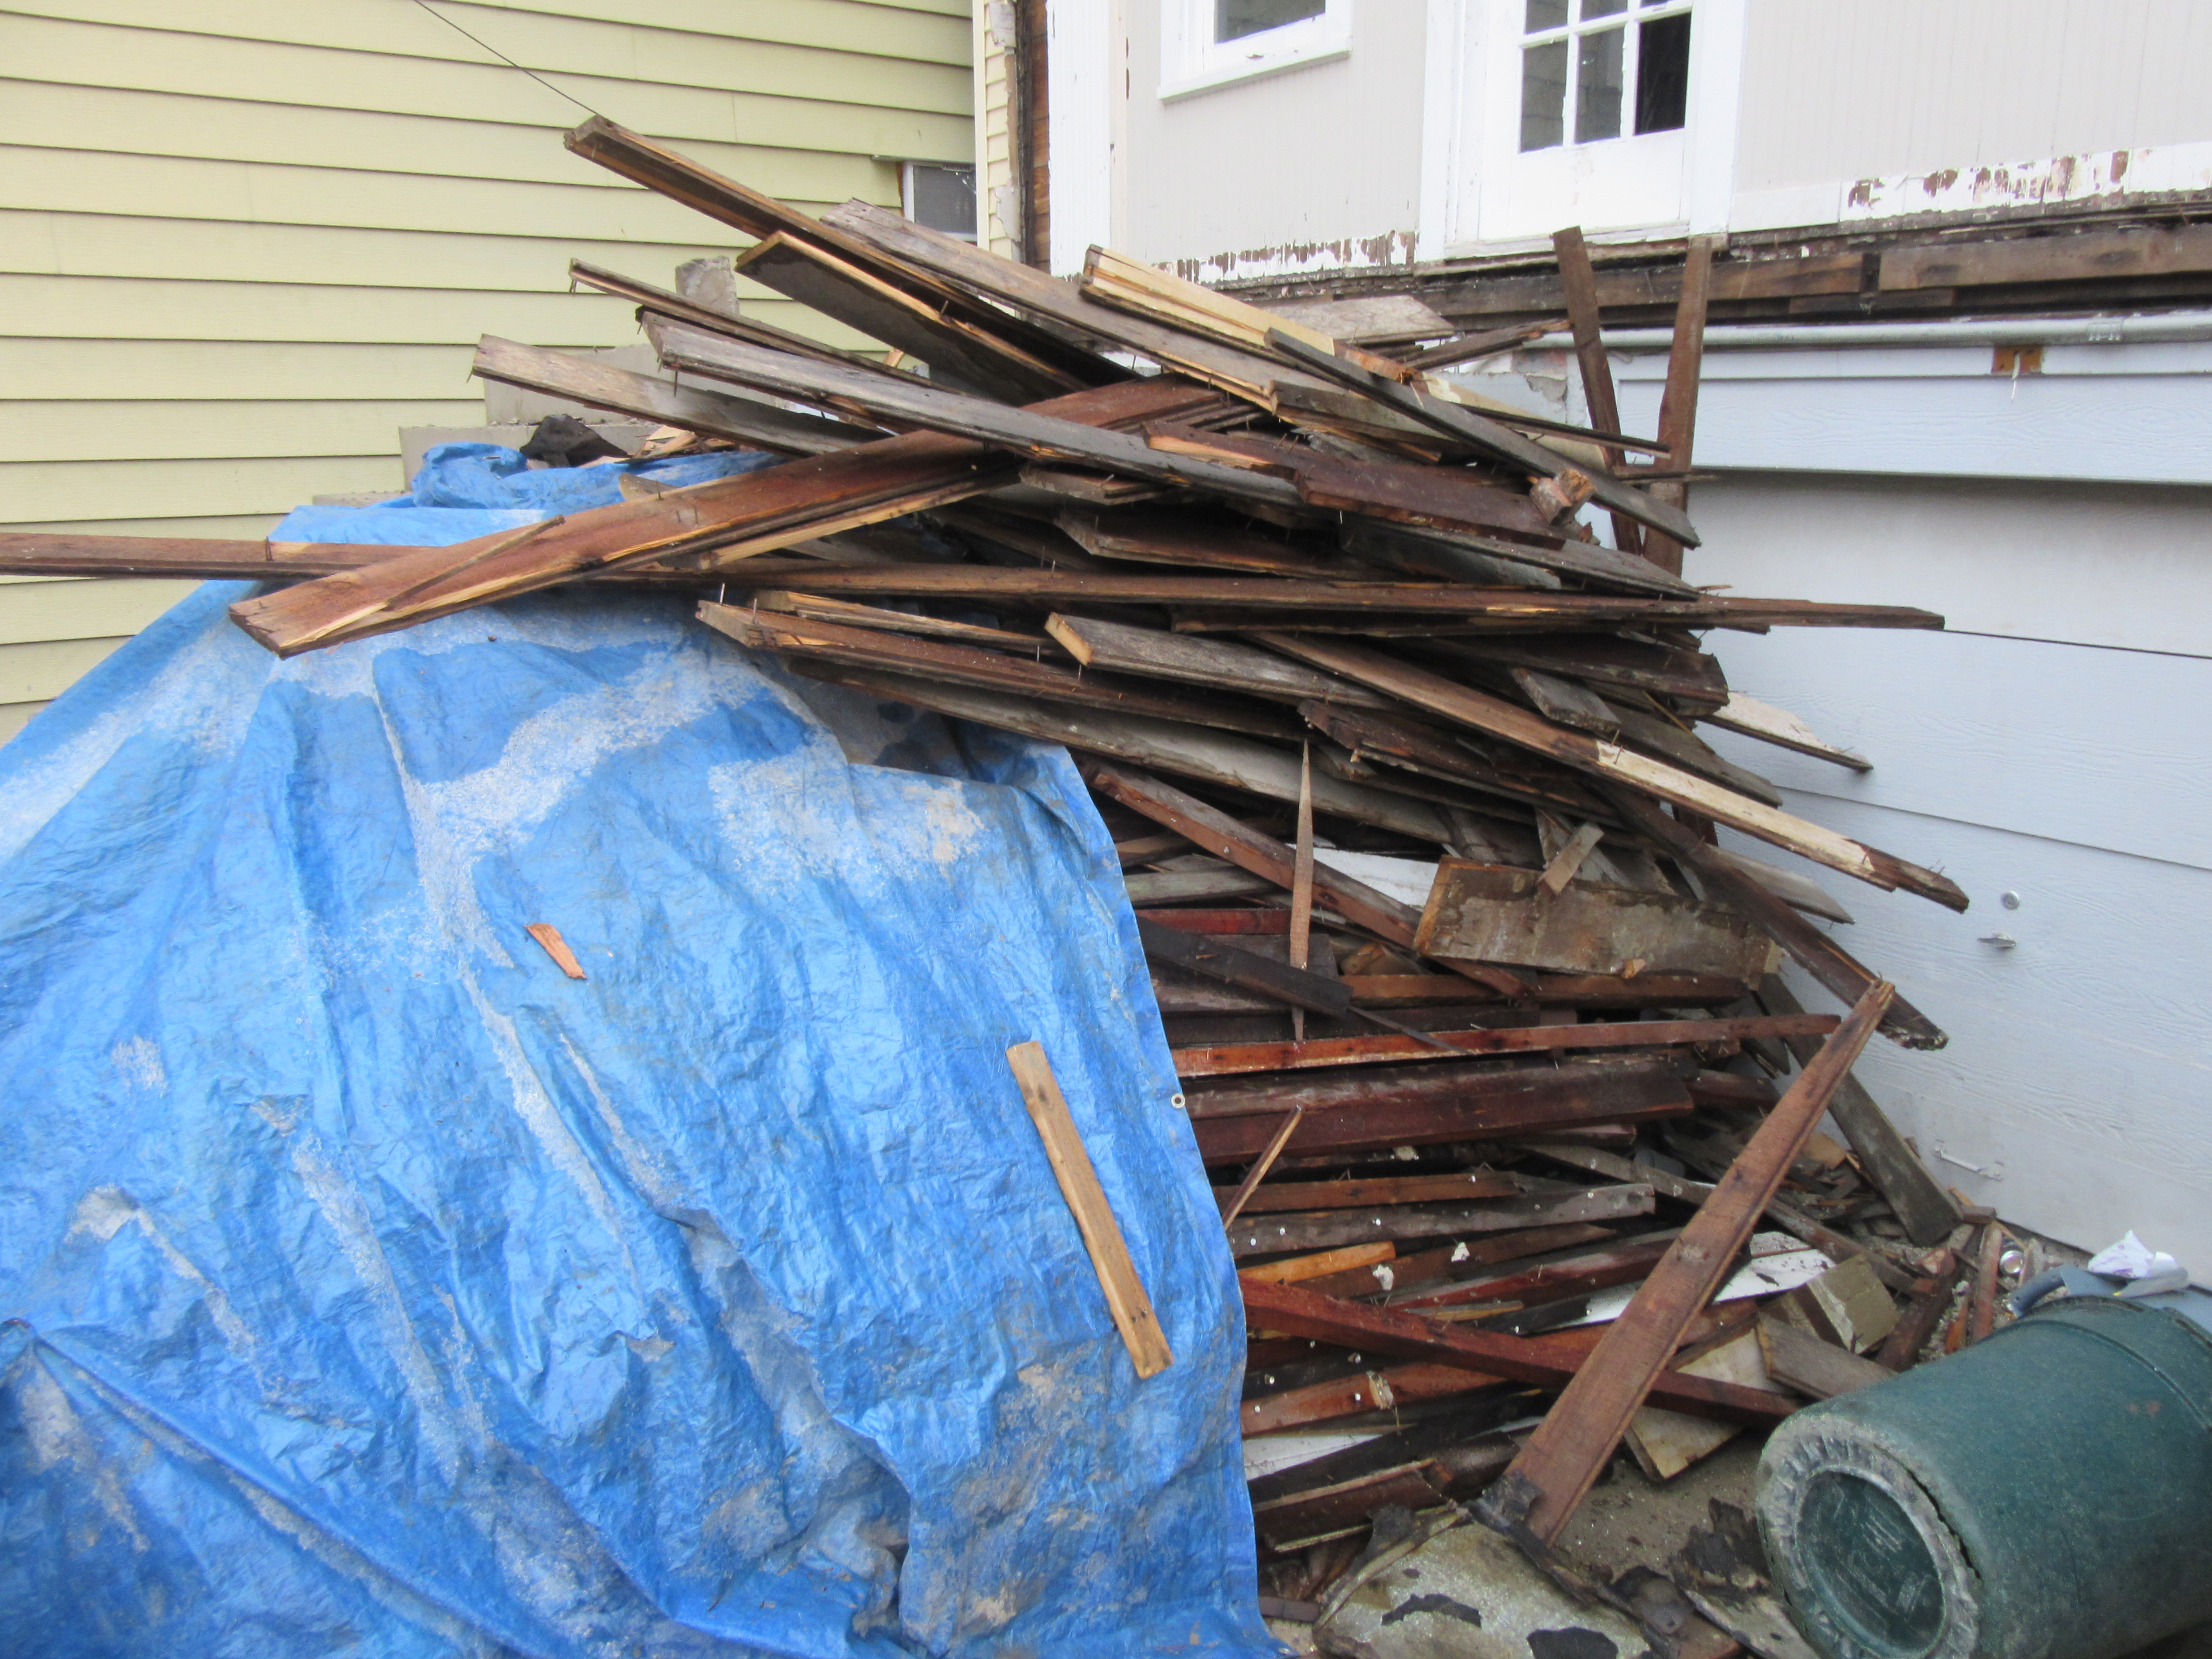
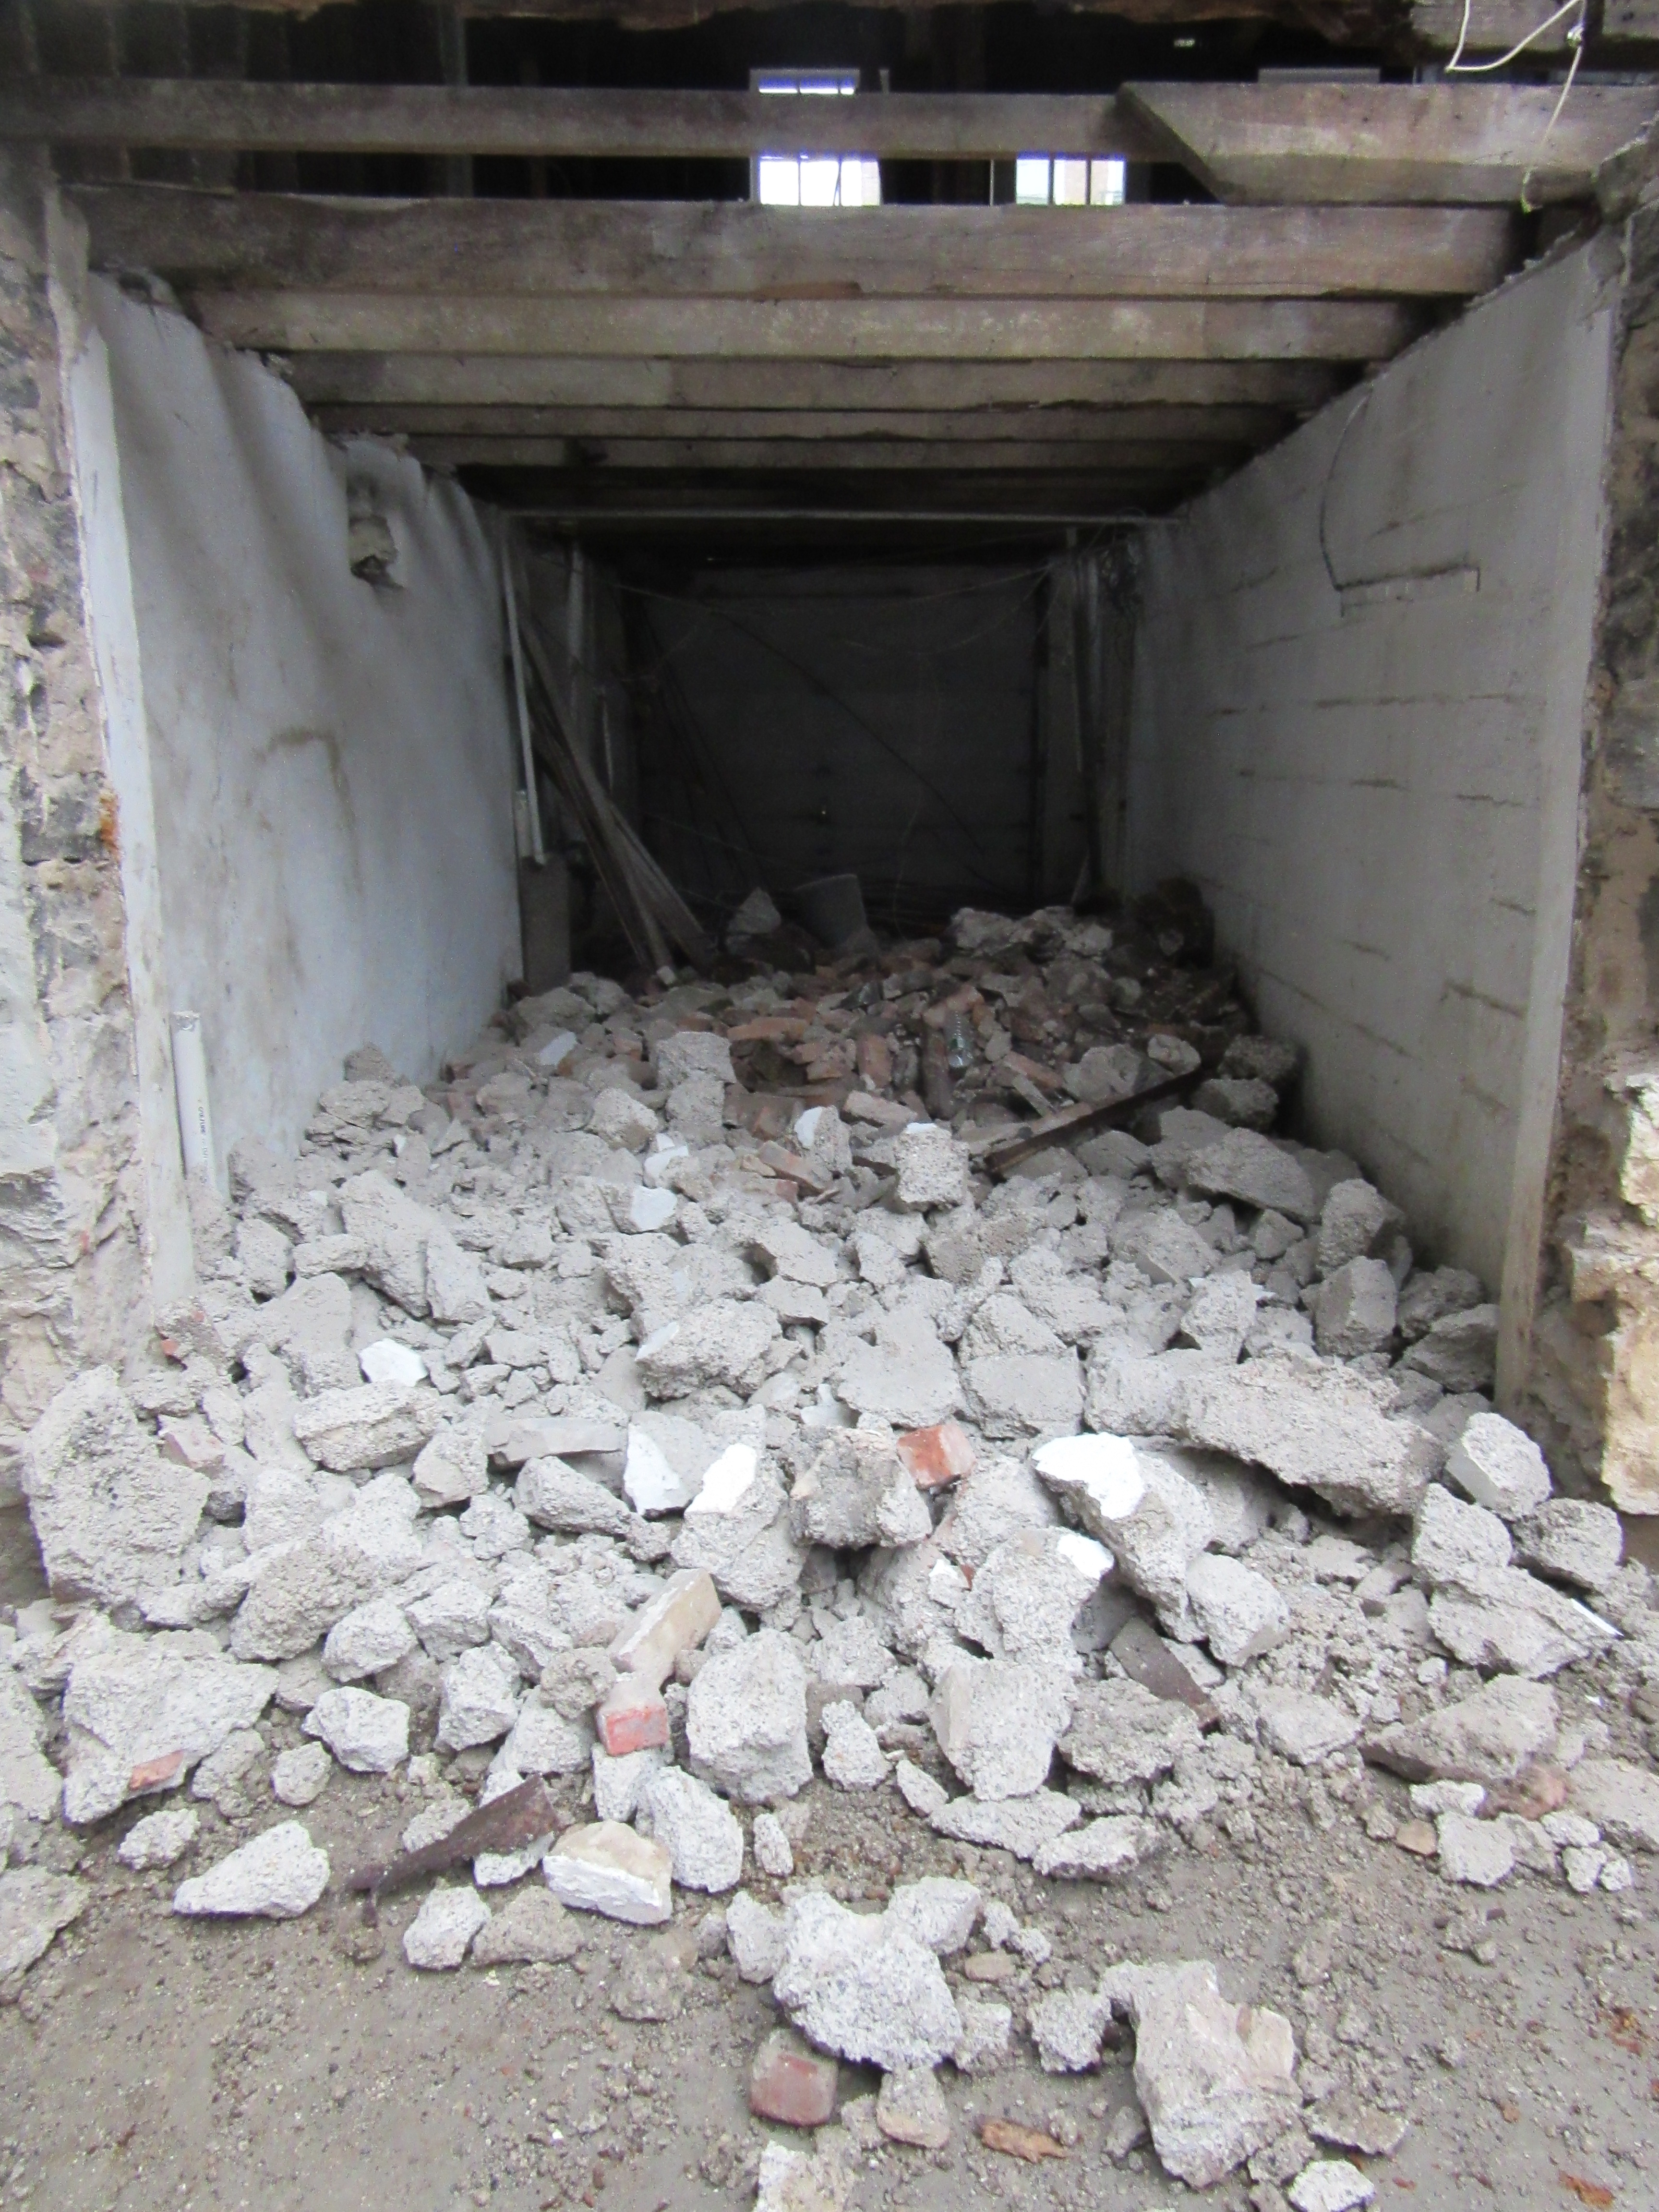
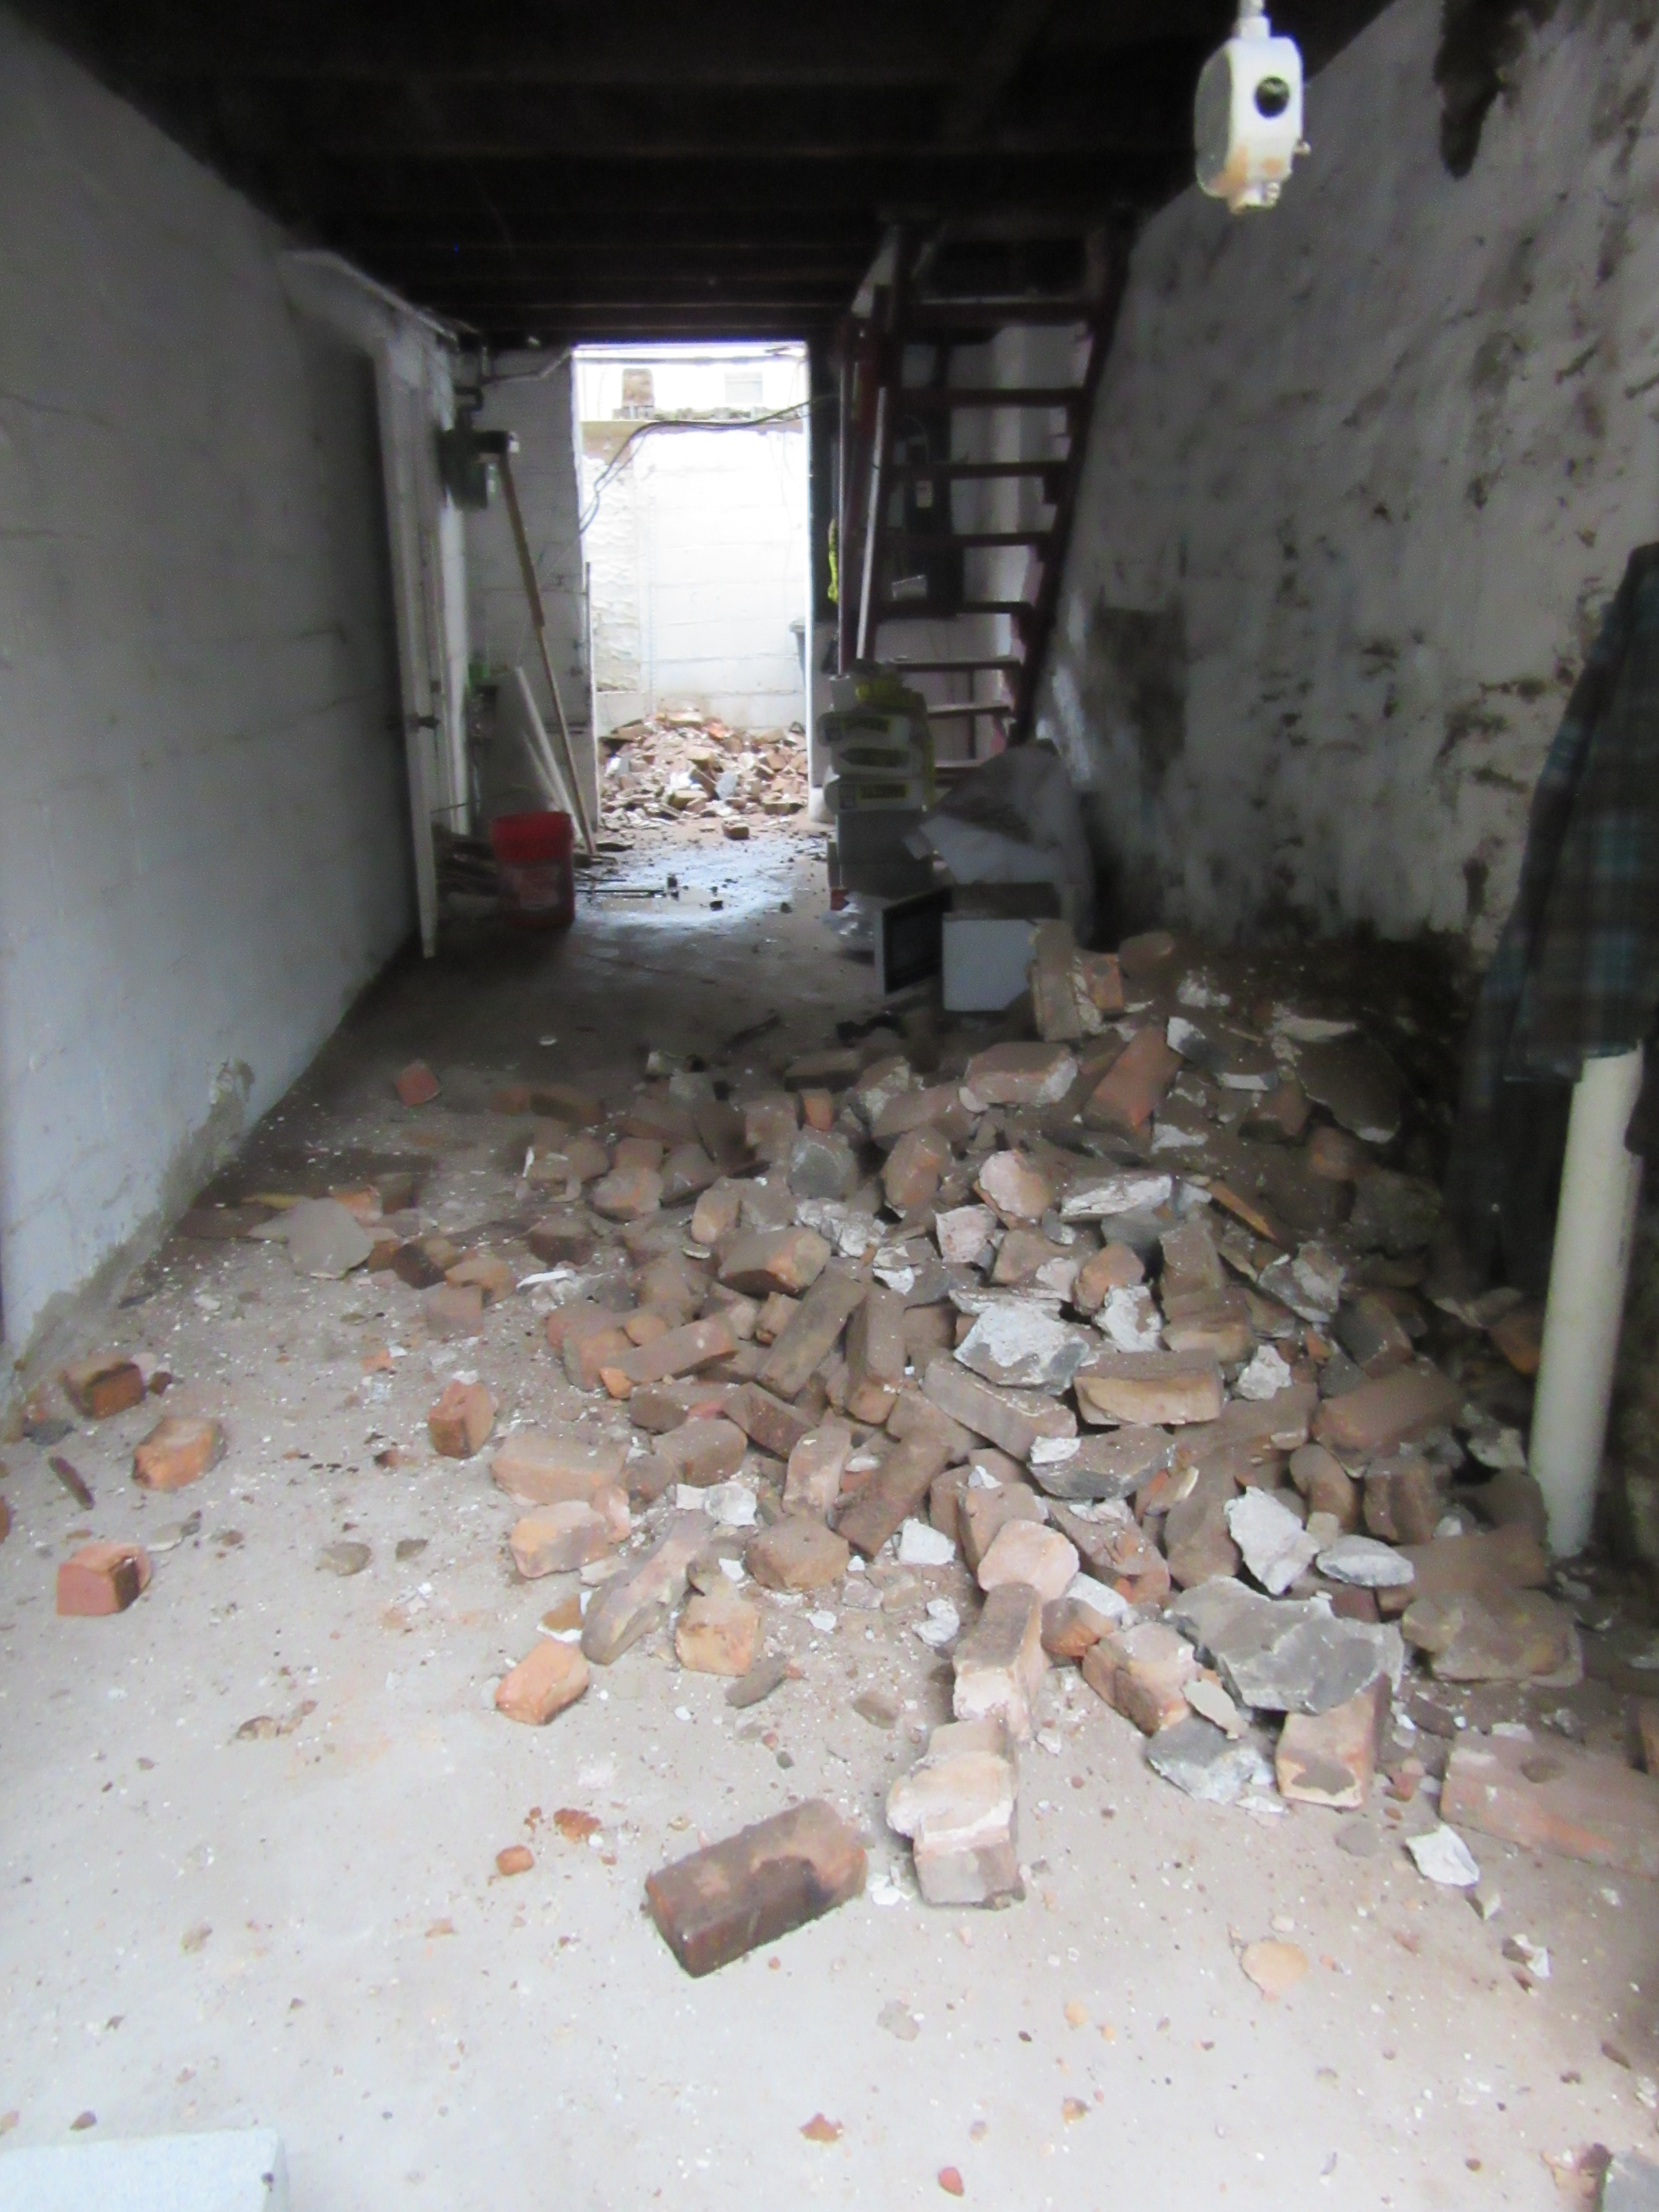
But the backyard was a depressing mess when I moved in. The mason left a mess behind after the foundation construction was completed. It was littered with piles of dirt and rock. Weeds and trees were growing uncontrollably. There was an oak tree two doors down with branches so low that I could reach up and touch them while standing in the yard. Those branches blocked out most of the sunlight.

That all wouldn’t have been so bad had my original plan worked out. The construction was supposed to take a year, during which time I would float both the mortgage on my Hoboken condo that I was living in, and the mortgage I used to buy the house and fund the construction. I would then move into the house and sell the Hoboken condo. I estimated that the profits from my condo would leave me with a large enough nut to start the backyard project right away.

Well, that didn’t happen. I floated both mortgages for four years, not one. I had to do so much additional borrowing that when I finally sold the condo, I didn’t turn a profit. After all that, I was broke and couldn’t afford to move forward with the yard renovation.

All I could do was stare at the yard and say, “this sucks”.  I focused on getting myself settled in the house and refinancing the construction loan into a traditional mortgage.

The “Temporary” Solution

Headed into 2020, a series of unplanned events helped me piece together a slightly functioning yard. First off, the pandemic kept me at home with not much to do. I started to wander outside and think that it wouldn’t be terribly difficult to weed the yard and clean up the construction debris. I got started on that with a pair of gloves, some basic gardening tools, and a box of contractor bags.

Once I got through all the layers of debris, I looked at the trees on my property and thought they wouldn’t be so daunting to remove. So, I bought my first chainsaw and got to work!

I sort of read the safety instructions and watched a quick video on YouTube and started to cut down the trees. It wasn’t as hard as I thought it would be and I was able to cut up all the branches and stuff them into contractor bags.

Me and my chainsaw
I wonder how this thing works.

That left me with the stumps. For whatever reason, I recalled a story a friend told me in college about his father teaching him how to take tree stumps out by digging around the tree and cutting the roots out until the stump can be removed.

Bye bye trees

Having nothing to lose, I gave it a shot. I dug a hole around both tree stumps and cut the roots one at a time until I was able to shove the stumps out of the ground. That left me with two rather sizeable holes where the stumps were.

Maybe I should start a stump removal service

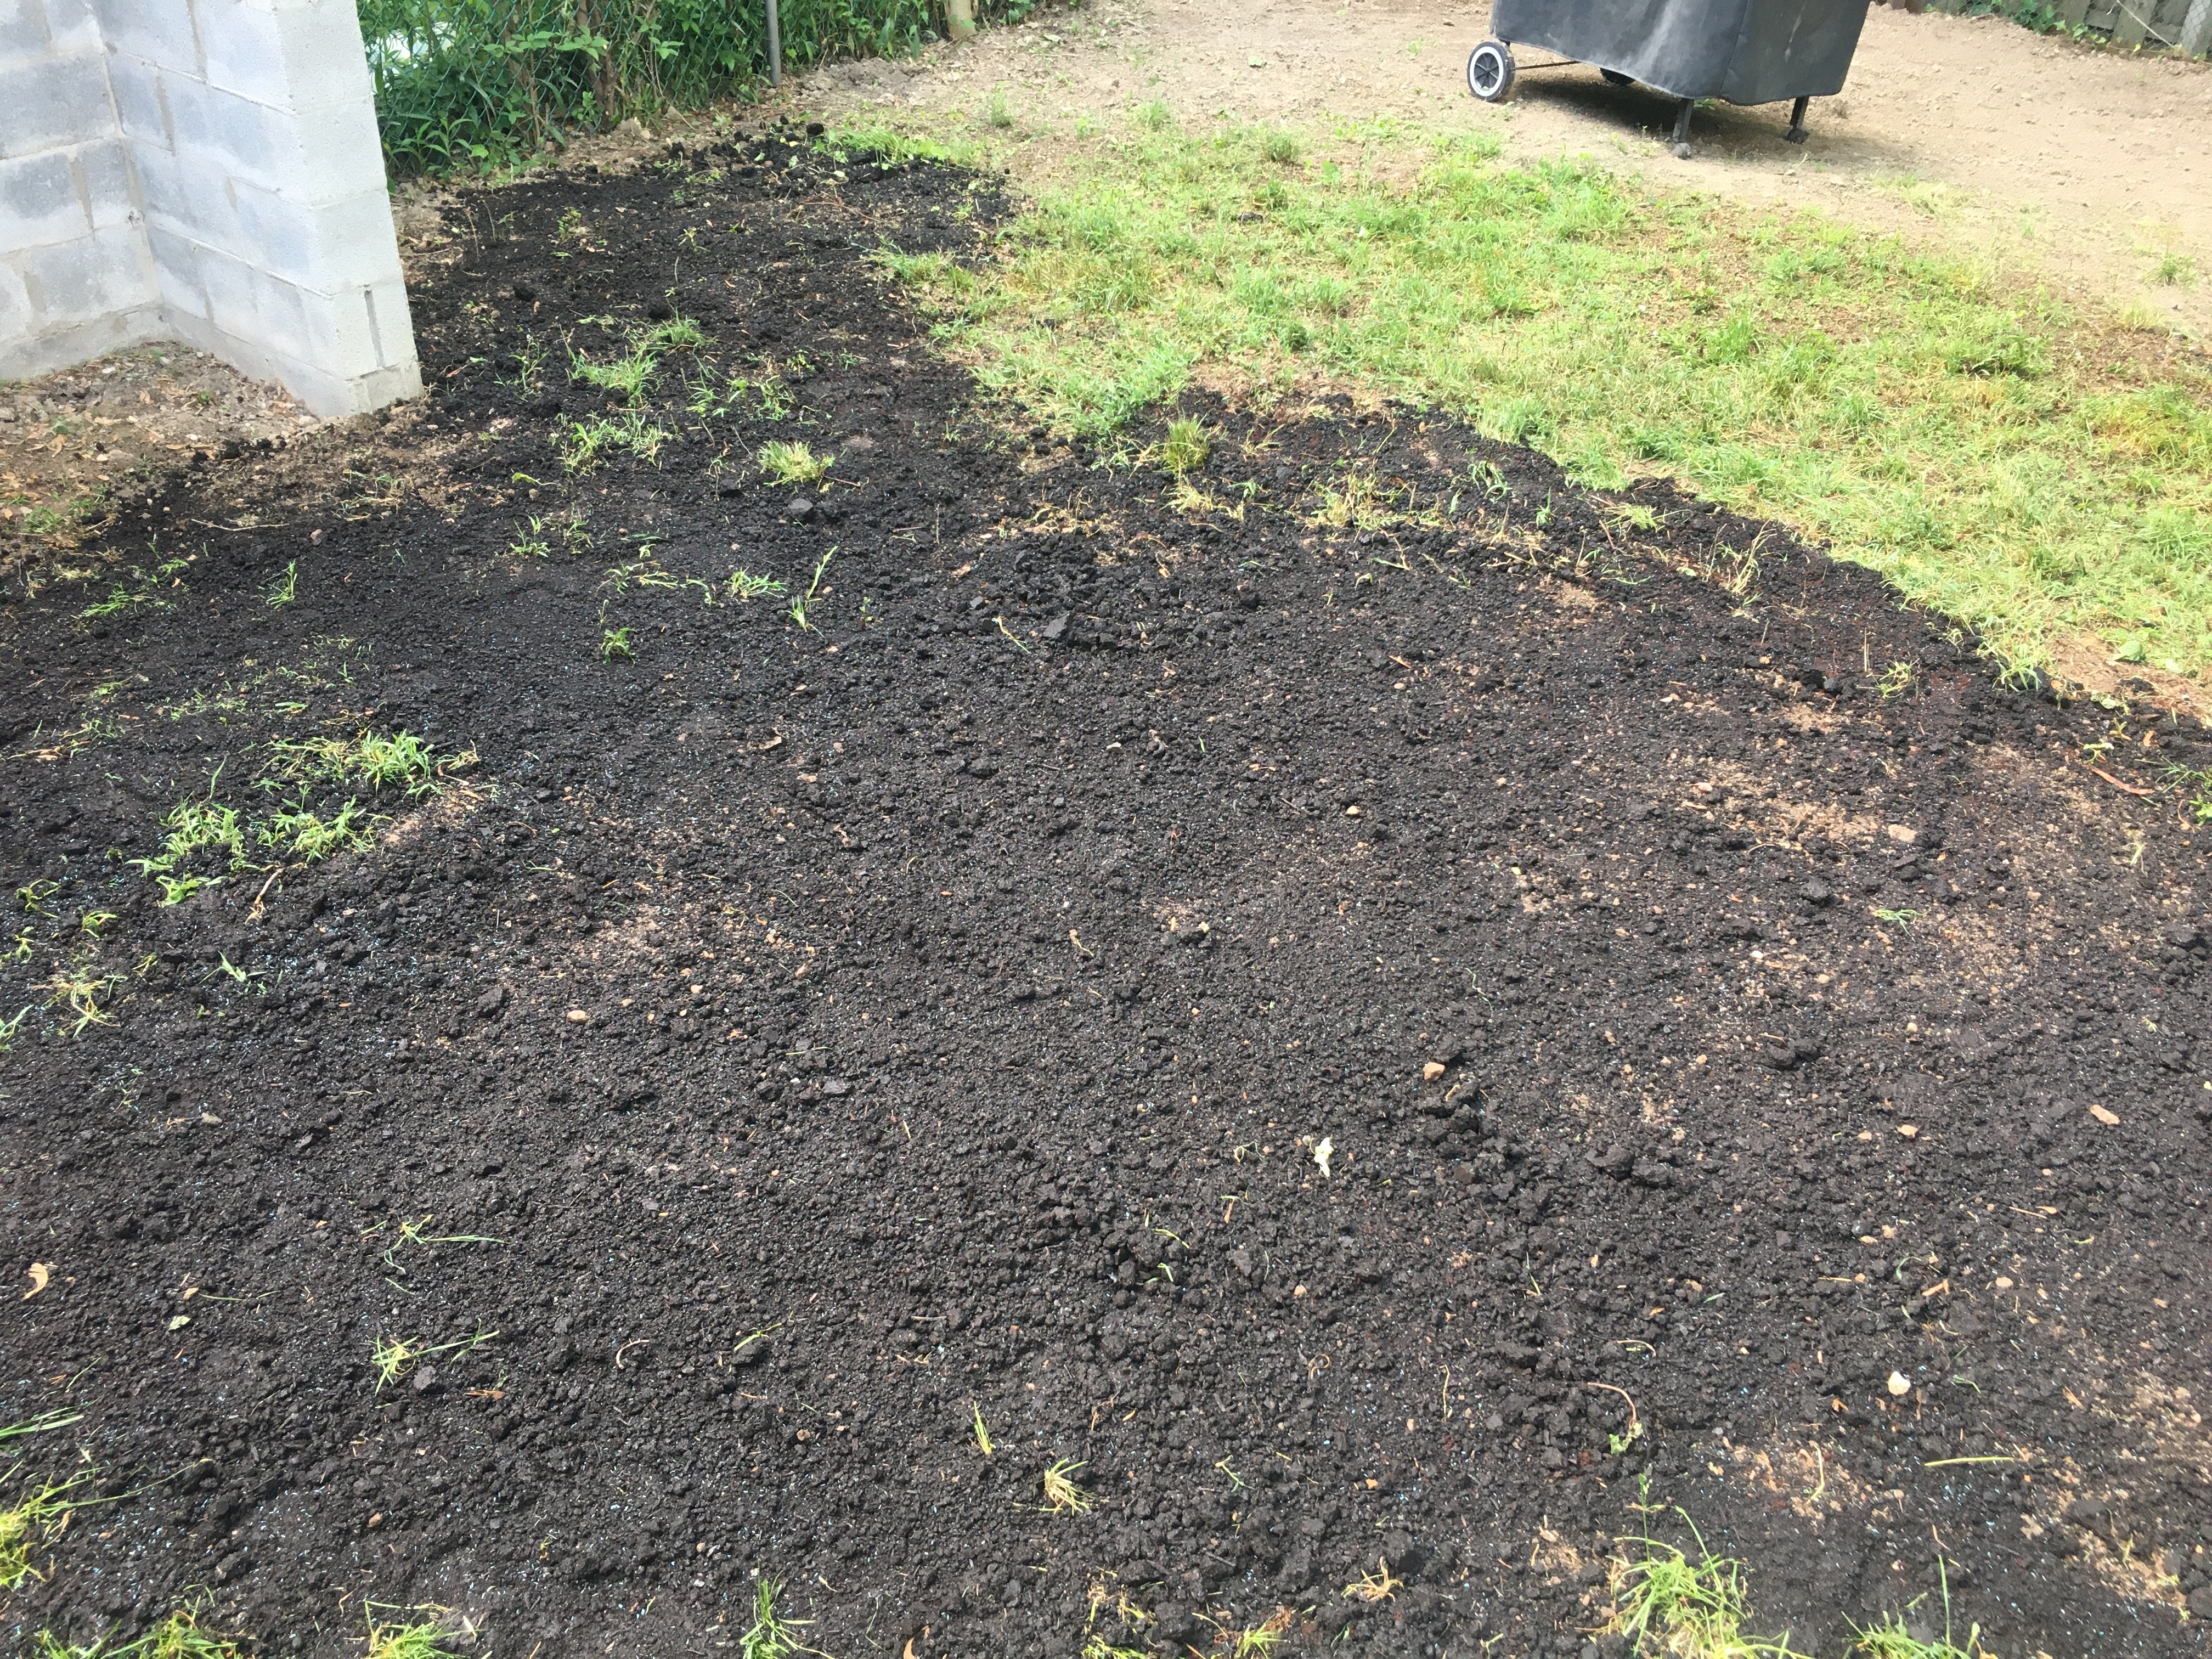
I still had the mounds of dirt closer to the house that the mason left behind. I had a shovel and a bucket, so I filled the bucket with dirt from the mounds, walked it over to one of the holes and emptied it. I repeated that process until the holes were roughly filled in. I had used enough of the dirt from the mounds that I had effectively leveled the yard. Well, not leveled very nicely, but it was much better than it was. I used a metal rake to smooth it all out as best as I could.

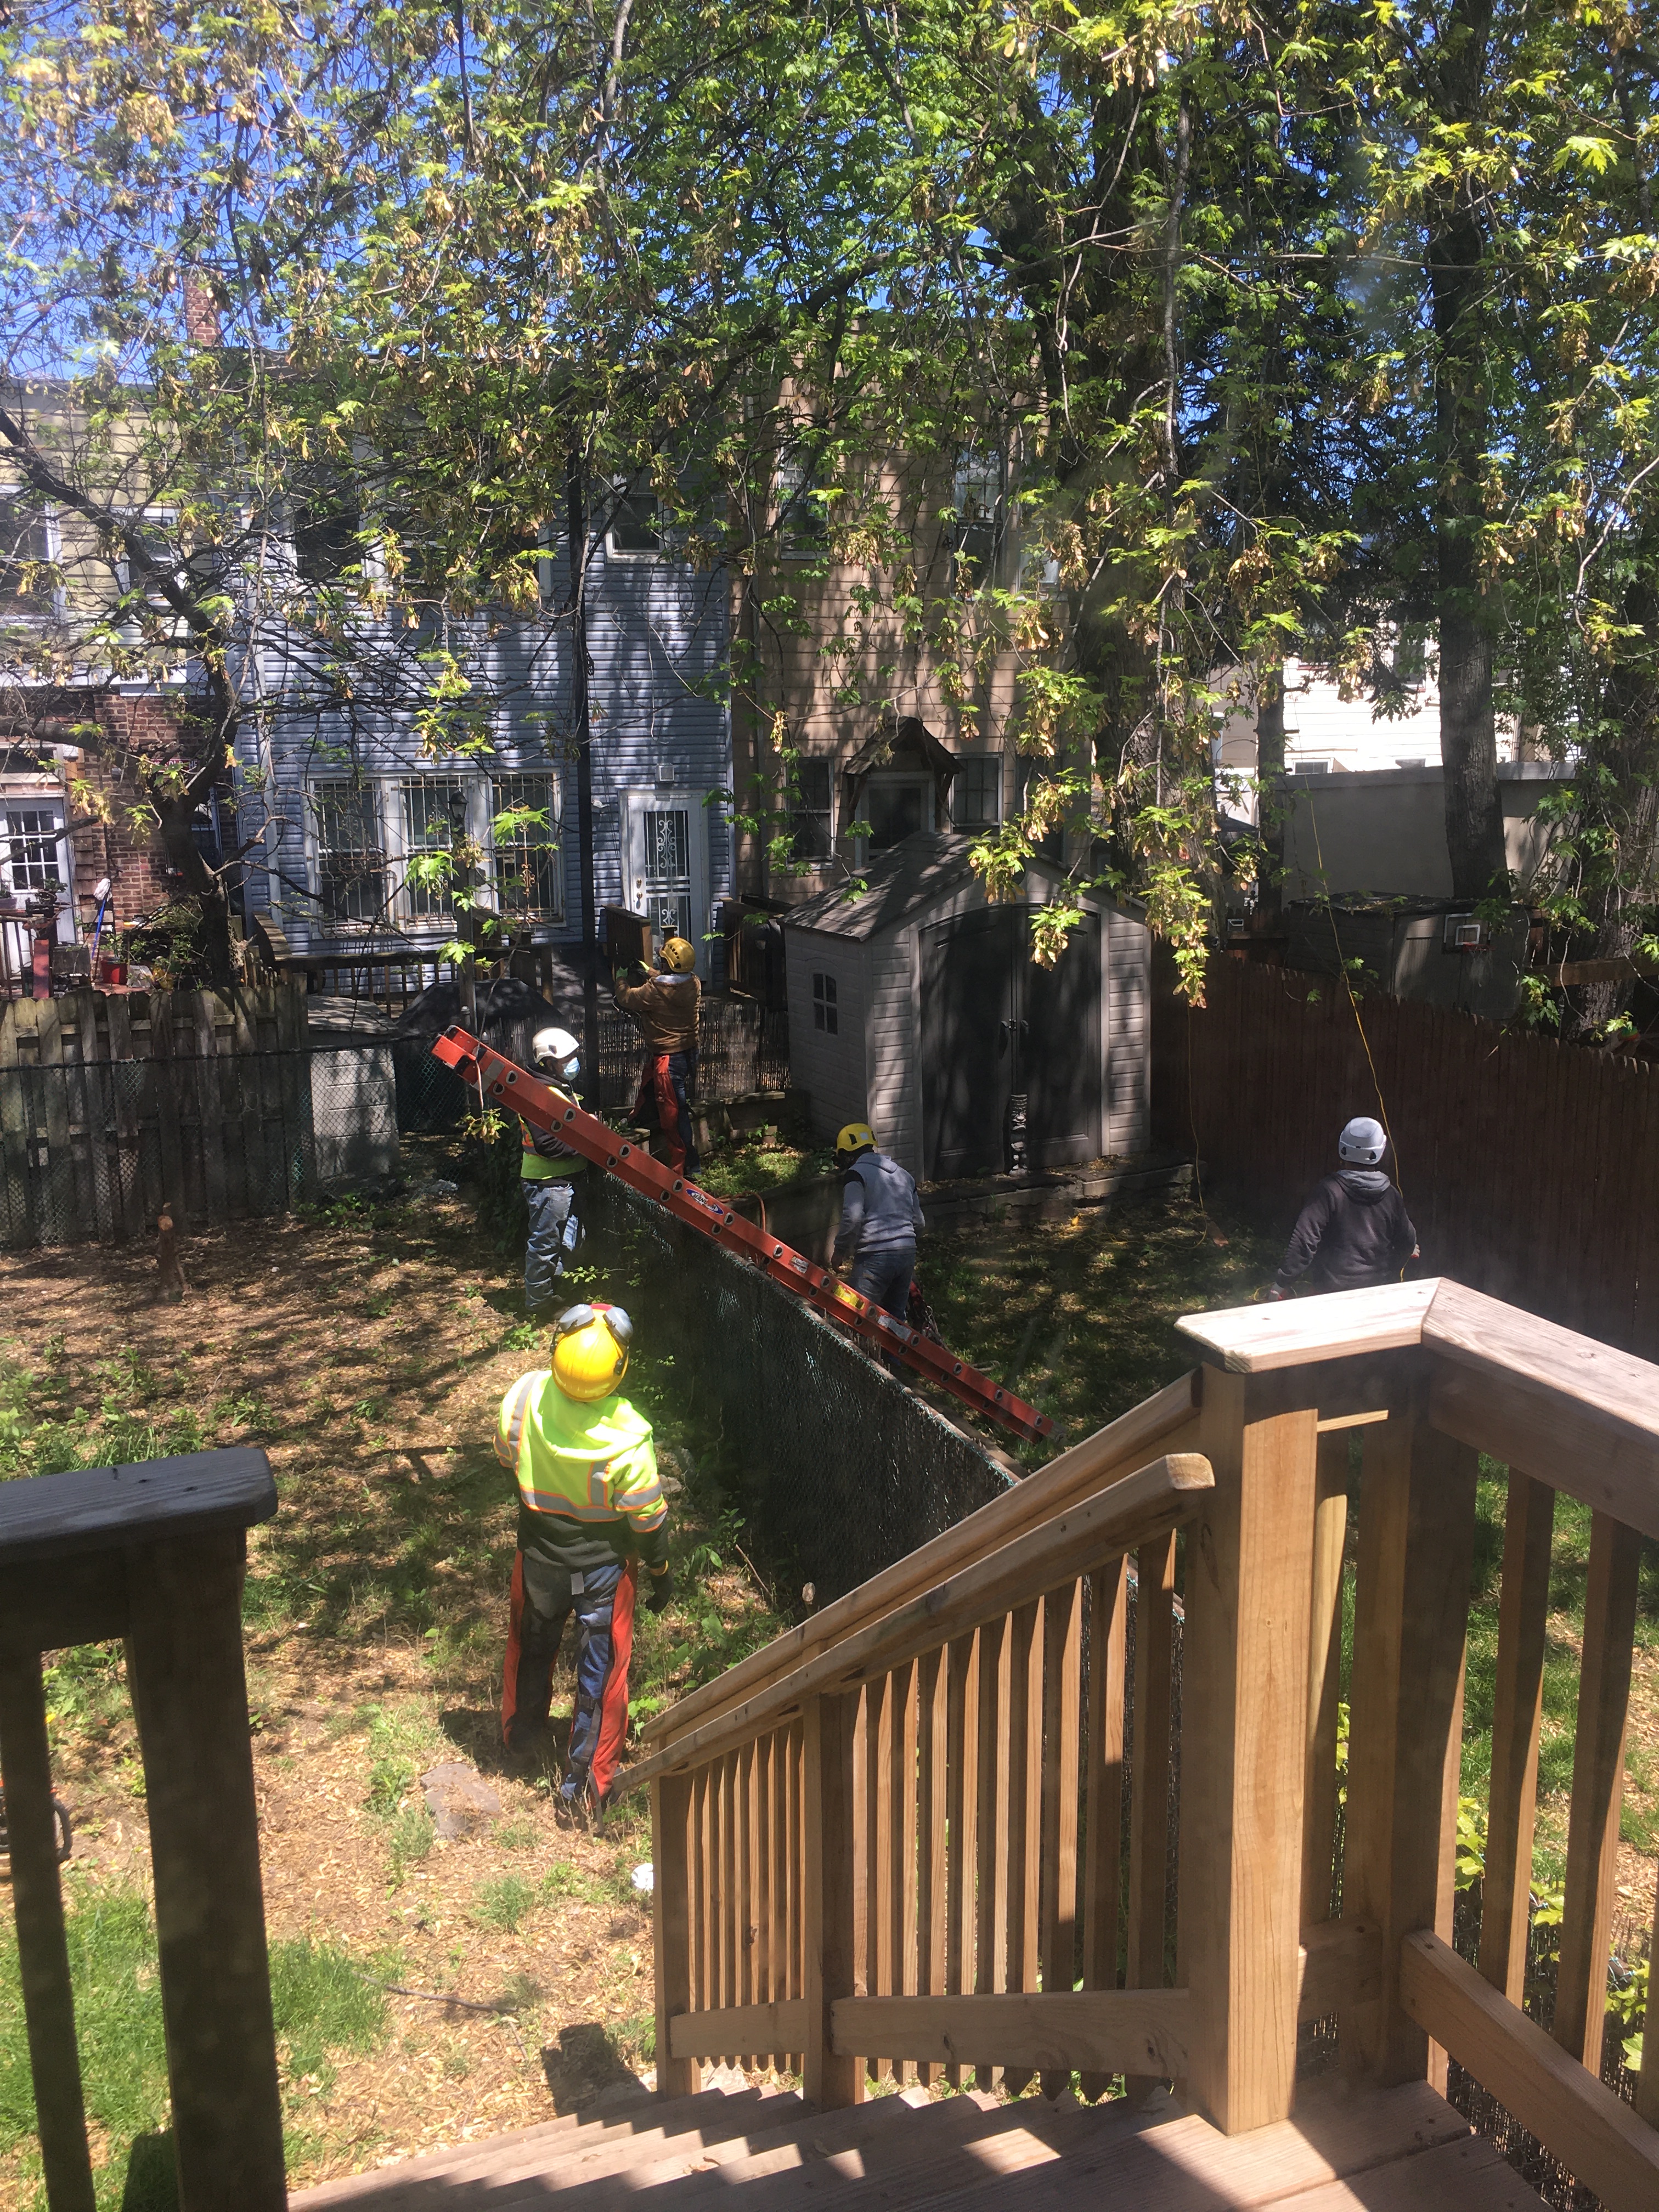
Around that same time, my neighbor (the one who owns the house between mine and the one with the unruly trees) decided that she did not like those huge branches in her yard, either. She was having a hard time growing grass and flowers because of the lack of sunlight. She hired a tree removal company to remove the three lowest branches and I agreed to split the cost with her. That made a huge difference in my yard, it was a lot brighter and more open.

The branch removal in progress

I didn’t start out with a plan but suddenly I had a clean-ish space with no trees, weeds, debris. It had sunlight for a good part of the day. I called my plumber and asked him to install a hose bib in the yard. To my recollection, he had agreed to do that as part of the original construction but for some reason it went unfinished until I asked for it.

I never wanted to grow a lawn. I’m ideologically opposed to the time and expense and waste of resources it takes to maintain a well-manicured lawn. But, for lack of a better idea, and more importantly a lack of funds, I decided I would try to grow grass as a temporary measure so I could get some kind of use from the space.

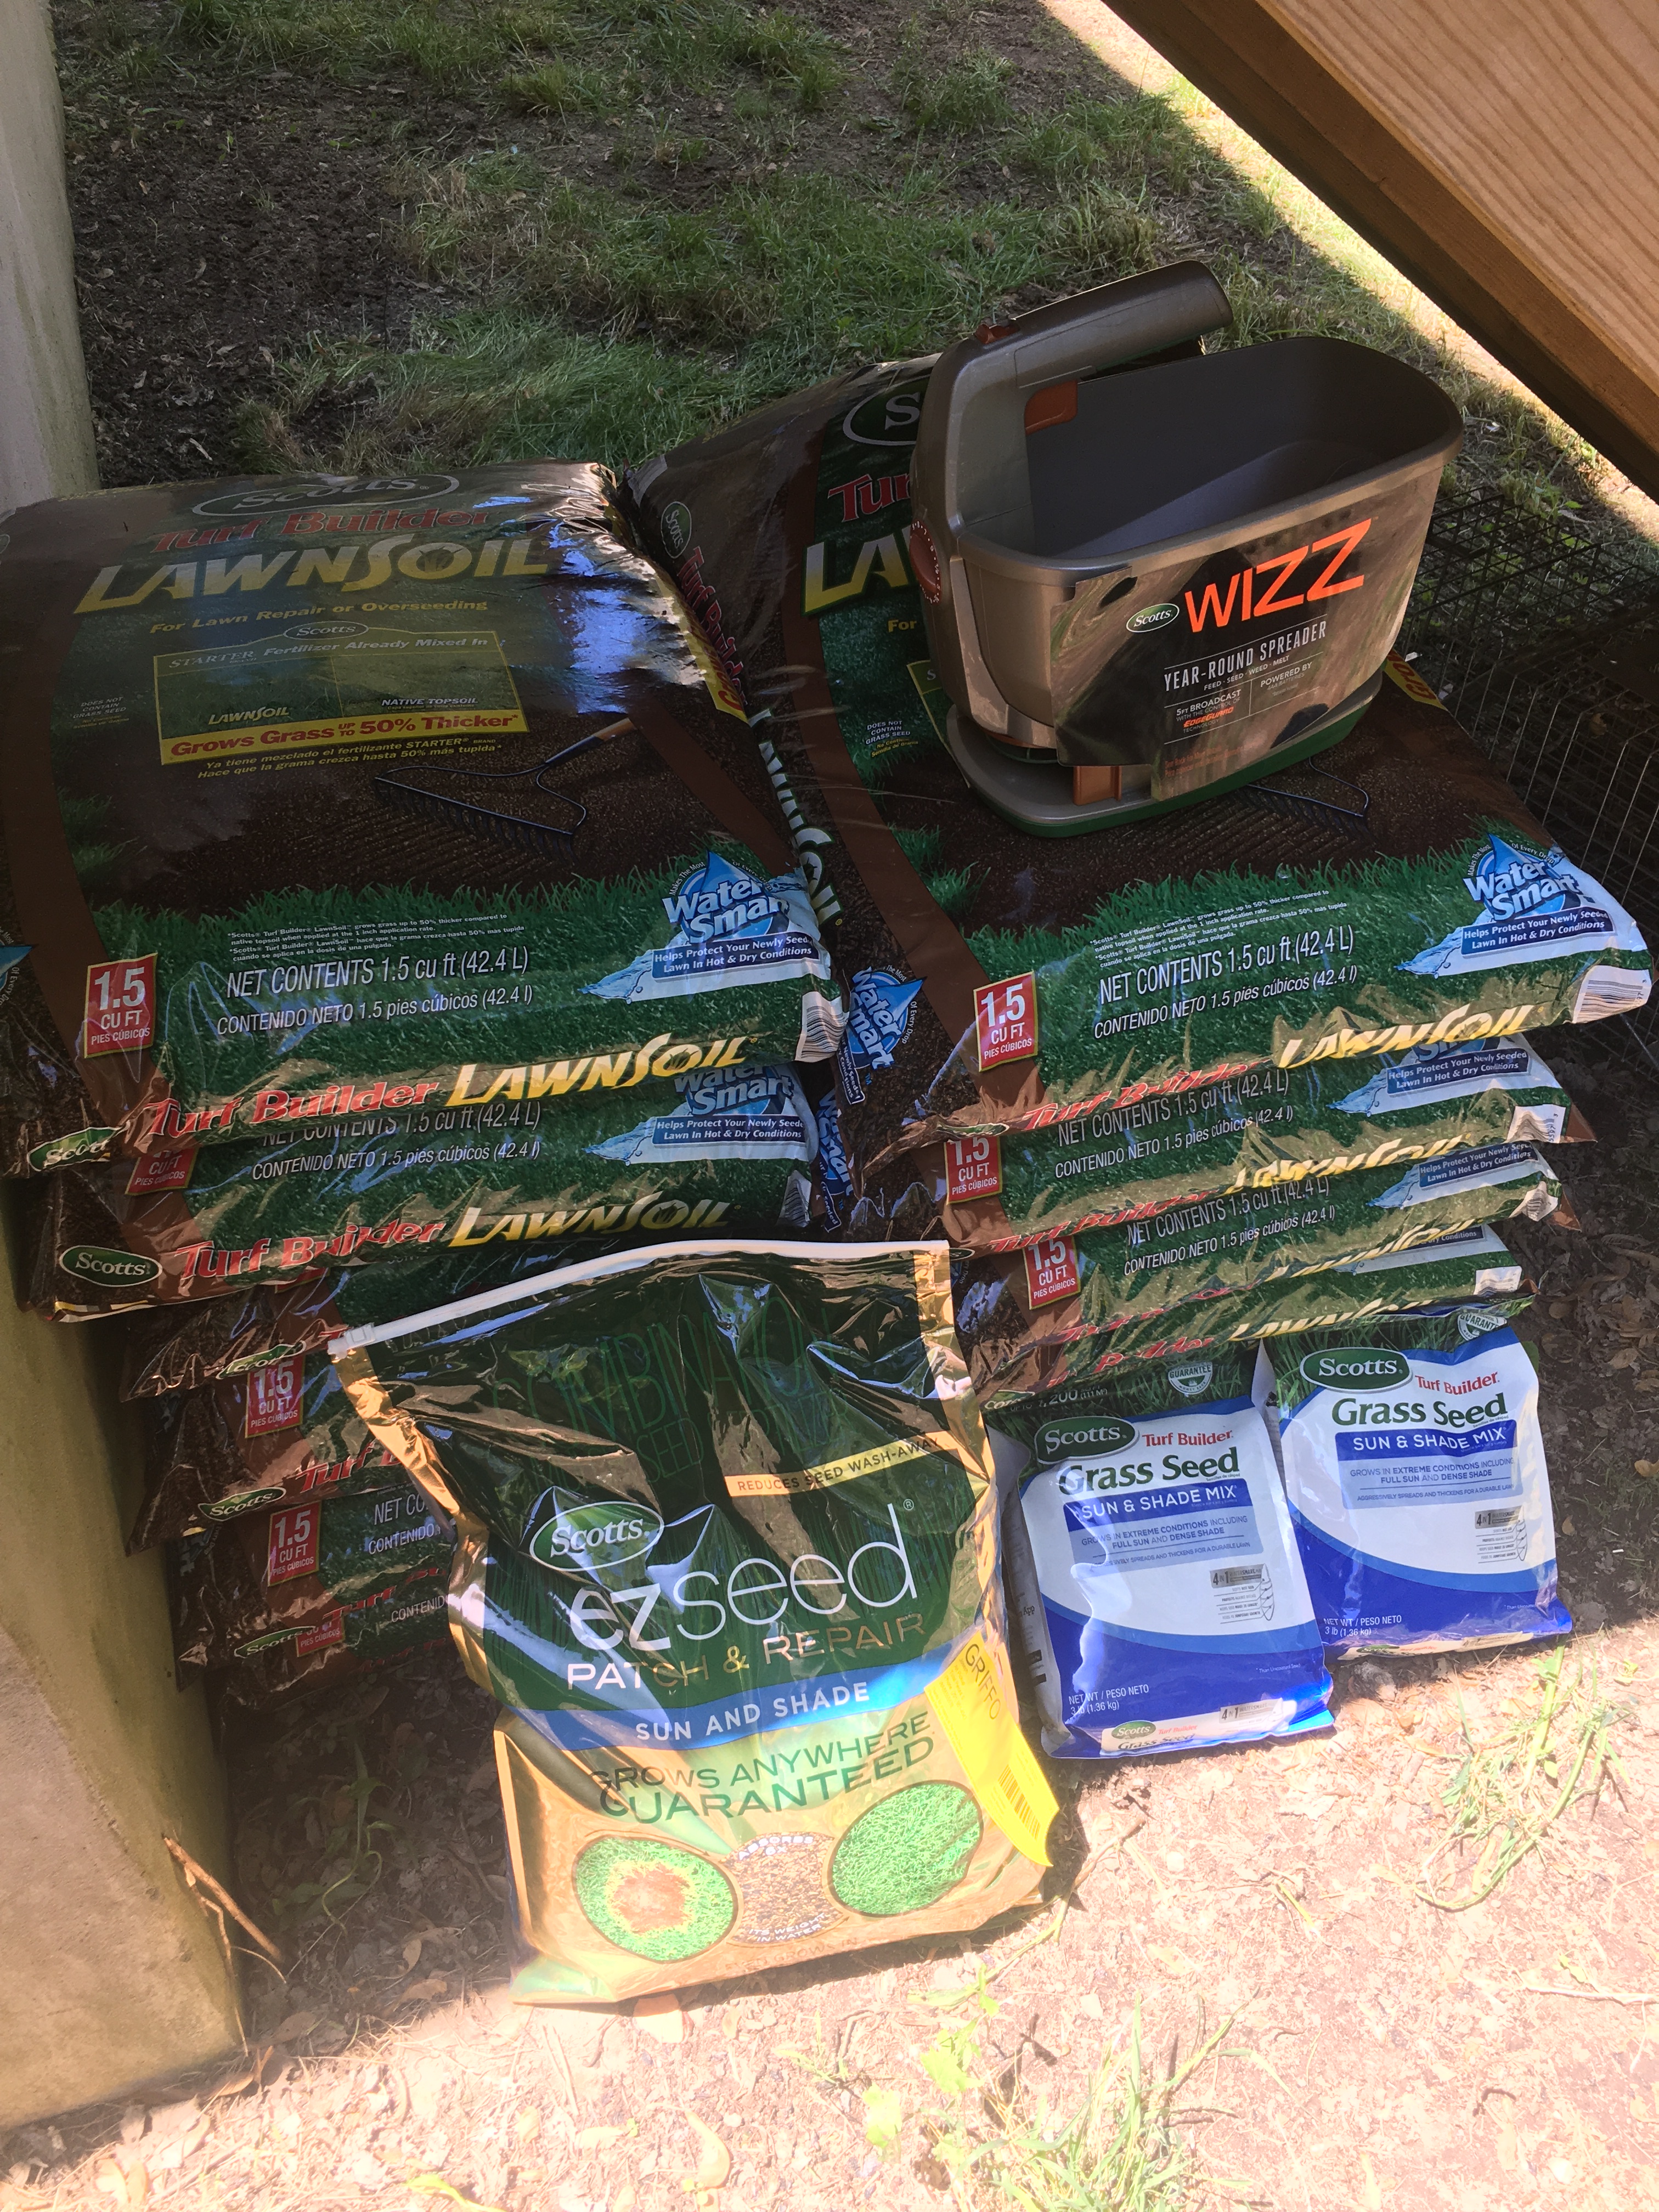
I bought several bags of lawn soil, grass seed, and a spreader. I spread it all out on the lawn and watered it. Over the course of the next month, I didn’t get much growth. A friend suggested that the problem was I was trying to plant grass too late into the spring and that I should try again in the fall. Someone else told me that I needed to water it every day. So, I didn’t accomplish much at first.

Let’s see what we can do with this stuff
Lawn soil spread out and seeded

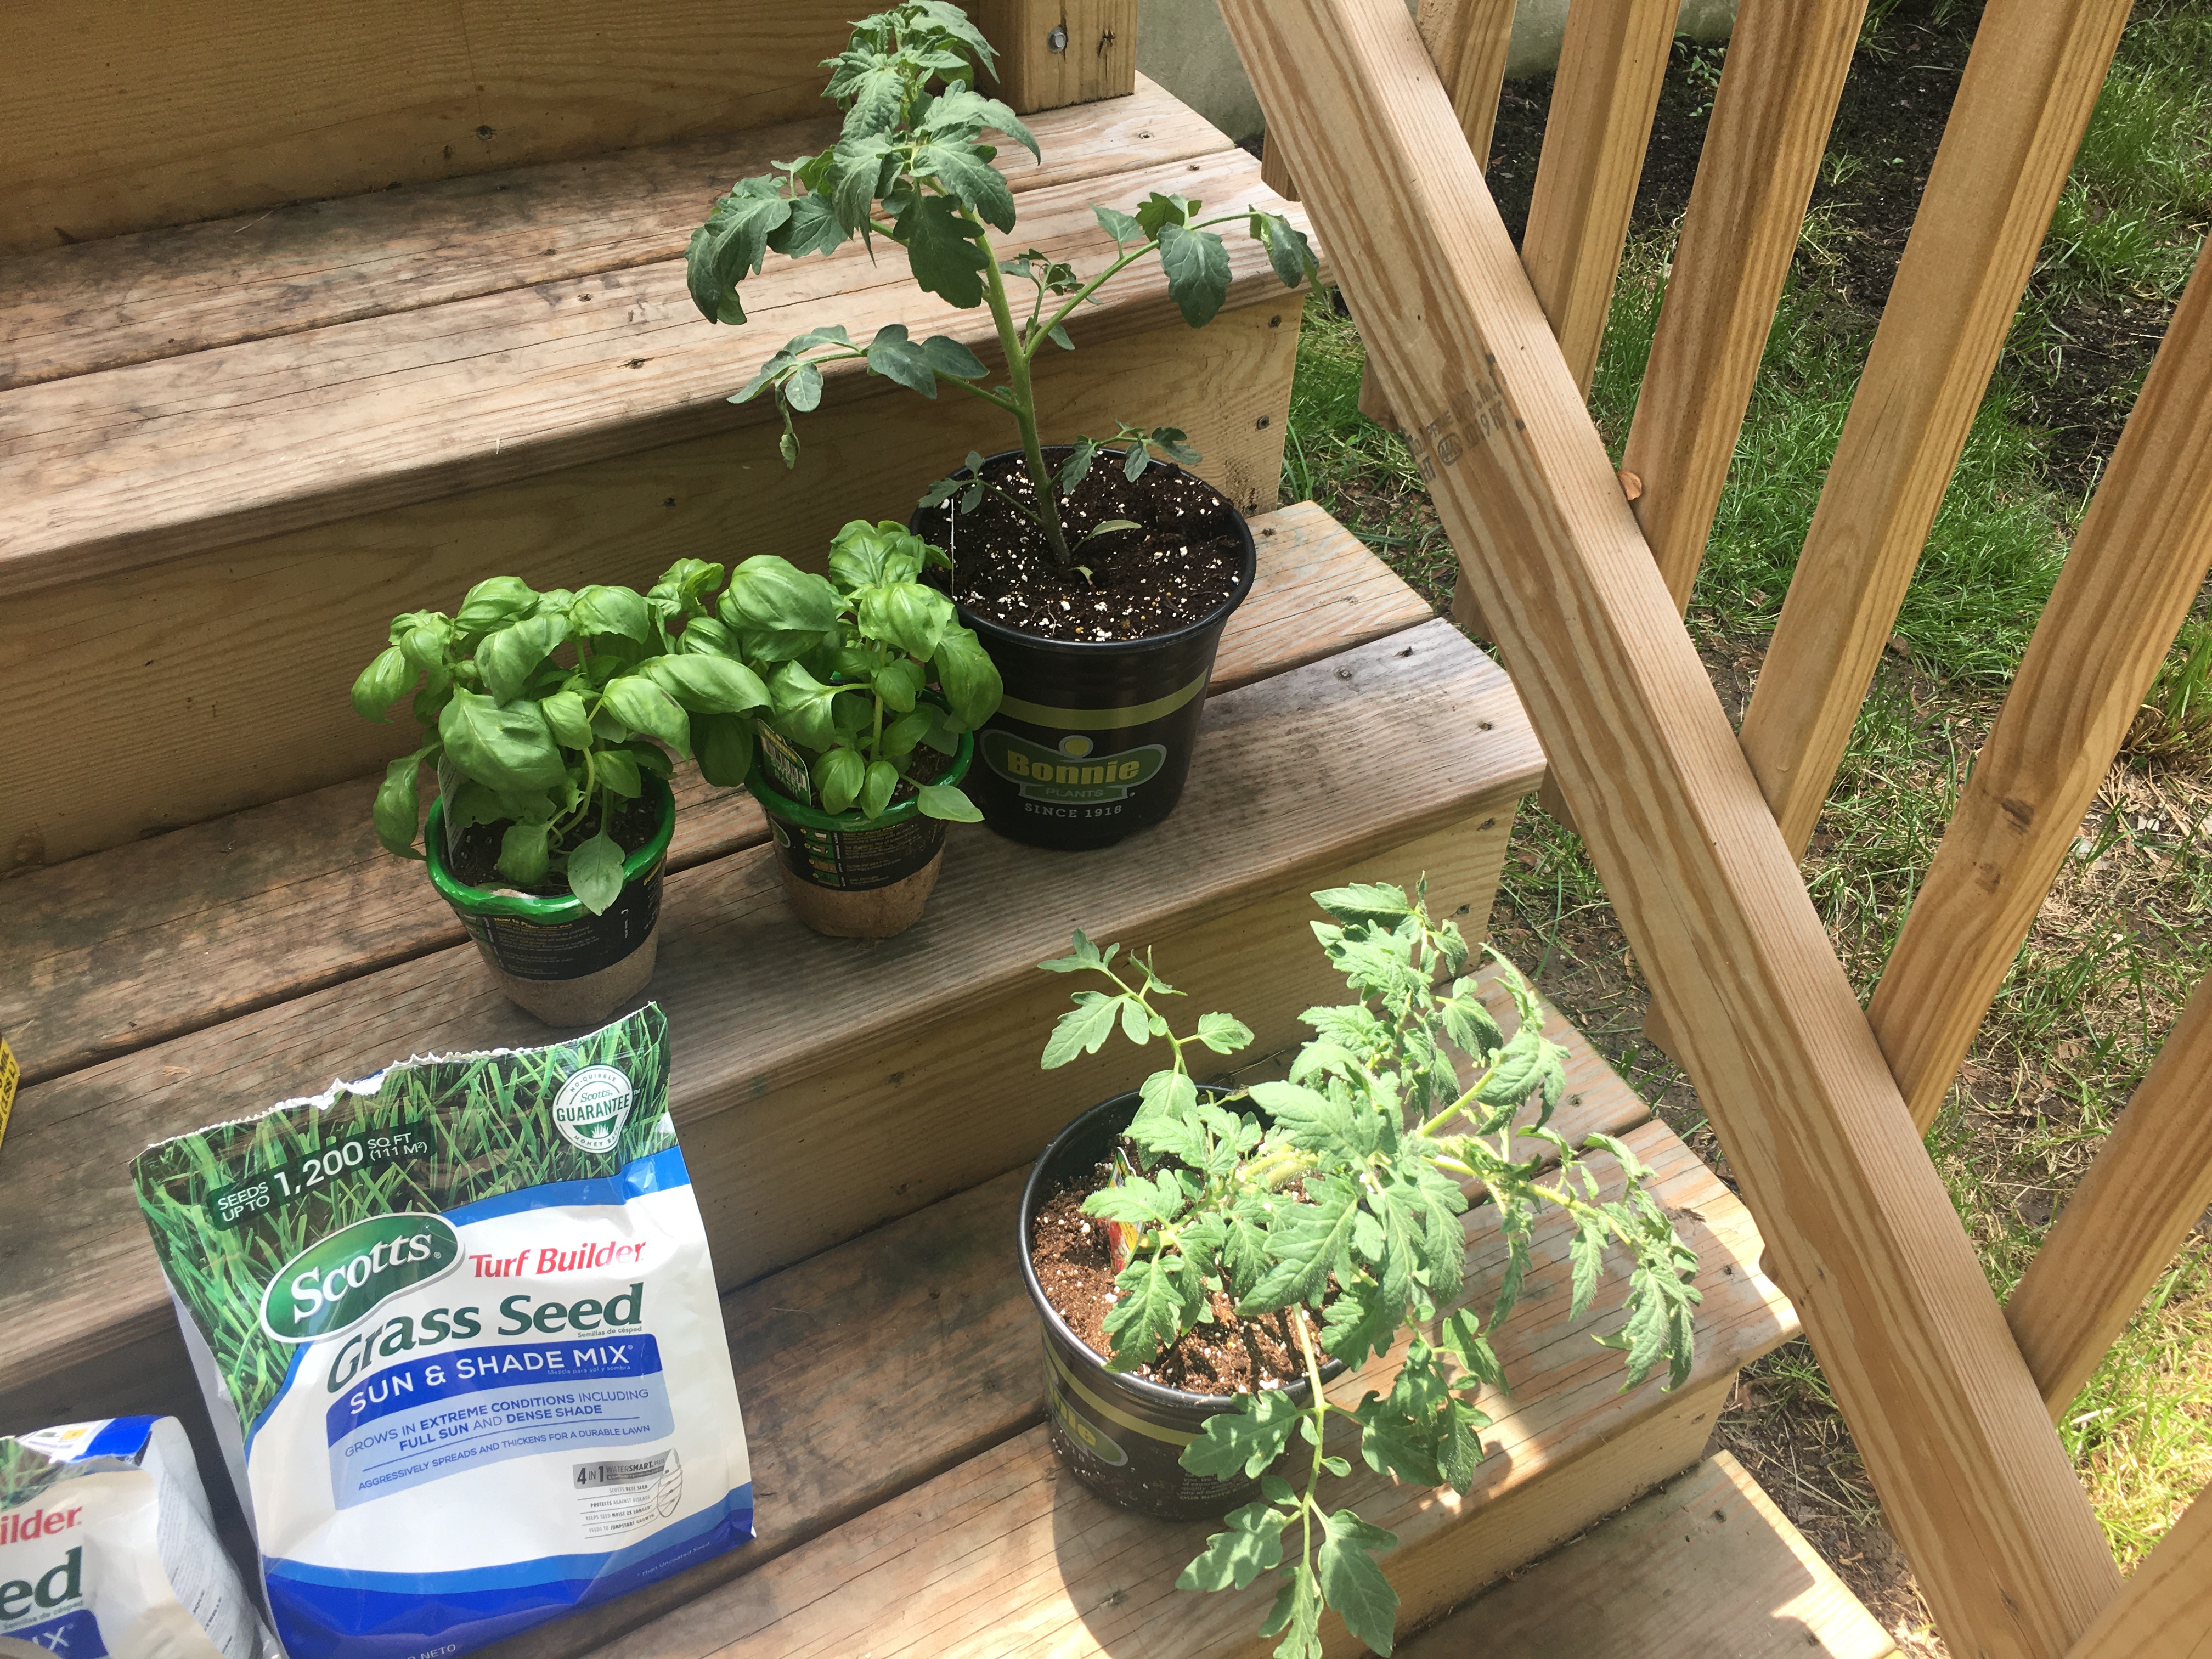
On a whim, I also decided to put together a crude vegetable garden. I took a pitchfork to a small patch of dirt to loosen it up, and added some garden soil, cow manure, fertilizer, and lime and turned it all over. I bought two tomato plants and two basil plants and planted them in the ground.

Now let’s do some gardening with this stuff
Some basil and tomato plants I bought at Home Depot
And we have a garden! Sort of.

The garden didn’t work out all that great. I brought cages that were too small for the tomato vines, and they overgrew them and crawled along the lawn. They were too close to the basil plants and blocked all their sunlight. I got a decent number of tomatoes, but squirrels took bites out of each one and I hardly had any usable yield.

Things got a little messy because I used the wrong-sized cages
The squirrels treated the tomatoes like it was their salad bar

Some good friends of mine built a planter and gave it to me as a housewarming gift. They started it off with some herbs and they grew in very nicely, so I had that going for me.

By September, I had some patchy grass. I bought more lawn soil and planted more grass in the areas with no growth. This time I watered every day, and I had a lot more success. I got enough growth that I rolled into spring 2021 with a fully grown lawn.

The view of the lawn from my bedroom, now with grass!

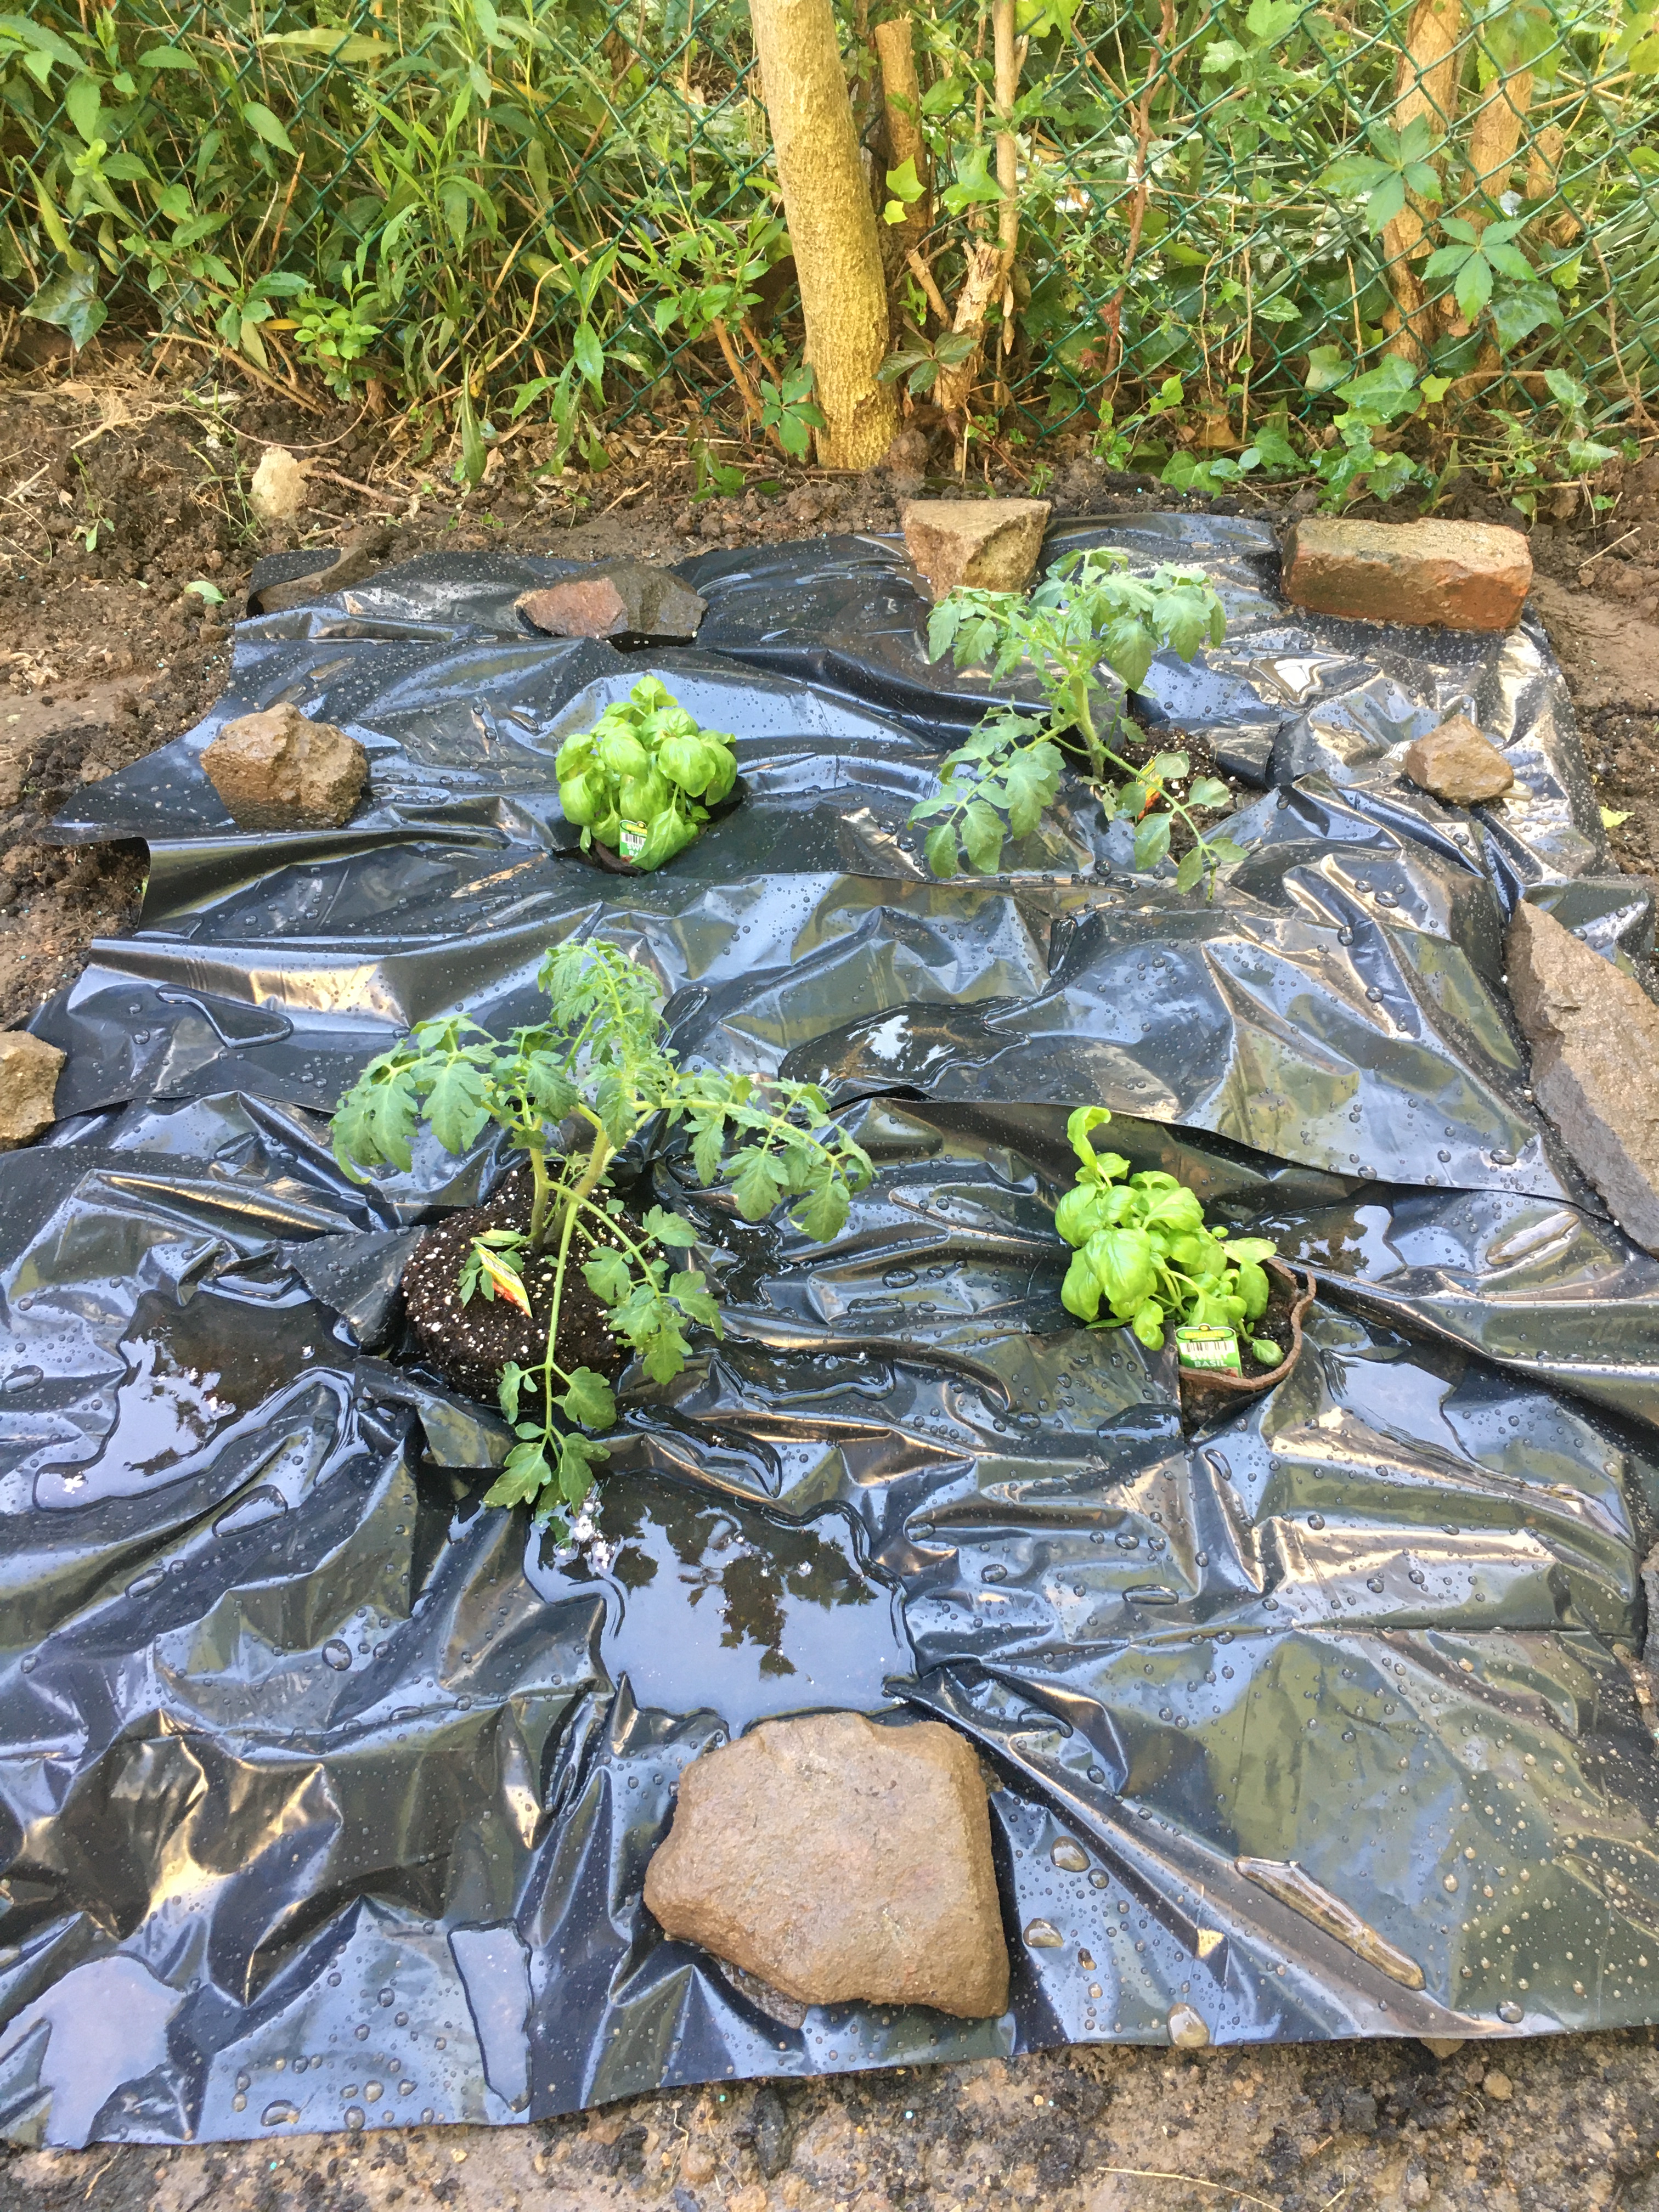
In 2021, I expanded the garden to have enough space for four tomato vines. I put black plastic down in front of it so I could have space for some potted herbs.

Garden 2.0, but still not great

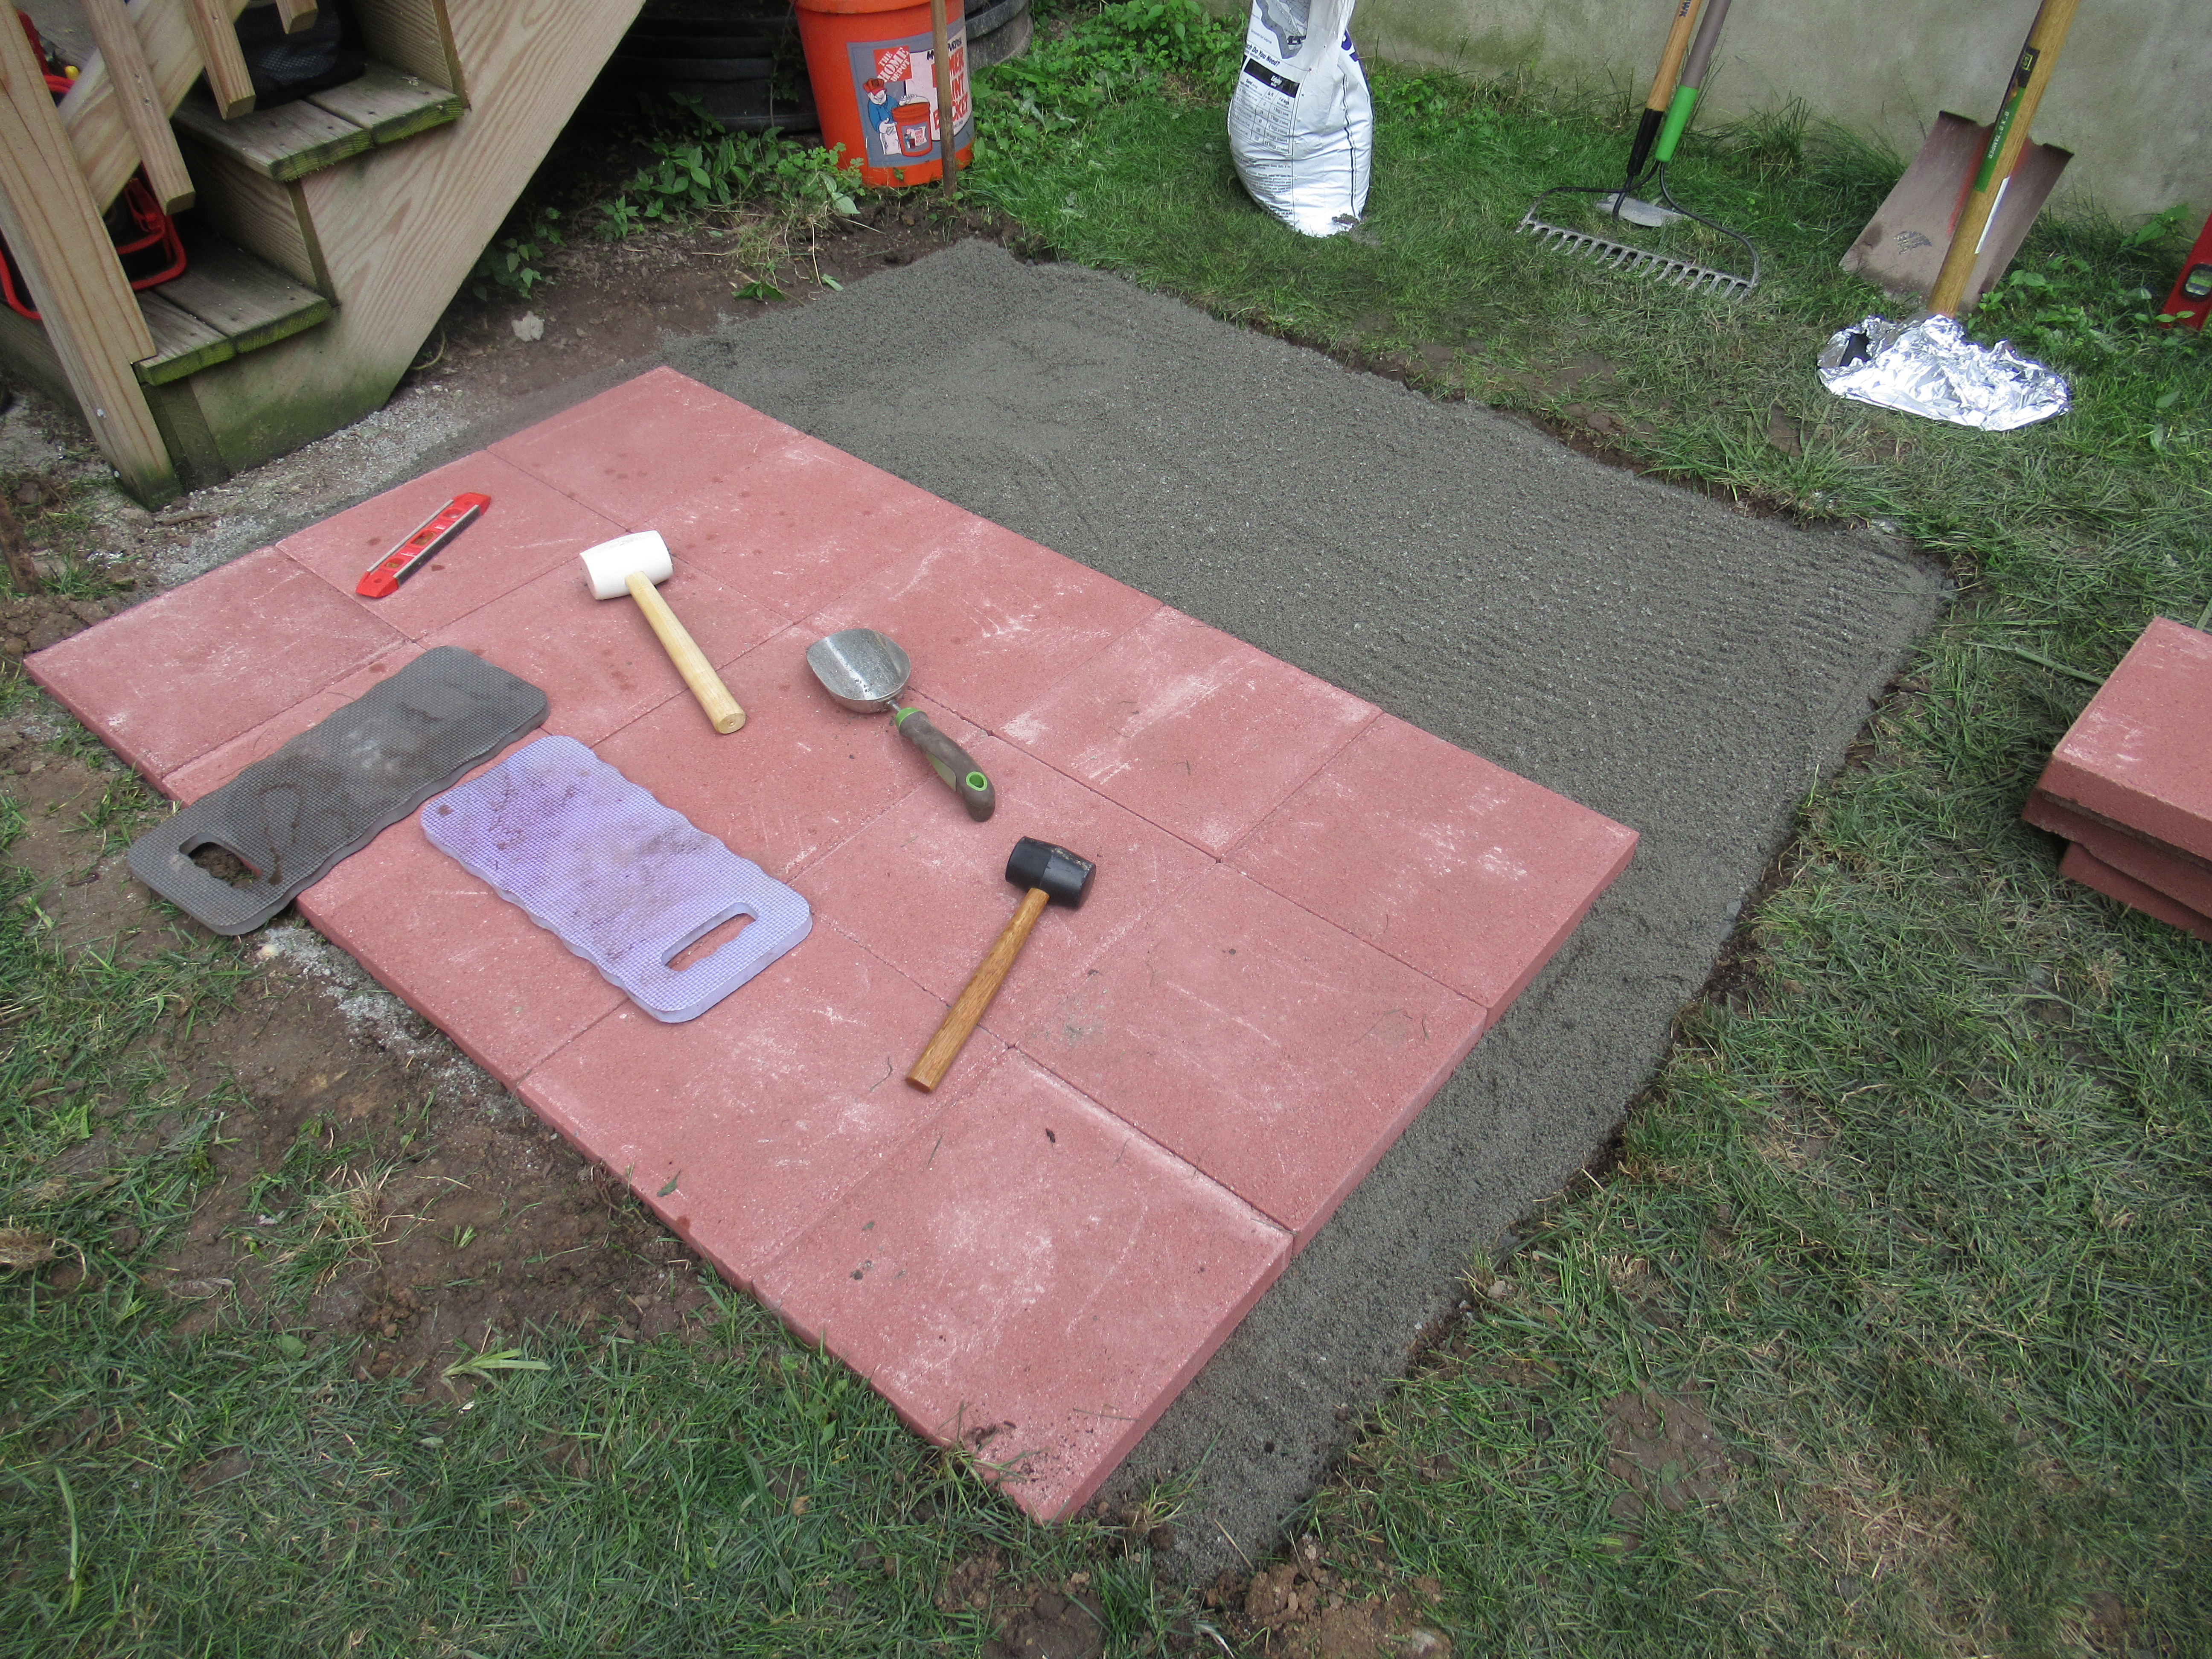
The last project I took on was to put pavers down so I would have a level space for my grill. A friend of mine who has skills (I don’t) agreed to come over and help. I bought some pavers, leveling sand, paver base, edging, and a tamper and we got to work. By the end of the day, I had space for my grill.

Materials and tools for the grill patio
Construction of the grill patio

The next two years, I tried my hand at gardening. I started my seeds indoors and every spring thought I’d be in good shape, but never got a good tomato yield. I am, however, very good at growing basil in pots for some reason.

All that time I never did all that much with the yard otherwise. I bought some cheap furniture and had some friends over once or twice, but the condition of the space was not up to the standard I wanted. At least I could grill all I wanted. I was also able to try and fail at gardening. It kept me busy. But I wanted to get back to the original plan to develop the space properly. I got started on that project in the summer of 2023 and it is now underway in April, 2024. I will pick up that story in my next post so watch this space!

Whether I Like It or Not, Phase II Is Underway

There is nothing the Internet hates more than an abandoned blog. But that is exactly what I did in 2018. I stopped writing about my house project just when we were getting ready for the kitchen and bathroom installations. That would have been the last major hurdle to clear to finish the house. It was also the part I was most excited about.

The project had already been delayed by that point by almost two years. There were various reasons why that happened, but I trusted my contractor and things were progressing well that year. But I had decided to hire a friend who was in the kitchen and bathroom design and build business to handle that part of my project. She was supposed to get started on her end of things once the walls were complete.

When it was time for her to get started, the project completely went off the rails. I descended into a personal hell for the next year. It was so chaotic, and I was such a mess that I never was able to write about what was going on.

Fast-forward to November of 2019, and I was able to get the work permit closed out and I moved into the house. I meant to pick up the blog but for various reasons I did not. Two reasons were the global pandemic that set in a few months after I moved, and a job change I made in June of 2020 which took away a lot of my focus. But the biggest reason I stopped writing was because I was so upset and angry about what happened.

That was a shame, I really enjoyed writing about the project. Not just because of the feedback I got from others, but because I wanted to journal the process for myself. Several times since I moved in, I wanted to restart the blog, but I never had a good starting point. I wanted to pick up the story from 2019 before I got into any of the positive things that happened to the project since then. But I just put it off, primarily because my memory had started to fade, and I would have to do my own research about myself from text messages, e-mails, and pictures to even remember what happened!

I’ve made a promise to myself to go back one day and fill in those gaps. Not just for myself, but I would like a permanent record on the Internet about what my kitchen and bathroom design and build contractor, Niki Sinclair (formerly Nichola Sinclair of Inigo Designs) did to me. For the rest of her life, I will pay for the blog to stay on line so anybody who searches for her will have a very good accounting of what they’d be getting into if they attempted to do business with her in any way.

But all that is for another day. I found my re-starting point for the story, and it is not about Niki Sinclair.

It is now 2024 and I just got my work permits to replace my backyard. I intend to build a beautiful space to entertain, recreate, cook, and grow vegetables in. This time around I found a reputable contractor and I have reason to believe that things will go smoothly, and the finished product will be awesome.

The "temporary" back yard
This is my “temporary” backyard that is going to be replaced.

Despite my optimism about the contractor, I am having a hard time getting excited about this project. In fact, I’m dreading it. All these years later, I’m still feeling the effects of the initial build and I can’t help but feel nervous about this next phase. But, at the very least, I want to get back to writing and this feels like a much better place to restart by journaling the project as it happens. So, if you are still around and want to read more, I am happy to have you with me again. In the coming weeks, I’ll document the story of the yard since I moved in, my goals for what I want it to be when it is finished, and progress on the design and build.

A Virtual Fourth Look

For those of you who prefer video to reading a blog post, here is the latest walk through of the house.  This one details the walls, ducts, and a few other carpentry items.

Marching Toward the Finish

What started as a dream in 2014 when I decided to look for a new house, became reality in 2015 when I bought the house, and has been a saga ever since construction started, is finally starting to look like a house that someone can actually live in.  Like the saying goes, “Picasso didn’t paint the Sistine Chapel Ceiling in a day.  A masterpiece takes time.” Despite the duration of the project, it should pay off in the end with a little patience.

The Construction Loan

Faithful readers will recall my first blog post in which I explained I took out a 203K loan instead of a traditional mortgage to finance the purchase of the property and the construction costs.  The bank gave me a standard six-month time frame to complete the construction and pay out the funds to my contractor in six intervals.  Well, it’s been over 2½ years now and they are out of patience.  They extended me so many times I can’t remember.  They said it absolutely has to be done by August 31 or they will cut me off and stop dripping funds to the contractor.

Given that I’ve been carrying the mortgage on my current home along with the mortgage on the new house since late 2015, and we are over budget anyway, this is becoming a bit of a stressful situation.  I’ve had to resort to taking a loan against my 401K and taking out several new credit cards that have 0% financing for the first 18 months as a way to bridge loan myself some extra money to carry me until I can sell my condo and pay all of it back.  Also, I have to show the bank that enough of the house is done to pay out the remaining portion of the loan by the end of August.

So, I had to light a fire under everyone who was working on the house.  Things had been moving at an OK pace, but we needed to make sure there is literally no downtime, and that any decisions or materials that need to be ordered are taken care of ahead of time so there are no more delays for waiting for something.  All of it is basic project management stuff, lay out ahead of time what is needed and what steps have to be taken, and be ready to work when the time is right.

I’m hopeful we are going to be in good shape headed into August.  Plenty of progress has been made and I’m looking forward to seeing what the house looks like as it is built.  This story left off with us passing the insulation inspection.  I’ll pick it up from there.

Drywall

The drywall was delivered in late May.  I gave a deposit check to Doctor Drywall and we got ready to proceed.  As was always the case with this project, even that wasn’t without some sort of issue.  Apparently, the delivery service wanted to use a crane to lift the second-floor drywall through a window rather than carry it up stairs.  My street is so narrow that they would have had to had the police close off the street in order to operate the crane.  So, after a week, they abandoned that idea and decided to charge me an extra $1,000 for them to carry the drywall upstairs.  Not sure why we couldn’t have just done that from day one, but either way, we got all the drywall delivered and ready to go.

IMG_0859.JPG

The upstairs drywall, had to pay extra for delivery!

IMG_0874.JPG

The first floor drywall.  I wasn’t impressed with the effort the gentleman by the window was putting in that day.  I guess he wasn’t too interested in impressing the owner of the home with his work ethic.

Drywall installation is a surprisingly quick operation.  I showed up on a Friday to see the drywall delivery, and by the next Tuesday, I returned to see most of it installed.  They made a huge mess out of the place in the process, but we keep a clean jobsite so it was easily removed over the course of the week.

IMG_0875.JPG

Drywall in the front bedroom

IMG_0881.JPG

Drywall and cement board in the guest bathroom

IMG_0883.JPG

Drywall in the middle bedroom, including the Cattywampus Corner for the fume hood.

IMG_0885.JPG

The master bedroom being walled.

IMG_0887.JPG

Cement board in the shower in the master bathroom.

IMG_0898.JPG

The first floor under construction

IMG_0901.JPG

The wall below the front steps taking shape.

IMG_0905.JPG

Another angle of the messy first floor.

Once the drywall was installed, it had to taped and spackled.  This took about a week or so and was a pretty uneventful process.  No delays or issues popped up.

IMG_0899.JPG

That’s a lot of spackle!

IMG_0912.JPG

The living room taped and spackled.

IMG_0913.JPG

The first floor taking shape.

IMG_0926.JPG

The front bedroom after being taped.

IMG_0934.JPG

This guy can spackle while walking on stilts! WOW!

There was some trouble with the basement during the process.  There was a misunderstanding about how it was supposed to be fireproofed.  As per fire code, we had to prove that the garage area was fire resistant, but some sort of a mistake was made when interpreting the architect’s plans and it wasn’t fireproofed properly.  After a little back and forth with the architect, he told them how to fix it, and they came back and completed the job.

IMG_1448.JPG

They got the basement right on the second try.  Good enough.

Spiral Ducts

Once the walls were in place, the HVAC guy was able to come in and build the spiral ducts.  Since this house was designed for exposed ducts, that part of the job had to be done after the walls were hung, opposite of most houses that have the ducts hidden by the ceilings and the walls.

The tin knocker efficiently installed the spiral duct work throughout the house.  I had asked him to keep it as minimal as possible so that it didn’t dominate the appearance of the house but was visible enough to have an effect on what it looks like. I was pretty pleased with how it turned out.

On the first floor, I asked for it to be as high as possible, and to only be as long as necessary to heat and cool the room.  He made the duct such that it was close to the wall and went only as far to the north and south as necessary.

IMG_1452.JPG

The spiral duct that travels most of the length of the first floor.

On the second floor, the ducts come down from the roof and travel through the hallway and the three bedrooms.  Again, in the bedrooms, I requested that they only be long enough as necessary to keep the rooms heated and cooled.

IMG_1139.JPG

The ducts coming in from the ceiling on the second floor.


IMG_1132.JPG

The duct in the master bedroom.

Carpentry

While the ducts were being installed, my GC brought in the carpenter to proceed with some additional items.  First, they installed the molding around the windows and door frames.  I asked for the simplest look they could find, and he obliged me with flat molding with as little detail as possible.

IMG_1147.JPG

Molding in the living room.

We also ordered and installed most of the interior doors throughout the house.  I found a few door patterns I liked on line but they were rather pricy.  My GC suggested we buy simple, flat doors with no color or pattern and that we can paint and decorate them at a later time.

IMG_1466.JPG

The master bedroom again, this time with the door and the molding.

I own two cats and I wanted a place to put the litter boxes that was easily accessible to them, but out of the way.  I told the GC to claim the bottom two feet of the linen closet in the hallway and leave it open so I can use the space to put the litter boxes.  I think it should work out well, I hope the cats use them!

IMG_1473.JPG

The cat corner is at the bottom of this linen closet.

The carpenter completed some of the outside work as well.  He built the deck and stairs from the back door to the back yard.  He also put the siding up on the front stairs landing.  We reversed some of the charred boards left over from the rest of the front siding and will paint them later on.

IMG_1480.JPG

The back deck and stairs.

Masonry

My “friend” the mason returned to finish off what was left of his end of the job.  After considering if we should just get another guy after the trouble he caused in the beginning, we decided that we should just let him finish and kiss him goodbye.  So, he finished off the limestone treads on the front steps, and a few other miscellaneous items on the side and back of the house.  I am happy to say that he is done and out of my life!

IMG_1670.JPG

The front steps are done, and the porch carpentry is getting there.

Painting

The GC had a painter come in and prime all the walls throughout the house.  This step made it look like we’re finally nearing completion.  The ceilings are actually now in their finished state unless I change my mind and paint one of them an actual color.

When the painting was done, the GC had the floor guy come in and sand down and finish the floors on the first and second floor.  Then we had them protected with Shark Board so that they won’t get damaged going forward.

IMG_1673.JPG

The first floor facing the front of the house.  Painted and flooring protected.

IMG_1674.JPG

The first floor facing the back of the house.  Painted and flooring protected.

What’s Next?

There are a million plates spinning at once right now.  The HVAC guy has to install the heating and cooling equipment, which will include bringing a crane in to get everything on to the roof.  We ordered an outdoor railing from an iron worker.  We picked out an on-demand water heater which needs to be purchased and installed by the plumber.

But the thing I am most excited about is the kitchen.  The crown jewel of this house, and the feature that I have spent the most time thinking about these past 2½ years is the kitchen and it is finally getting started.  I’ll have more on it in the next blog post, but I had countless meetings with my kitchen designer, and we have finalized the design of the cabinets.  The appliances have been ordered and are on their way, and fabrication and installation of the cabinets should be done in the next two weeks.

In addition to the kitchens, the same designer is also building my bathrooms.  Most of the major design decisions have been made and most of the tile has been delivered to the house.  We were able to come up with some sleek concepts that aren’t going to break the bank for all three bathrooms.

A lot is about to happen in a short period of time.  I think that Picasso would be pleased with where things are headed.

A Virtual Third Look

Here’s a quick video walk through of the house right before the walls were put up.  It accompanies the last blog post and it details the insulation installation and the hardwood flooring.

Picking Up the Pace

Things have tended to move faster once the frame was built. Of course, not nearly as fast as I’d like, but now that the house is weather proof and everything is contained indoors, there are fewer reasons to have idle time and we can keep moving.

At the end of my last post, we were getting ready to have the building inspection.  We’ll pick up the story from there.

Stairs

Before we could have the building inspection, we needed to order, fabricate, and install the finished staircase from the first to second floor.  There was a temporary staircase in place, but it would not have passed inspection as-is, the inspector would have wanted to see the final product.

When I was asked what kind of stairs I wanted, I poked around online and found a “waterfall” design that I thought looked cool and asked for that to be built.  I thought it had a sleek, modern look to it, and I liked how the drywall met the treads and the risers when viewed from the side.

stairs design.png

A sample of the “waterfall” stairs I found online and thought were cool.  They were the inspiration for what I asked for from the staircase fabricator.

While the rough plumbing and electric work was being done, we ordered stairs from Alvaro Stairs in North Bergen.  The stair fabricator noted that we didn’t have enough room to build the risers exactly as I wanted, and we needed to leave some extra space for nosing in order to meet code.  So, I settled for treads that had a bit of a nose, and decorative wood on the sides that would replicate the waterfall look from the side.

Once the stairs were in, the contractor was able to build the frame to close off the staircase from the basement and frame the basement door.

Stairs.JPG

The stairs as installed.  They will have a similar waterfall look on the side as the sample we were working with.  The treads and risers are made from red oak, and the stringers are made from pine.  The drywall will be installed right into the stringers and it will look similar to the sample picture when finished.

My Friend, The Building Inspector

This purpose of the building inspection was to take a look at the overall structure of the house and the materials that were use to build it.  We would need to pass this inspection before we would be allowed to insulate the house and move on with the project.

My contractor was nervous about this one, having dealt with the Union City Building Department for the entirety of this project.  He told me (and I was able to corroborate this story with a large number of other people) that Union City is not like other municipalities in North Jersey, in that they have a very stringent building code standard, and they pay attention to every detail.  He asked me if I could have the architect on standby if needed.

I had a few vacation days I needed to kill so I happened to be off of work the day the building inspector came.  There was a four-hour window for when the inspector was supposed to arrive so I asked my contractor to text me when he showed up.  I got the text that he was there and I jumped in the car.  While I was on my way up (and I drove safely and didn’t check my text messages until I parked, thank you very much) I got another text: “trouble brewing, get the architect here”.  So, I called the architect and he said he was free and could be there in a matter of minutes.

I arrived at the house and the inspector was staring at the plans and my contractor was nervously pacing about.  They started to rattle off terms that went over my head and were somewhat confusing.  The architect walked in a few minutes later and was able to join in the discussion and help things along.

After a very detailed review of the plans, a long discussion, and a big walkthrough of the entire house from basement to roof, the inspector found a few things he wanted addressed.  A few of the things he cited us for:

  • The roof joists were missing something that was required to keep them from compressing.
  • Some washers were missing in the basement on the masonry bolts.
  • The windows on the 2nd floor were too low to the ground and needed to have limiters put on them to keep them from opening for more than 4 inches. This was likely my fault for switching the original design from casement windows to double-hung and not double-checking if they needed to be higher off the ground.  Because, like, I don’t know building code.
  • The tin knocker put screws in the dryer vent pipe. That is a no-no and we had to take it out and replace it with one that didn’t have screws in it, only tape.
  • We had made a change to the original plans to put some of the HVAC equipment on the roof. Because of that, the inspector told us we need a railing.  My architect disagrees, he believes this code doesn’t apply to a single-family house, but for now, it’s on the report as something that needs to be addressed.  We might try to argue as I don’t feel like adding yet another $1,000 expense to the project that adds little value.  Whenever the HVAC guy is on the roof to do maintenance, I’ll just say “bro, don’t fall off” and we should be good.

Throughout my observation of the conversation and the walkthrough, it appeared to me that my contractor was overly anxious about what was happening.  In my opinion, the inspector was just doing his job.  Getting annoyed at him if he found something wrong would be like getting annoyed at a cop for giving you a parking ticket an hour after the meter expired.  He was being fair with us.

At the end of everything, he looked at us and said “I’m going to let you insulate.  There’s nothing here to make me stop you”.  So, we have to address the items on his report and prove that they were done (mostly by taking pictures and videos of completed work), but we got to move on.

Gas Pouch

PSE&G showed up and installed the regulator and meter for the new gas line in the pouch we built for it.  This was to close out the work I had paid them to do in the very beginning.

Gas Pouch.JPG

The new gas regulator and meter

Button Up the Electric

There were still a few things the electrician had to do.  We did a walkthrough, and not everything was finished, and a few things had to change.  There were a few outlets that weren’t placed properly, and a few switches and fixtures had to be added.  This process dragged on a bit longer than I would have liked as it took several weeks to finish.  But it had to be completed in order to do the AV and data rough wiring.  We wouldn’t be able to work at the same time, we’d get in the electrician’s way.

One of the big milestones that place during this phase was to have PSE&G upgrade the service to 200 amps.  The previous incoming connection of 100 amps would not have been nearly enough.  We had to install a breaker in the driveway for the entire house.  Due to some code regulation, it had to be there and couldn’t be inside the house.  I’ll need to secure it or someone can just walk up and just shut the entire house electricity off.

200 Amp Service.JPG

200 amp service.  Cool!

AV and Data Rough Cabling

The reason a professional was not doing the audio-visual and data cabling was because I lucked out and happen to have a family connection to help.  My brother happens to be a professional in the field and works for The Judge Group doing corporate AV installations.  He was willing to work for food which was a huge help with the budget.

So, he donated about 10 hours of his time on nights and weekends and got to work cabling the house for television, data, and audio throughout.  The first thing we had to do was get the holes drilled in the frame where we needed them, so we asked the electrician to help.  His drill and set of tools were better suited for the task than anything we had.

Once the spray foam insulation would go in (more on that shortly), we’d be unable to pull any more cables in the future or fix any broken ones unless there was a conduit of some sort that wasn’t encased in spray foam.  We went to a local hardware store and looked around for something that was shaped like a bendable tube.  We settled on what looked like a long shop vacuum hose and brought that back to the house.

Basement

The majority of the AV and telecommunications equipment will be housed in a rack in the basement and controlled remotely from an iOS app.  The DirecTV whole home DVR, the incoming Internet connection (I haven’t decided between FIOS or Optimum yet), the Denon home theater system, and the HDMI switcher will all be in the rack.  So, all the HDMI and speaker cables will route into the designated corner.  In some cases, we used HDMI, in others, we used Cat 6 depending on the required length.

Basement wiring av.JPG

The corner of the basement where all the cables run to.  Everything is carefully labeled.  This is a combination of speaker cable and HDMI and Cat 6 cables.

Living Room

The living room required the most work out of all of the rooms.  It is designed to be the main media center, computing center, and entertainment area for the inside of the house.

My desk will be along the east wall, so we wired for signals to be sent in both directions between the living room and the basement.  The desk will house a TV, my computer, Xbox One, and Amazon Fire TV.  The computer, Xbox, and Fire TV will send signals to the HDMI switcher in the basement, and the switcher will send a signal back up to the TV.

Desk wiring.JPG

The desk wiring, using the improvised hose “conduit”.

The ceiling will hold the four surround sound speakers required for 7.2 surround sound.  I ordered one set of the speakers ahead of time so when the drywall is put in, they can use them as a template for the cutouts if they’d like.  If not, we’ll cut the holes in later.

Surround speaker cable.JPG

The four cables dangling from the ceiling are the cables for the ceiling speakers in the living room.

The west wall is where the TV and remaining speakers are going to go.  I was going to get a 65” TV, but I found out that a friend who is also renovating his home got a 75” TV so now I’ll have to do the same.  I haven’t ordered the TV yet, but we measured it out so the TV will be in the center of the wall from left to right, and we put an outlet and the HDMI output behind where it will be hung so they will be hidden.

The two front speakers and the single center speaker will be hung on the wall to the sides and below the television.  The subwoofers will be on the floor on the north and south ends of the west wall, and we ran subwoofer speaker cable and outlets to each area.

West wall wiring.JPG

There’s a lot going on here.  This will be the wall for the biggest TV in the house.  It will have two suwoofers (on the bottom left and right), the right and left speakers, the center speaker below the TV, and the TV hung in the middle.  It also has the conduit for the speakers and HDMI that run upstairs to the master bedroom.

We also ran the wire for the upstairs bedroom television, and the bedroom and bathroom speakers through the same conduit in the living room.  The wires traveled the floor joists and through a hole in the upstairs subfloor and into the bedroom.

Bedroom speaker cable from downstairs.JPG

The cable runs on the left go disappear through a hole in the ceiling and head up to the master room bedroom.

Kitchen

I want one smaller television (45” – 55”) in the kitchen across from the island so I can watch TV while I’m preparing food.  I didn’t think I needed any speakers given the proximity to the audio on in the living room so this TV will likely always have the same signal as what’s on the living room TV.  Again, we hid the outlet and the HDMI cable behind the television.

Kitchen wiring.JPG

The HDMI and outlet for the kitchen television

Dining Room

I’m going to transfer my only TV in my Hoboken apartment to the dining room in the new house.  It’s only 55” but I think the size will work well for this room.  I may want to add cabinetry in the dining room at a later phase so I don’t want the TV to take up too much of the wall.  The table is also going to be close to the TV so it will be good enough.  The outlet and HDMI connector will be hidden behind the TV.  In this case, we ran Cat 6 instead of HDMI due to the length of the cable run.

Dining room TV.JPG

The dining room TV layout.  The speaker cable for the ceiling is in the hose on the right.

This TV will be far enough away from the living room that it will need its own audio, so we ran speaker cable for two stereo speakers in the ceiling.  Once again, we used our improvised conduit to guard against the spray foam insulation.

Dining room speaker cable.JPG

The cable for the left speaker in the dining room.  It will be over the dining room table and in line with the chandelier.

Master Bedroom and Bathroom

The bedroom will be a bit of a simpler install.  I don’t have a television in my bedroom in my apartment, but I figured that since I have two floors now, I might as well get one in the master bedroom.  I also wanted to listen to music in the bedroom and master bathroom as I like to crank loud rock and roll in the morning while I shower and get gussied up for work.

As such, we put an outlet and an HDMI connector for the TV.  I haven’t planned a size yet, it’ll probably be in the 55” to 65” range, nothing too crazy.  We ran speaker cables for stereo speakers in the bedroom and on the opposite side of the wall in the bathroom.  The speakers will be on the same left and right channels in each room, they won’t be able to play separate music, which would have been silly anyway.

Bedroom TV and Sound.JPG

The bedroom TV will be hung on the shared wall between the bedroom and bathroom.   The speaker cables will run to both rooms so I can listen to Motörhead while I shower and get dressed in the morning.

Insulation

I learned a new term called “R-value” as it relates to insulation throughout the design and build process of the house.  The R-value is a measure of a material’s resistance to conductive heat.  Standard building codes tend to indicate the necessary R-value for external walls and roofs based on the climate in the region.  You have to use materials (mainly insulation) that have an aggregate R-value to meet your R-value requirements.

In the beginning, we failed our initial drawing review because we the architect didn’t have the exactly correct R-value indicated in the plans as per Union City building code.  Once we had that sorted out, the plans stated that we needed the following R-values:

  • Basement ceiling: 30
  • External walls: 21
  • Roof: 49

There were three main ways we could reach the required R-value, by using fiberglass insulation, spray foam insulation (both open or closed cell), or insulated siding.  Insulated siding wasn’t an option because we couldn’t insulate the Shou Sugi Ban boards, and the color of vinyl siding I chose didn’t come with an insulation option.

So, we were left with spray foam and fiberglass as options.  Fiberglass is much cheaper than spray foam, but it takes a lot more space, the higher the R-value.  Because we have a 2×4 frame on the external walls, we didn’t have much space to work with.  This ended up becoming problematic from a design and budget perspective.  We ended up having to go with the much more expensive option of spray foam on the external walls, and a hybrid spray-foam and fiberglass for the roof to meet the required R-values.

Basement insulation.JPG

The fiberglass insulation in the basement gets us to an R-value of 30.

Kitchen wall insulated.JPG

The east wall insulated with spray foam.  Gets us to an R-value of 21.

Living room west wall insulated.JPG

The aforementioned living room west wall insulated with spray foam.  It is now evident why we used that silly hose to make a conduit for the speaker and HDMI cables.

Master bedroom and roof insulation.JPG

The master bedroom insulated with spray foam.

Roof Insulation.JPG

The roof insulated with spray foam and fiber glass.  Gets us to an R-value of 49, baby!  That’s some hefty insulation right there!

The insulation cost came out to roughly double what was budgeted for.  This was my least favorite cost-overrun of the project, given that it’s not something that you can even see.  The bright side is that this insulation should work very well to keep the sunlight from heating up the house.  It will also help me save on heating and cooling costs as heat will not be able to enter or leave the house very easily.

Hardwood Floors

The flooring was pretty straight forward.  The architect had rendered the house with a very light-colored wood flooring material.  After some back and forth with samples, I decided on 3 ¼” red oak select floorboards.

While we were waiting for the insulation inspection, we had some time to install the floors.  The flooring guy had the materials delivered and installed in a matter of two days.  He added some filler where there were gaps in between boards. At a later time, we’ll have it sanded and covered in three coats of polyurethane.  I’m not going to have it stained so it will retain it’s light coloring.

Flooring Downstairs.JPG

The hardwood flooring on the first floor.

Flooring Upstairs.JPG

The hardwood flooring on the 2nd floor.

The Insulation Inspection

The insulation inspection was very straight forward.  The same building inspector came back and passed us for insulation.  He still wanted a few things cleared up from the original inspection before he gave us our “sticker” to continue the project, but he gave verbal approval to move forward with drywall.  This will be the last inspection until the very end.  Major milestone passed!

What’s Next?

In the immediate future, we will begin installing the drywall in the ceilings and walls.  This will be a relatively simple project.  We have to plan for the fireproof ceilings and walls in the basement, and the moisture-proof walls in the bathrooms upstairs.  Also, getting the drywall inside the house is apparently going to be a bit of a logistic challenge.  From what I hear, it is going to require a big truck with boom lifts to get it through the windows.

Following that, we can work in parallel on the HVAC installation of the exposed duct work and the required machinery.  We’ll finally begin what will be my favorite part of the project, building and installing the kitchen cabinetry and appliances!

Time Check

I get asked 100% of the time when the move in date is.  I still have no idea.  I bought the place in December 2015, and we’re still working on it in May 2018.  You do the math…

A Virtual Second Look

This is another video walk-through of the new house, to show progress since the first one.  This one includes the new siding, electric, plumbing, lighting, and A/V wiring.


Scatter-Brained and Over Budget!

I woke up the other day and couldn’t believe I still live in Hoboken.  I was supposed to be out in late 2016 in my worst-case scenario.  Yet, as I headed into year three of the construction phase, the light at the end of the tunnel is beginning to show.  Progress has been taking place at a rapid clip, and it’s a lot of fun to watch the house get built.  It is a fascinating process that I never knew anything about until now.  I’m also getting to make more and more decisions about how I want it to come out.  The questions are coming my way fast and furious from the contractors and it has made me a bit scatter-brained, but this is the fun part and I’m certainly enjoying it.

Homemade Japanese Siding

The siding project took an interesting turn, and unfortunately set the project back a few weeks, and of course jacked up the price!  I recall asking my architect early in the process what the siding on the front of the house was supposed to be, I couldn’t tell from the renderings he showed me.  He muttered something about using “charred cedar planks” and I didn’t think much of it, assuming that we could just go to the lumberyard and buy some.  I turned my attention towards other aspects of the project and didn’t ask about it again until the framing and roof were done.

As it turns out, I should have asked more questions a lot sooner in the process.  As I mentioned in my last blog post, the architect wanted to do use Shou Sugi Ban siding, and that is definitely not something that you can just walk up to a local store and buy.  In late November, we found ourselves in the position of having to buy it from a specialist (nowhere near new Jersey) or build it, or pick a different siding material.  Since I wanted to remain true to the original plan, I decided that we should go ahead with Shou Sugi Ban siding.  This decision set us back some time as we then had to figure out what to do.  If I had asked more questions earlier, we could have gotten ahead of things and had the siding ready to go on time.  Lesson learned for the next time (just kidding, there is NO next time!).

We looked into buying it, but the cost of the materials and the shipping was absolutely prohibitive.  So, my contractor had to learn to become an expert in Shou Sugi Ban siding fabrication in his backyard.  During some of the coldest days of December, his crew grabbed makeshift blowtorches and about 10 canisters of propane. They spent four days torching tongue-and-groove cedar planks.

imagejpeg_0.jpg

Making Japanese siding in a backyard in New Jersey

When the burning phase was complete, they carefully wrapped the charred sides of the boards and transported them to my house.  They laid everything out on all three floors of the house and applied two coats of polyurethane to each board to weather treat them.

imagejpeg_0 (2).jpg

Pre-treated Shou Sugi Ban siding after the charring phase is done

imagejpeg_0 (3).jpg

The siding was carefully wrapped before they sent it to the house

imagejpeg_0 (4).jpg

The entire house was used as a staging area for adding coats of polyurethane to the siding

The architect suggested that we use the Shou Sugi Ban siding on the front face of the house, and just far back enough on the sides where it would be visible from the street.  He also wanted us to use it for the back face of the house, but I felt that would be too costly.

We bought Ply Gem Mastic Quest Double 4” vinyl siding in “Misty Shadow” for the rest of the house and prepared to get the process of fastening all of the siding to the house started.  The first problem was how to hang the cedar planks vertically to match the plans.  Since some of the planks would fall in-between where the interior studs were, there was no way to nail them to the house.  So, we put up fireproof plywood across the front and sides of the house.  That way, we could nail the finished planks to them.

The siding guy proceeded to hang the vinyl siding on the house and finished it all in the matter of one week.  At long last, we had a finished-looking house that was water tight!

imagejpeg_0 (5)

Adding the plywood layer so we have something to nail the wood planks to

imagejpeg_0 (8).jpg

Putting up the wood planks

30650.jpeg

Installing the vinyl siding in back

So far, there have been no leaks from the new roof and the new siding.  We’ve had some pretty bad rain and snow so it has been tested well.

My contractor told me that the first day they had the Shou Sugi Ban siding on the house, someone driving by slammed on his breaks outside the house to ask what it was.  He said that it looked fantastic.  I’ve been back to the house many times since, and I’ve witnessed it myself.  People stop and stare and point out how cool it looks.

IMG_0070.JPG

The finished vinyl siding in the back

IMG_0068.JPG

The vinyl siding on the east side of the house

IMG_0063.JPG

The front of the house.  Make sure to stop and stare!

I’m a bit concerned that the siding is already beginning to patina.  That will either need to be touched up, or it will simply be part of the look.  I’ll have to decide over time.  Either way, I took the risk with backyard-made Shou Sugi Ban siding, let’s see how it holds up!

Now Let’s Get the Inside Going

Completing the siding was a huge milestone, because for the first time since we started, it put us in the position to work on multiple things at the same time.  My general contractor brought in his team of specialists that he’s been working with for years to get started on the interior plumbing, electric, and HVAC.  All three of these processes required that we have an idea of the final layout of the finished house.  So, a lot of decisions had to be made.

Plumbing

The house plumbing design has to accommodate the following:

  • Two full bathrooms on the second floor.
  • A half-bathroom on the first floor
  • A kitchen with a sink and a pot filler
  • Water and a drain for the washing machine on the second floor
  • A natural gas cooktop
  • A natural gas dryer on the second floor
  • All drain vents must exit through the roof

There was some discussion with my GC about the type of piping to use for fresh water.  Ultimately, we decided on pex tubing over copper to save money.  There were a few advantages to pex, one of which is that they have a tendency to be harder to burst in situations where they freeze.

In order to prepare for the rough plumbing for the bathrooms, we needed to know where all of the faucets were going to be located so we could install the rough-in valves.  Each faucet I selected was wall mounted, so they all have a different set of valves than a typical vanity-mounted faucet.  They had to be set precisely in place before the walls are built.

IMG_0333.JPG

Tubing and valve for the first floor bathroom sink

IMG_0255.JPG

Tubing and valve for second floor bathroom sink

IMG_0247.JPG

Tubing and valve for the master bathroom sink

IMG_0249.JPG

Tubing and valve for the master bathroom shower head and hand sprayer

There was some trouble understanding how one of the bathroom faucets was supposed to be installed.  I selected a GROHE shower head, sprayer, and faucet for the main bathroom that had a “double-el” valve that my plumber had never seen before.  We had to call the plumbing supply showroom a few times to understand what to do.  Eventually, we got clear instructions for how it would have to be installed.

IMG_0316.JPG

Tubing and valve for the main bathroom shower, faucet, and hand sprayer.  The controversial “Double-El” valve is highlighted in the red square in this photo.

Each of the drains and the bathroom exhaust fans needed to be vented through the roof.  The open floor plan on the first floor made it tricky to navigate pipes through between the floor joists.  For the most part, all piping and vents were run through the half bathroom ceiling on the first floor and straight up to the roof.  Others were routed straight up the east wall.

IMG_0334.JPG

There’s a lot going on above the drop ceiling in the half bathroom on the first floor

The kitchen fume hood was a bit of a controversial topic.  There was no obvious way in the plans to fit an 8” pipe and route it outside the house.  The wall the kitchen is on is too close to the neighbor’s house to simply punch a hole in it and vent the fume hood right there.  We kicked around a few ideas, my two favorites of which were to install it illegally after the inspections were done, or to forget it and install a fume hood that re-circulated air inside the house through a filter!  Both were terrible ideas so after much debate, we decided to sacrifice a corner of the middle bedroom and use that to vent the fume hood properly through the roof.  It will now be forever referred to as the “Cattywampus Corner”.  It is a small sacrifice to make if I can fry three pounds of bacon at once without setting off the smoke detector.

IMG_0093.JPG

The “Cattywampus Corner” in the middle bedroom will be built around this pipe for the fume hood

The gas line into the house had to be rebuilt entirely because the regulator was dangerously located in the garage near where the car would park.  We had PSE&G come in and create a new pipe that went through an old window that we bricked over in order to make a pouch for the new meter and regulator.

IMG_0343.JPG

The new gas line coming through the pouch we created where the basement window used to be

The new gas line inside the house had to be routed to the kitchen for the range, the upstairs washer/dryer closet, the basement machine room and the roof for the upstairs heater.  We also installed a “T” on the gas line so in the future we can use it for the outdoor kitchen range.

Electric

The electric wiring design was a combination of what was on the original plans, and a re-think of the lighting and TV layouts once I was able to walk around inside the house.  At all times, building code needed to be observed.

First Floor Original Plans.png

The original plans for the first floor.  We moved the island closer to the kitchen counter, and re-worked the recessed lighting plan a little bit to be more in line across the room.  Our changes didn’t radically alter the design.

On the first floor, we had to finish the layout so we could plan the wiring.  That included, the kitchen layout, the location of the dining room table, the couch, my computer desk, and the couch.  This was the most involved decision-making process so far.

We started with the kitchen.  The final layout varied from the plans somewhat due to some decisions about the placement about the kitchen island and the cabinet designs.  We moved the kitchen island a bit closer to the cabinets, and we made it a bit longer.  We also added a pantry which moved over the placement of the refrigerator.

Once everything was drawn out on the floor and walls, we were able to plan where all the outlets needed to be.  That included the outlets for the refrigerator, warming tray, oven, and the convection steam oven.  It also helped us place the lights on the ceiling.  We started with three pendant lights over the island, and then planned two rows of recessed lights that travelled the entire downstairs.  In the kitchen, the recessed lights illuminate the space on either side of the island.

IMG_0271.JPG

The kitchen wall

After the kitchen was in place, we were able to lay out roughly where the dining room table would be.  My kitchen designer asked me if I had any details about what kind of table I’d be using so that we could make a better idea about where to place the dining room chandelier.  I really don’t have an idea yet so we aligned it roughly with the kitchen island.  We also placed it somewhere in the middle of the south wall and the end of the island.  That then gave us an idea of where to put the television so we could place the outlet on the wall behind it.

The living room was up next.  This room was a bit simpler because there are no hanging lights, we simply had to finish travelling the recessed lights through the area.  We also added a third row of lights in the area over the television because this room was a bit wider than the other two.  We identified where the television was going to go and placed an outlet behind it.

We also planned out where the speakers were going to be, with a plan to install 7.2 surround sound.  We placed the two required subwoofers in each corner of the room and put an outlet behind each.  The front three speakers will be mounted on the walls, assuming a TV size of 65 inches.

IMG_0173.JPG

Row of recessed lights for the living room

IMG_0332.JPG

Both rows of recessed lights across the first floor zones

Lastly for the first floor, we planned out the computer desk and all of the various inputs and outputs we’ll need for audio/visual and data.  It will be along the back wall of the living room behind the couch.  The downstairs will include a mix of hardwired Internet connections for gaming and computing, and WiFi for everything else, including smart home devices.

We planned the switch layouts such that I can control all three rooms as zones and have “layered” control in each zone as well.  For example, in the dining room

The second floor was a bit simpler to plan out.  Each room was compartmentalized and treated separately, so there was less to align and match.

The first bedroom in the front of the house will be lit by one hanging light in the center of the room.  The same with the middle bedroom.

The master bedroom will be lit by both recessed lighting and by a hanging light in the center of the room.

The outlets in the bedrooms were arranged by building code.  I added them all up and there are 20 outlets in total, for a total of 40 sockets.  I can’t imagine having enough things to plug in that require that many sockets, but building code is building code.

The hallway will be lit by sconces.  There will be exposed ducts running along the ceiling so we won’t be able to light them from above.

One area that is still under discussion is how to light the stairs.  I didn’t like the idea of overhead lighting above the stairs because I’d have no way to reach it to change the bulb.  So, we are working out a plan to install recessed lighting in the wall along the staircase.  The final design has yet to be decided.

Each bedroom and the hallway required a hard-wired smoke detector.  They were all placed out of the way from the lights in each area.

HVAC

While this was all going on the tin knocker was busy installing all the rough items needed for the HVAC system which will be put in place at a later time.  He can’t put the duct work in until the walls are in place, but everything that goes inside a wall or a ceiling or exits the house through the roof needs to be installed now.

IMG_0295.JPG

All of this has to exit through the roof

IMG_0195.JPG

HVAC ducts which will go inside the walls

In order to have two-zoned heating and cooling, and in order to fit everything in the house and not take up backyard space, we are going to use a combination of the roof and the basement to store all heating and cooling machinery.  So, all intakes and vents had to be planned out accordingly.  The house doesn’t have a chimney so we are using PVC flues where needed. All of the bathroom exhausts were installed and vented through the roof as well.

IMG_0280.JPG

The various exhausts and intakes that exit through the roof

Finishes

Also on the to-do list are all of the finishing items, especially those that require cabling or plumbing before the walls are put into place.  I’ve been keeping track of all of my ideas using OneNote and researching ideas and modifying the list as I go.

OneNote Notes.png

My scatter-brained notes

The most interesting part is planning out the audio/visual and data connections and making sure they are future proof.  The plan is to store most of the equipment in the basement, and route HDMI and speaker cables throughout the house where needed.   My brother does commercial A/V installations for a living so he has graciously offered to help design and install everything we need before the walls go in.

The working plan includes the following:

  • DirecTV (for television)
  • Verizon Fios (for Internet)
  • Five indoor televisions (two living room, one kitchen, one dining room, one master bedroom)
  • 7.2 surround sound in the living room
  • Stereo speakers in the dining room, master bedroom, master bathroom (I like listening to music when getting ready in the morning)
  • Amazon Echo integration throughout the house
  • WiFi throughout the house and outside
  • Xbox One for gaming in the living room
  • Amazon Fire TV for media streaming

We have an unorthodox plan for running the necessary cabling throughout the house before the spray foam insulation goes in such that we can pull ore replace cables as necessary.  We are going to use some hoses we found at a hardware store as cheap conduit.

There are a few other non-A/V items that I’m planning for, some of which I’ve already purchased so we can install them when they are ready:

The Hunter Douglas shades required a power supply which I purchased to be installed in the basement.  All three shades will be connected to the same power supply and the electrician will install the wiring.

The hand dryer will not only be practical but will add to the ambience on the first floor.  I want it to look and feel like a trendy restaurant or club.

The Nest Hello was just released this March and I got in on the first shipment.  It will provide video security for the front door and will also alert me anytime someone rings the bell, whether I am home or not.

Amazon Key is a new product as well, and it will allow for keyless entry using a keypad to the front door, and the delivery hatch we are building to the basement.  This will allow Amazon to deliver packages and leave them inside the house.  Each Amazon Key is coupled with a security camera that stores footage in the Amazon Cloud.  Every time someone uses the keypad to open the door, I get an alert and I can watch what is going on using an app.

Inspections

With equal parts optimism and dread, I was looking forward to the separate plumbing and electric inspections which were scheduled for March 19.  My GC put his crew on a deadline to have everything ready to go before then, and they worked through the weekend to complete everything.  I wanted to get these two inspections, but also calculated about a 100% chance of failing them both for some reason.

Much to my surprise, we passed both without issue.  My GC was so surprised, he told me he couldn’t sleep that night because he was so excited!  He also forgot to attend a meeting with a perspective customer because his emotions got the best of him.  I’ve never been so happy to be 100% wrong about something.


What’s Next

Our next inspection is the building inspection on Wednesday.  This one is going to check on everything we built including the frame, the roof, and the siding.  One of the inspectors who was at the house a few months ago noted that he believed that wood siding was not allowed on the sides of a house.  But our siding plan was on the original approved plans, and I checked the building code myself and nowhere does it say we can’t have wood siding.  I don’t know what to make of his comment, but I’m hoping for the best on Wednesday.

Once we get past inspection, we can install the bespoke conduit for the AV equipment.  Once we are sure everything is in place on the exterior walls, we will spray-foam insulate everything.  That will be the last step before we can put floors and walls in.

Over Budget

Not only is almost every single item on original plan over budget, but I’m still bleeding cash each month as I pay off two mortgages.  Everything I wrote about in this blog has been a lot of fun and I’m very much enjoying the decision making and implementation process.  Waking up every morning knowing that I’m going broke from paying two mortgages since I bought the place in December 2015 and knowing that I’m nowhere near completion is becoming very stressful and upsetting.  Any cash I had on hand for cost overruns has pretty much evaporated and I’m looking for new ways to borrow and fund the rest of the project.  In the end, this will probably cost me time getting started on phase 2 (mainly the backyard), but I can’t worry about any of it now.  We’ve picked up the pace in 2018 and I’m doing my best to keep everything moving as quickly as possible.

A Virtual First Look

This is a video that accompanies my previous blog post about the framing being completed on the new house. It even includes some dramatic police activity in the first few seconds.

Longest Year Ever

So, here’s something I didn’t know when I decided to gut-renovate a house.  It takes almost an entire calendar year to finish partial demolition and masonry work.  We started in October 2016, and as of the time of this writing, we are getting ready to start the framing of the house in October 2017!

What took so long?  Well, if you’ve been following my blog, the town was very difficult to deal with at first, and then I’ve been mired in construction delays.  At times, I’ve wondered if I make a mistake by not completely demolishing the house.  I probably could have gained efficiency if the old structure wasn’t in place and then we would have had enough room to bring machinery in to assist in the excavation process.  It’s hard to tell exactly what the cost and time difference would have been had I done that, but we did get to save most of the original structure, so that should be worth something.

We Have a Drainage System

In June, we dug a trench where the old clay pipe drainage system used to be.  Apparently, the sewer connection is somewhere behind the house, not in front of it.  We were able to locate the connection, and hook the new PVC pipe system into it.

IMG_7421.JPG

The drainage system in the front driveway

Once the new drainage system was built, we had to call in the town to inspect before we could cover it back up and fill it in.  It took about 4 days lead time to call the inspector in.  He failed us due to the way the pipes were configured, I never got the exact detail why.  The plumber had to fix the problem and we had to get the inspector back in seven days.

IMG_7428.JPG

All of the sewage connections in the house come together in the garage

Just like that, an entire week was lost.  This may not seem like a big deal, but this is typical of a project.  A three-day setback here, a week setback there, a three-week setback for some reason.  It all adds up to major, major time lapses in between actual work.  I’ve come to learn that watching your construction project sit idle for any amount of time is a special kind of torture that I wouldn’t wish on anyone.

Let’s Button It Up

After we finally passed the inspection of the drainage system, we were able to build the basement floor.  We backfilled the dirt over the pipes and filled in the trenches.  We put a plastic sheet down over the dirt and then built a rebar mesh on top of that.  That required yet another inspection, one which we passed on the first try.

IMG_7761.JPG

The drainage trough at the foot of the driveway

IMG_7763.JPG

The plastic membrane and rebar

IMG_7767.JPG

The plastic membrane and rebar

It took a few weeks for the mason to come back, of course, but when he did, he poured concrete over the rebar and plastic, and I finally had a finished basement floor!

IMG_8268.JPG

View of the fresh coat of cement from the driveway

IMG_8271.JPG

The fresh cement in the rear addition of the house

More Demolition

Once the floor was poured, my general contractor called in the framer so he could get ready to get started.  They also called in my architect to walk through the plans together and get on the same page.  One of the things they reviewed was the remaining demolition work that needed to be done.  The house needs to be demolished in stages so the remaining shell can stay in place without collapsing during construction.

IMG_8590.JPG

Making a big mess out front

For reasons that weren’t too clear to me, we still hadn’t done a lot of the work that the framer required in order to start.  It could have been done while we had some downtime in between inspections, but it didn’t happen.

Somebody noticed that there was concrete between the garage and first floor that had to be demolished.  I don’t know why we didn’t learn this sooner.  So, they had to put plywood down on my brand-new garage floor and demolished the concrete, making a mess of the basement again.

IMG_8592.JPG

This is now on top of my new basement floor!  AAAAAHHHHH!!!!!

They had to demolish the original brick chimney while they were at it.  That was another bit of work that could have been done much earlier.  Finally, they had to strip the outside and inside of the house to the studs and plywood.  When it was all done and cleared out, there wasn’t much left but the outer shell of the house, and the ceiling and floor between the first and second floors.  The house was finally in a condition to be framed.

IMG_8593.JPG

What’s left of the chimney

IMG_8594.JPG

The spaces in between the joists were where the cement was between the first floor and the basement.  Nobody noticed it was here until we had finished the basement floor.  It had to be removed because it was potentially damaging to the joists.

IMG_8597.JPG

The hole to the sky where the chimney used to be

IMG_8923.JPG

What is now left of the front of the house. The garage door is gone, replaced temporarily with that blue tarp.

IMG_8935.JPG

All that is left of the second floor.  Only the outer shell and the roof will remain.  The floor will be completely ripped out.

OK, So Let’s Get Started

In late August, my GC e-mailed me to tell me the framer was going to start on September 20.  We had a week or so of demolition left and the house would be ready to go long before the start date.  Naturally, I called him right away to tell him we needed to move that date in.  He told me it wouldn’t be possible because the framing guy was working another job.  I told him that I really needed the house to be framed before the winter set in.  He emphatically stated that it would take at most two weeks to frame the house and I didn’t have anything to worry about.

September 20 approached and the GC told me the start date was now going to be September 21.  Then the framer declared that because it was a Thursday so we might as well start the next Monday.  I didn’t follow that logic at all, but I wasn’t going to flip out about four more days wait.

On Monday, I texted the GC and asked him if we were starting.  Heard nothing back that day.  On Tuesday he texted me and said he was aware I was waiting for an answer and I’d hear back from him by the end of the day.  No word for the rest of the day or all of Wednesday.  Thursday, I called and got him on the phone.  He told me he was very embarrassed, but the framer wasn’t going to take the job.

Things took an interesting turn after that.  I repeated my original deadline that the house had to be framed before the winter or the project would be in serious jeopardy.  I would at some point just run out of money, having to pay two mortgages.  I’m already well over 10 months past my projected worst-case scenario of being done from when I bought the house in December, 2015.

My GC proceeded to get very worked up in explaining to me that he’d figure something out.  He said he was embarrassed and upset about the situation and he felt that his entire reputation was on the line.  I ended up having to calm him down and tell him not to get bent out of shape.  It was almost as if our positions were juxtaposed.  I should be the one that is bent out of shape!

I started to consider my options in order of preference:

  1. Wait for my GC to find a new framer
  2. Find my own framer
  3. Fire the GC and quickly find someone else
  4. Stop making mortgage payments and let the bank foreclose on the house

Each option had pros and cons.  At that point, as much as I like the guy, my confidence in my GC was pretty much shot.  I didn’t have a framer or a new GC in mind and it would be difficult to make a big change like that given my time constraints at work.  The fourth option was a nuclear one, but it’s not as bad as it sounds.  I’d lose about 15 years of savings with everything I’ve put into the project so far and my credit would be ruined.  But I’d stop the bleeding.  I wouldn’t need my credit rating anymore because it would be years before I could save up enough to try again.

Anyway, on Friday, I got a series of text messages from the GC that he had found a new guy and that he might be able to start next week.  They met at the house that day, and by Saturday, we had a quote from him.  After a day of pondering my options, the first one looks like it was going to work out.

I have it in writing that it should take the new framer about three weeks to finish, and that includes installing the windows that I ordered in August.  The framer has a job he needs to start right after that, so he is incentivized to hurry up!

In a way, this is almost too good to believe that we found a reputable guy just in time that has nothing else better to do for the next three weeks.  But, this is pretty much my best choice right now.  So, on Monday, we are going to order $16,000 worth of lumber from Kuiken Brothers, and we are going to get started.

How Did It Come to This?

When I started this blog, I had figured that it would be an interesting story about design decisions, construction, and decorating the house over the course of many years.  I thought I would be living in the house by the end of 2016, and would have sold my Hoboken condo, rolling the proceeds from the sale into a much smaller mortgage on the new house.  Instead, this blog has turned into an infrequent, long-winded complaint about not much getting done!

I don’t live life with regrets.  I believe in taking measured risks in order to get better outcomes for yourself.  This was definitely a risk, and so far, it has not worked out at all.  I am certainly not going to say I regret this decision, I know that I wouldn’t have been happy had I simply stayed in my small Hoboken apartment with no eye towards the future.  But, this certainly now falls into the category of a BAD IDEA!  I’m never going to make up all the money I lost paying the double mortgage for so long, and as of this writing, I can’t see how it’s even going to get done before 2019, a full three years and more after I bought the place.

This is a pivotal week.  If they start framing the house and come even close to their self-imposed three-week deadline for completion, my whole outlook will change.  I’ll be in a position to tell my contractor that he’d better have someone working on this job every single day until it is done!  All work can proceed on the house once the framing is complete, and weather will no longer be an issue.

Wish me luck…